Rev. 02 – July 16
th
, 2009
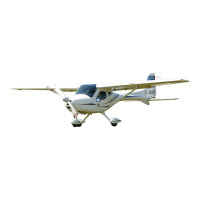
8 Aircraft Ground Handling and Servicing
Aircraft Ground Handling and Servicing 8 - 6
8.8 Connecting folded Wings to Fuselage
1. Unlock the fairings between strut and wing/fuselage and slide them
along the strut.
2. Withdraw the main wing securing bolt from the wing and place it nearby.
Ensure that the bolt stays clean until remounted.
3. Remove the wing support aid bracket while a second person is
supporting the wing at the wing tip.
4. Now the second person at the wing tip moves the wing slowly forward
while securing that the wing does not spin around its axis. The weight of
the wing is supported by its strut, therefore, the wing must never be
lifted or pushed on top.
5. When the wing has reached its forward position, the person at the
fuselage position has to rotate the wing to align both connection latches.
Care has to be taken, that the surface of the wing is not damaged by
the fuselage connecting latches.
6. When the connection latches between the fuselage and wing are
aligned, the wing must be lifted by the person at the wing tip. The
person at the fuselage must ensure that flap drive connection fits
correctly into the bushing on the fuselage.
7. If all latches have engaged and the wing fits properly to the fuselage,
the main bolt can be pushed into its support tube. To install the main
bolt correctly, please use the special installation tool which comes with
the aircraft. Now secure the bolt with the securing pin. The person at the
wing tip can now release the pressure supporting the wing tip.
8. Inside the cabin, the pushrod quick fasteners MUST properly be
connected and secured.
Insecurely connection, improper operation of control surfaces or
insecure locked fasteners will lead to loss of control of the
aircraft!! When in doubt contact your local REMOS dealer or
service center.
9. Proceed in identical order with the second wing.