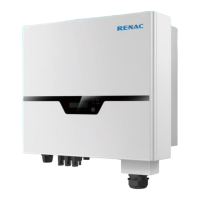
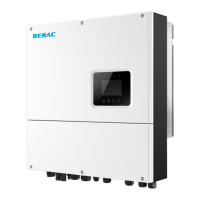
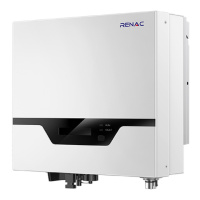
This document is a user manual for the RENAC R3 Pre Series solar inverters, specifically models R3-10K-G5, R3-15K-G5, R3-17K-G5, R3-20K-G5, and R3-25K-G5. These are transformerless inverters designed to convert DC power from solar PV strings into AC power for the utility grid.
Function Description
The RENAC R3 Pre Series inverters are designed to efficiently convert direct current (DC) electricity generated by photovoltaic (PV) modules into alternating current (AC) electricity suitable for feeding into the utility grid. They incorporate a maximum power point tracking (MPPT) function to optimize energy harvesting from the solar panels under varying conditions. The inverters are equipped with various protection mechanisms, including DC insulation monitoring, input reverse polarity protection, anti-island protection, residual current monitoring, over-heat protection, AC overcurrent protection, and AC short-circuit protection, ensuring safe and reliable operation. They also support smart energy meter connection for feed-in power limit functions and demand response modes as specified by standards like AS/NZS4777.
Important Technical Specifications
DC Input Data:
- Max. Recommended PV Power: Ranges from 15000 W (R3-10K-G5) to 37500 W (R3-25K-G5).
- Max. DC Input Voltage: 1100 V.
- MPPT Voltage Range: 150-1000 V.
- MPPT Voltage Range (full load): Varies by model, e.g., 300-850V (R3-10K-G5) to 480-850V (R3-25K-G5).
- Rated Input Voltage: 630V.
- Start-up Voltage: 165 V.
- No. of MPP Trackers: 2.
- No. of Input Strings per Tracker: 1/1 (R3-10K-G5) to 2/2 (R3-17K-G5, R3-20K-G5, R3-25K-G5).
- Max. DC Input Current: Varies by model, e.g., 20A/20A (R3-10K-G5) to 30A/30A (R3-17K-G5, R3-20K-G5, R3-25K-G5). The R3-25K-P model has a maximum DC input current of 37.5A.
- DC Switch: Integrated.
AC Output Data:
- Rated AC Power: Ranges from 10000 W (R3-10K-G5) to 25000 W (R3-25K-G5).
- Max. Output Power: Ranges from 11000 VA (R3-10K-G5) to 27500 VA (R3-25K-G5).
- Max. AC Current: Ranges from 16 A (R3-10K-G5) to 40 A (R3-25K-G5).
- Rated AC Voltage / Range: 3/PE 380, 400;+/-20%; 3/N/PE 380, 400;+/-20%.
- Grid Frequency / Range: 50Hz/60Hz; ±5Hz.
- Adjustable Power Factor [cos φ]: 0.8leading ~0.8lagging.
- Output THDi (@Rated Output): <3%.
Efficiency:
- Max. Efficiency: Ranges from 98.30% to 98.50%.
- Euro Efficiency: Ranges from 98.00% to 98.20%.
- MPPT Efficiency: 99.90% for all models.
General Data:
- Size (WidthHeightDepth): 506 x 386 x 185mm.
- Weight: 23kg.
- User Interface: LCD.
- Communication: RS485 (Standard), Wifi or GPRS (Optional).
- Ambient Temperature Range: -25 °C ~ 60 °C.
- Relative Humidity: 0-100%.
- Operating Altitude: ≤ 4000m.
- Standby Self Consumption: < 0.2W.
- Topology: Transformerless.
- Cooling: Natural/Fan (models vary).
- Protection Grades: IP65.
- Noise: <30dB to <45dB (models vary).
- Warranty: 5/7/10 years.
- Certifications & Standards: IEC61727, IEC62116, IEC60068, IEC61683 (Grid Regulation); IEC 62109-1, IEC 62109-2 (Safety Regulation); EN 61000 series (EMC).
Usage Features
Installation and Startup:
- Safety First: Emphasizes checking for damage, verifying PV string voltages, and ensuring proper AC and DC disconnections before and after installation. A 5-minute waiting period is required after disconnection to allow capacitors to discharge.
- Qualified Personnel: Installation must be performed by trained and authorized personnel familiar with local electrical codes.
- Mounting: The inverter should be mounted on a solid surface in a well-ventilated area, sheltered from direct sunlight, rain, and snow. Minimum clearances (500mm top, 300mm sides and bottom) are required for heat dissipation and maintenance access.
- Electrical Connection: Detailed instructions are provided for connecting to the grid (AC output) and PV strings (DC input), including cable stripping, crimping, and connector assembly. Specific attention is given to grounding (PE line) and ensuring correct PV string polarity.
- Start-up Procedure: Involves closing DC and AC circuit breakers. The inverter performs a self-check and, if sufficient solar energy is available, begins feeding electricity into the grid. First-time commissioning requires specific steps detailed in the manual.
User Interface:
- LED and Key: Features a green LED for "Run" status (on for normal operation, flashing for waiting/checking/starting up) and a red LED for "Fault" status (on for failure, flashing for temporary failure). A pushbutton allows navigation (short press for "Next") and selection (long press for "Enter") through the LCD menu.
- LCD Display: Provides real-time information such as normal/fault status, power output (Pac), PV voltages (Vpv1, Vpv2), PV currents (Ipv1, Ipv2), AC voltages (Va, Vb, Vc), AC currents (Ia, Ib, Ic), frequency (Freq), event list, and total/today's energy yield (E-total, E-today).
- Menu Structure: Organized into "Normal/Fault," "User setting," and "Factory setting" sections, allowing users to configure language, country, power factor (PF), clear events, set MAC address, view serial number, firmware version, safety country, and export power limits.
- Communication: Supports WIFI/GPRS modules for remote monitoring via a mobile app, displaying power generation and running status. It also includes COM2 for smart energy meter connection and DRM (Demand Response Mode) for DRED (Distributed Energy Resource Device) integration.
- Relay Connection: The relay can be configured for fault alarm output as a normal open (COM & NO) or normal close (COM & NC) contact, indicating inverter status.
Self-Test (CEI 0-21 for Italy):
- The inverter includes a self-test function required for commissioning in Italy, checking protection reaction times and values for overvoltage, undervoltage, overfrequency, and underfrequency.
- Execution: Can be performed directly from the LCD screen or via the "Solar Admin" software on a laptop connected via RS485. The test results (PASS/FAIL) are displayed and can be exported.
Maintenance Features
Routine Maintenance:
- System Clean: Annually (or more frequently depending on dust levels), check and clean the inverter enclosure, air inlet, and outlet to ensure proper ventilation and heat dissipation.
- Fans: Annually, check for abnormal noise during fan operation. Clean or replace fans if necessary.
- Cable Entry: Annually, inspect cable entries for insufficient sealing or excessive gaps and reseal if needed.
- Electrical Connection: Annually, verify that all cables are firmly in place and check for damage, especially where cables contact the metal enclosure.
Maintenance Instruction:
- Safety Precautions: Before any service work, always disconnect both AC and DC power sources, wait at least 5 minutes for internal capacitors to discharge, and verify the absence of voltage or current.
- Cleaning Air Inlet and Outlet: Use a soft brush or vacuum cleaner to remove dust and debris from the air inlet and outlet to maintain optimal cooling.
- Fan Maintenance: If fans are dirty or broken, they should be cleaned or replaced. The procedure involves stopping the inverter, loosening screws on the fan metal plate, disconnecting cables, cleaning/replacing fans, and reinstalling in reverse order.
- Troubleshooting: The manual provides a comprehensive troubleshooting guide, listing various fault codes (e.g., Isolation Fault, Grid Faults, OverTemp, PV Overflow Fault) and corresponding possible actions, such as checking connections, verifying grid parameters, reducing ambient temperature, or contacting local service.
- No User-Serviceable Parts: The inverter contains no user-maintainable components. Any internal maintenance or replacement of parts must be performed by Renac Power or authorized personnel to avoid voiding the warranty and potential damage.