English English9 10
Mount the Camera
•Donotfacethecameratowardsanylightsources.
•Donotpointthecameratowardsaglasswindow.Otherwise,itmay
resultinpoorimagequalitybecauseofthewindowglarecausedby
infraredLEDs,ambientlightsorstatuslights.
• Do not place the camera in a shaded area and point it towards a
well-litarea.Otherwise,itmayresultinpoorimagequality.Toensure
bestimagequality,thelightingconditionforboththecameraandthe
captureobjectshouldbethesame.
•Toensurebetterimagequality,it’srecommendedtocleanthedome
coverwithasoftclothfromtimetotime.
•Makesurethepowerportsarenotdirectlyexposedtowateror
moistureandnotblockedbydirtorotherelements.
•Thewaterproofcameracanworkproperlyunderconditionslikerain
andsnow.However,itdoesn’tmeanthecameracanworkunderwater.
• Do not install the camera at places where rain and snow can hit the lens
directly.
•Thecameramayworkinextremecoldconditionsaslowas-25°C.
Becausewhenitispoweredon,thecamerawillproduceheat.Youmay
poweronthecameraindoorsforafewminutesbeforeinstallingit
outdoors.
Installation Tips
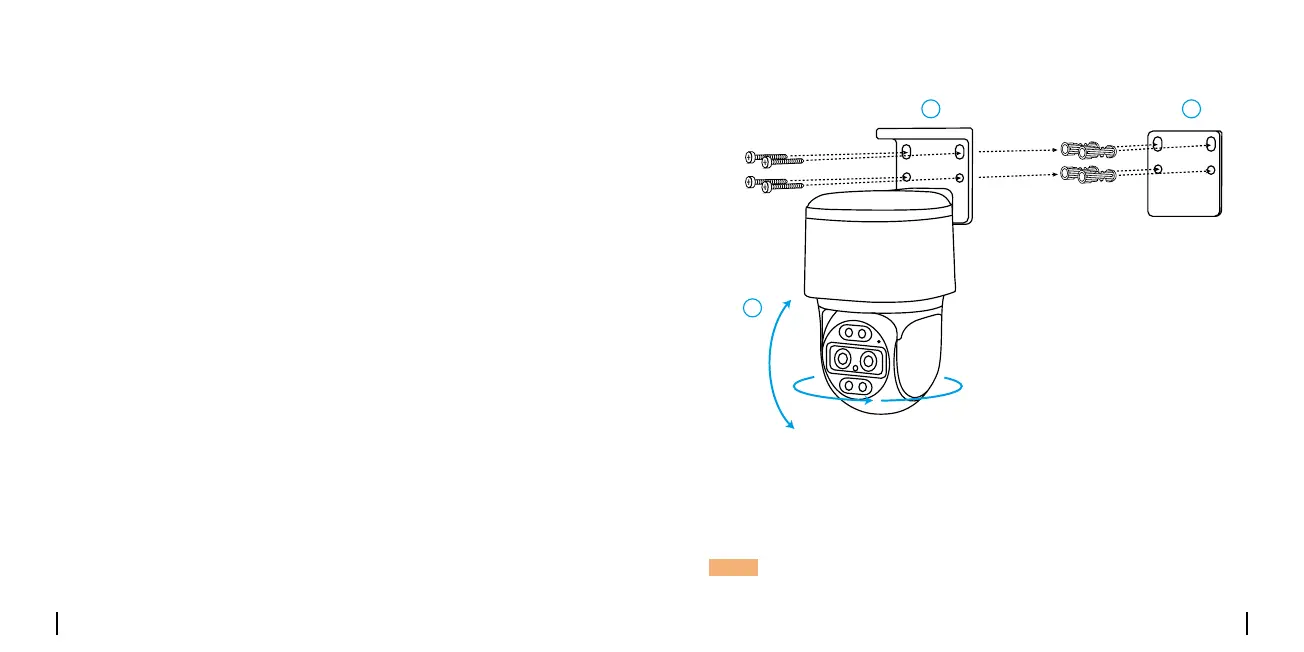
Mount the camera to the wall
1.Drillholesinaccordancewiththemountingholetemplate.
2.Installthemountbasewithscrewsincludedinthepackage.
3.Toadjustthecameradirection,youmaycontrolthecameratopan
andtiltviaReolinkApporClient.
1
2
3
NOTE:Usethedrywallanchorsincludedinthepackageifneeded.

 Loading...