Do you have a question about the Reolink Duo and is the answer not in the manual?
Instructions for setting up the Reolink camera using the PC client, including download and installation.
Details the LED indicators for charging status: Orange for charging, Green for fully charged.
Guide on how to mount the camera securely to a wall using the provided mounting plate and template.
Instructions for mounting the Reolink camera to a ceiling, including angle adjustment before fixing.
Recommended method for mounting the camera to a tree using the loop strap through the provided slots.
Solutions for when the camera fails to turn on, including checking the power switch and battery charge.
Tips for resolving issues with the camera not scanning the QR code on your mobile phone.
Steps to troubleshoot WiFi connection failures during the camera's initial setup process.
Details on the camera's video capabilities, including field of view, spotlight, and PIR detection distance.
Information on operating temperature, weather resistance, size, and weight of the Reolink Duo camera.
Statement regarding the device's compliance with FCC Rules and potential interference guidelines.
Declaration that the device meets essential requirements and provisions of EU Directive 2014/53/EU.
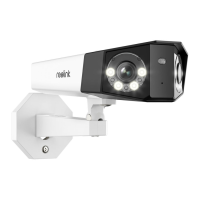
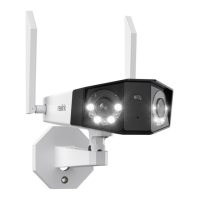
The Reolink Duo is a smart security camera designed for outdoor surveillance, offering a wide field of view and advanced motion detection capabilities. It is primarily intended for recording motion events and remote live viewing, rather than continuous 24/7 operation, to optimize battery life.
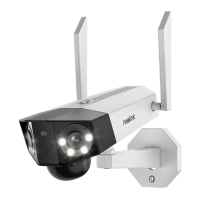
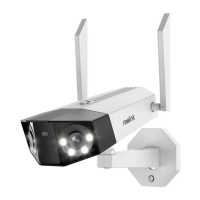
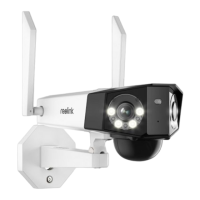
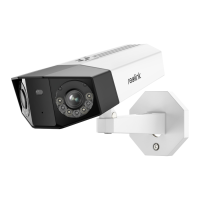
The Reolink Duo camera captures video with a wide horizontal field of view, allowing it to monitor a broad area. It features a daylight sensor, a microphone for audio capture, and a lens to record visual information. For enhanced visibility in low-light conditions, the camera is equipped with infrared lights and spotlights. Motion detection is handled by a Passive Infrared (PIR) sensor, which triggers recording when movement is detected within its adjustable range. The camera also provides audio alerts, which can be customized, and sends instant email alerts and push notifications to keep users informed of detected events.
The camera's connectivity is facilitated by built-in WiFi, indicated by a status LED that changes color to show connection status (red for failed, blue for succeeded) and blinking patterns for standby or working status. It includes a Micro SD card slot for local storage of recordings and a reset button to restore factory settings if needed. A power switch controls the camera's on/off state, and a speaker allows for two-way audio communication or broadcasting alerts.
Setting up the Reolink Duo camera is straightforward, primarily managed through the Reolink App on a mobile device. Users can download the app from the App Store or Google Play, then add the camera by scanning a QR code on the device and following the on-screen instructions. For those who prefer PC-based management, the Reolink Client software can be downloaded and installed. The camera is powered on by loosening a screw, removing a cover, and flipping the power switch.
Before outdoor mounting, it is recommended to fully charge the camera's built-in battery. Charging can be done using a standard power adapter (not included) or a Reolink Solar Panel (if purchased separately). A charging indicator (orange LED for charging, green LED for fully charged) provides visual feedback. After charging, it's crucial to cover the USB charging port with the rubber plug to maintain weatherproof performance.
Optimal installation involves mounting the camera 2-3 meters (7-10 ft) above the ground to maximize the PIR motion sensor's detection range. For better motion detection performance, the camera should be installed at an angle, as vertical approaches to the PIR sensor may hinder detection. The camera can be mounted to a wall or ceiling using the provided mounting plate and screws. When mounting to a wall, holes are drilled according to a template, the mounting plate is secured, and the camera is hung and locked into position. For ceiling mounting, the camera's angle should be adjusted before fixing, as horizontal adjustment is not possible once mounted. The loop strap offers an alternative installation method, particularly recommended for mounting the camera to a tree. To achieve the best field of view, an adjustment screw on the security mount can be loosened to turn the camera, then stiffened to lock it in place.
The Reolink Duo is designed for ease of use, with its primary functions accessible via the mobile app or PC client. This includes live viewing, accessing recorded motion events, and receiving notifications.
The Reolink Duo's battery is built-in and not user-removable. It is designed to be charged with a standard DC 5V/9V battery charger or a Reolink solar panel, with a strong recommendation against using solar panels from other brands. Charging and operating temperatures are specified to ensure battery longevity and safety, with charging recommended between 0°C and 45°C, and usage between -20°C and 60°C.
Proper maintenance includes keeping the USB charging port dry, clean, and free of debris, and always covering it with the rubber plug after charging to maintain its IP66 weatherproof rating. Users are advised against charging, using, or storing the battery near ignition sources. If the battery exhibits any abnormalities such as odor, heat generation, discoloration, or deformation, the power switch should be turned off, or the charger removed immediately, and usage discontinued.
Troubleshooting guidance is provided for common issues. If the camera isn't powering on, users should ensure the power switch is on and the battery is charged with the correct adapter until the green light indicates a full charge. For issues with scanning the QR code, adjusting the distance between the camera and phone, or ensuring sufficient lighting, can help. If the camera fails to connect to WiFi during setup, users should verify the WiFi password, move the camera closer to the router for a stronger signal, or adjust the router's encryption method to WPA2-PSK/WPA-PSK. It's also suggested to ensure the WiFi SSID is within 31 characters and the password within 64 characters, using only standard keyboard characters.
For environmental responsibility, the product should not be disposed of with household waste. Users are encouraged to recycle it responsibly through local waste and recycling systems or by contacting the retailer. Before returning the product, it is strongly suggested to reset the camera to factory default settings and remove any inserted SD card. Technical support is available through the official Reolink support site for any assistance needed.
| Weatherproof Rating | IP66 |
|---|---|
| Pan & Tilt | No |
| Night Vision | Up to 30 meters (100ft) (IR LEDs) |
| Audio | Two-Way Audio (Built-in Microphone and Speaker) |
| Storage | MicroSD card slot (up to 256GB) |
| Image Sensor | 1/2.7" CMOS |
| Interface | RJ45 Ethernet port |
| Motion Detection | Yes |
| Operating Temperature | -10°C to 55°C (14°F to 131°F) |