4
5
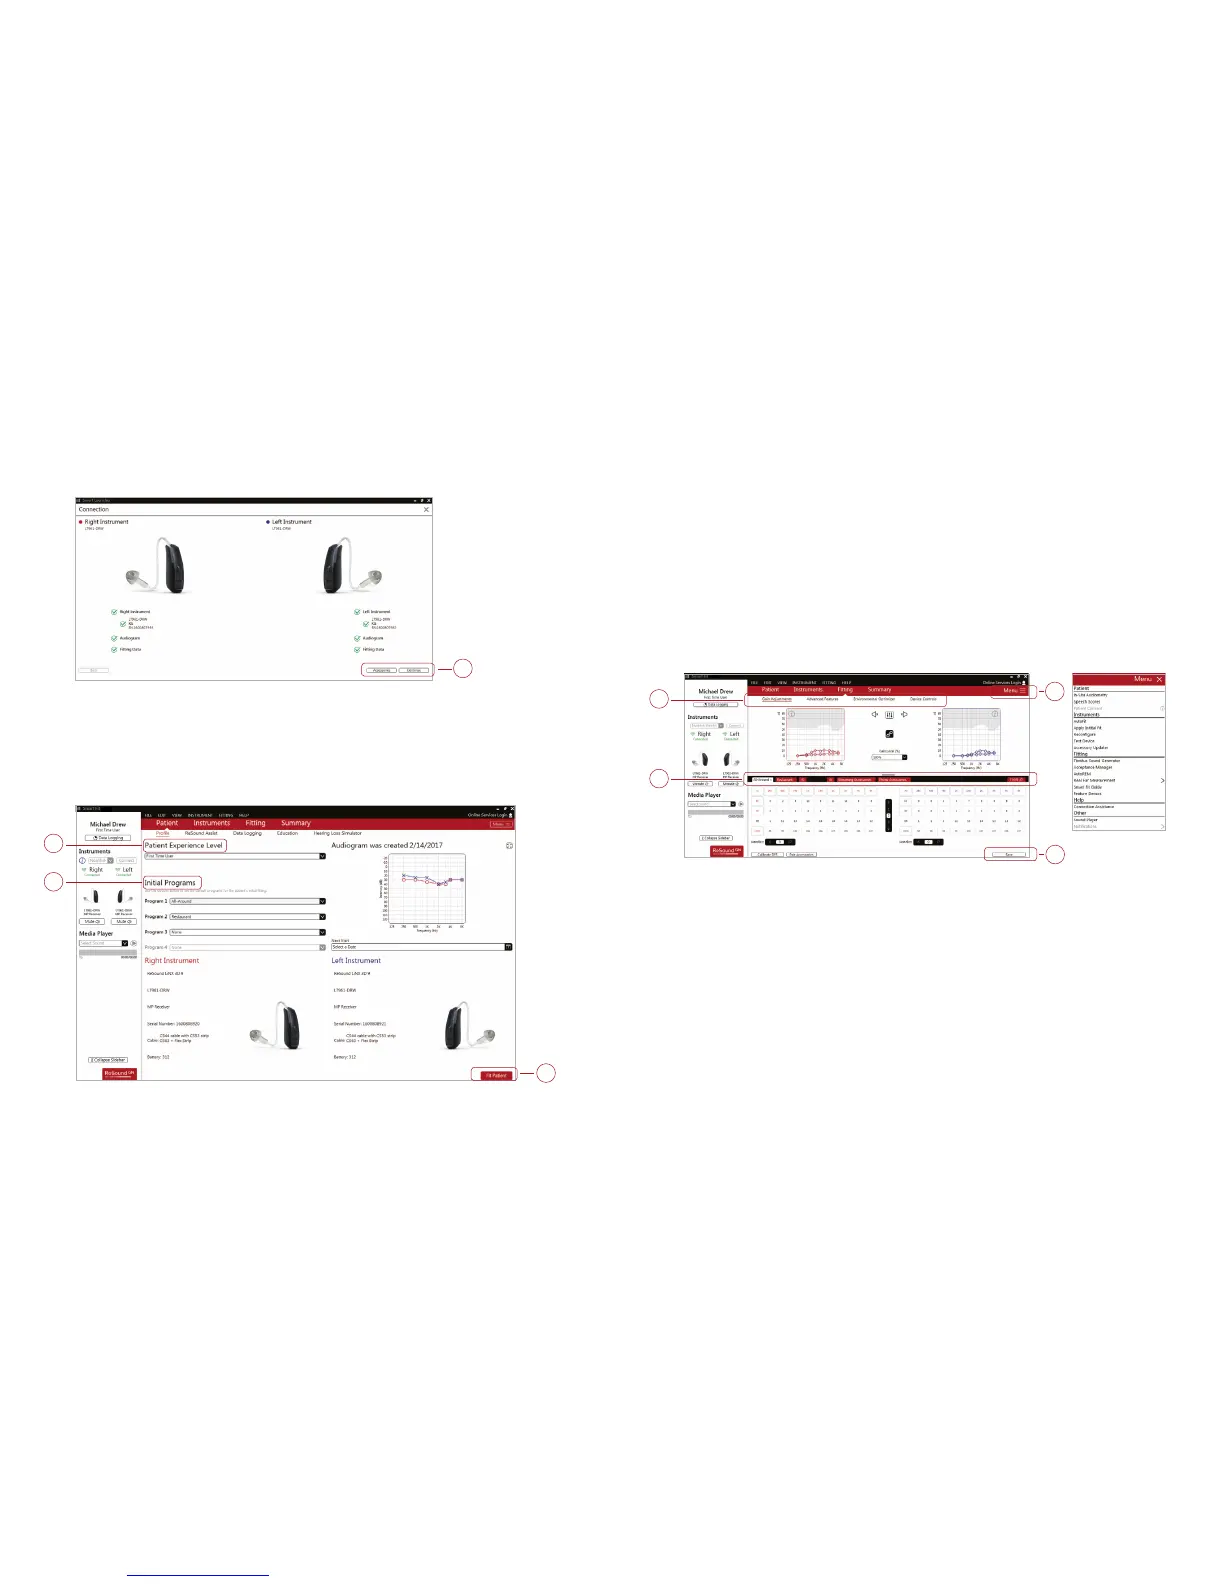
Fitting Screen
On the Fitting screen, adjustments can be made to gain, advanced features, and more.
1. Access to hearing instrument controls are also found on the fitting screen.
The tabs below the red navigation bar provides access to these tools.
2. Additional tools and features can be found in the upper right menu.
3. Programs are listed in the program tabs. Select the “+” to add additional programs.
Program tools can be found in the tab on the far right.
4. Click “Save” to save the fitting to the hearing instruments and database.
1
3
2
4
Patient Profile Screen
1. Select the Patient Experience Level based on the amplification history.
2. Set the desired programs to be used in the initial fit.
3. Click “Fit Patient” in the lower right corner to move to the Fitting Screen.
4. Confirm connected hearing instruments. Click “Continue” to proceed to the Patient Profile screen
or or click “Accessories” to pair accessories. For further instruction, see the Pairing Accessories
Section in this guide.
4
1
2
3

 Loading...