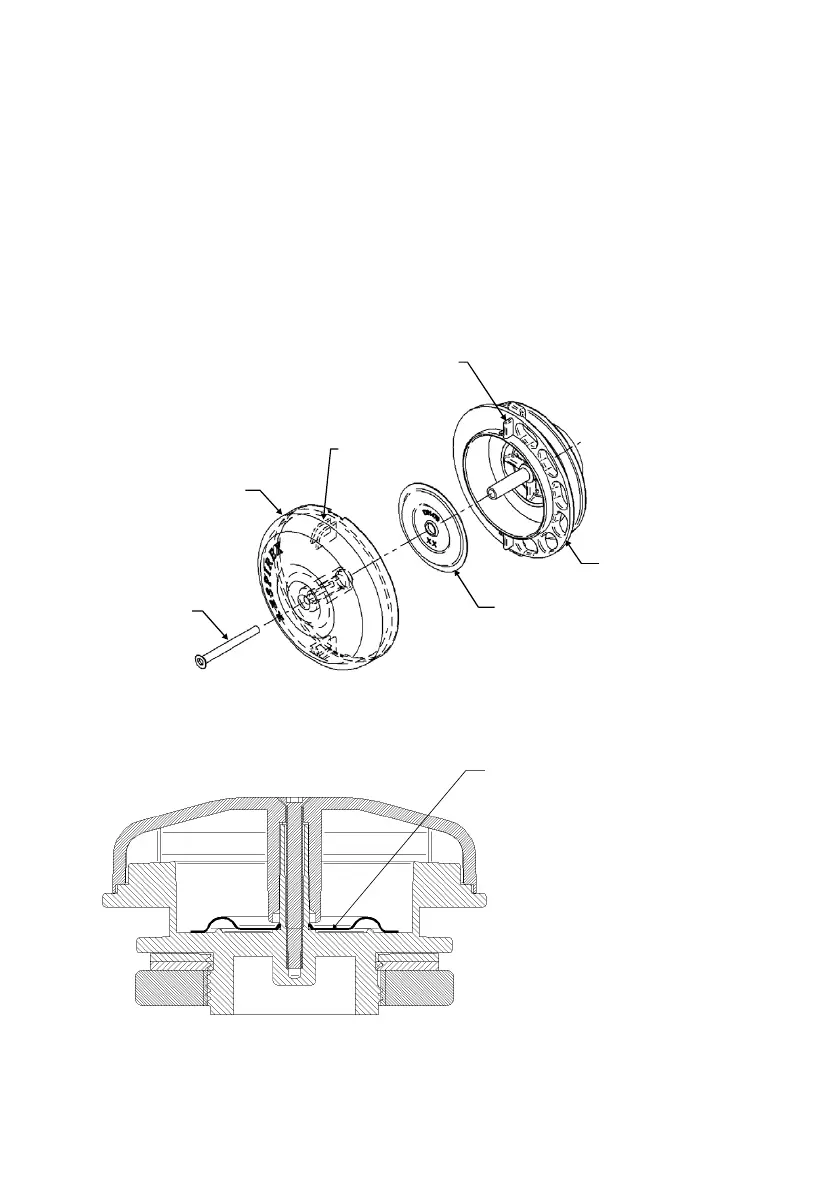
1. Using a torque driver with a ‘T8’ Torx bit, loosen and remove the screw from the centre of the exhalation valve,
then remove the cap.
2. Carefully slide the diaphragm up the central spigot and remove from the exhalation valve body.
3. Check that there is no dust, debris or contamination of any kind in the exhalation valve body.
4. Carefully slide a new diaphragm down the central spigot until it rests evenly on the valve body. Ensure the
diaphragm is correctly orientated with the ridged side uppermost (see Fig B).
5. Replace the exhalation valve cap and ensure the two location channels engage with the locating keys on either
side of the valve body. Note: When correctly located, the valve cap will not rotate independently on the valve body.
6. Replace the centre screw, turn by hand two times to engage the thread with the valve body, then fully tighten
using a torque driver set to 23 ± 2 cNm.
Valve body
Diaphragm
Locating key
Valve cap
Locating
channel
N
o
4 x 1¼ ‘Torx’
C/sk screw
Ensure the diaphragm is seated
evenly on the valve body with
ridged side uppermost
Fig. A
Fig. B