4
All trademarks and registered trademarks are property of their respective owners. © 2012 Kool Brands LLC.
Hooking up your Super Retro® Trio Plus Console
EN
Hooking up your Super Retro® Trio Plus Console
Connecting the AV/HDMI® cable
1. Connecting the AV/HDMI® cable into the Super Retro® Trio Plus Console AV/HDMI® port
located on the back of the console:
a. HDMI® into HMDI® socket
b. Red & white into the (L R) sockets
c. Yellow into the (V) socket
2. Plug the other end into the signal input ports on the TV set, also matching the colors
indicated.
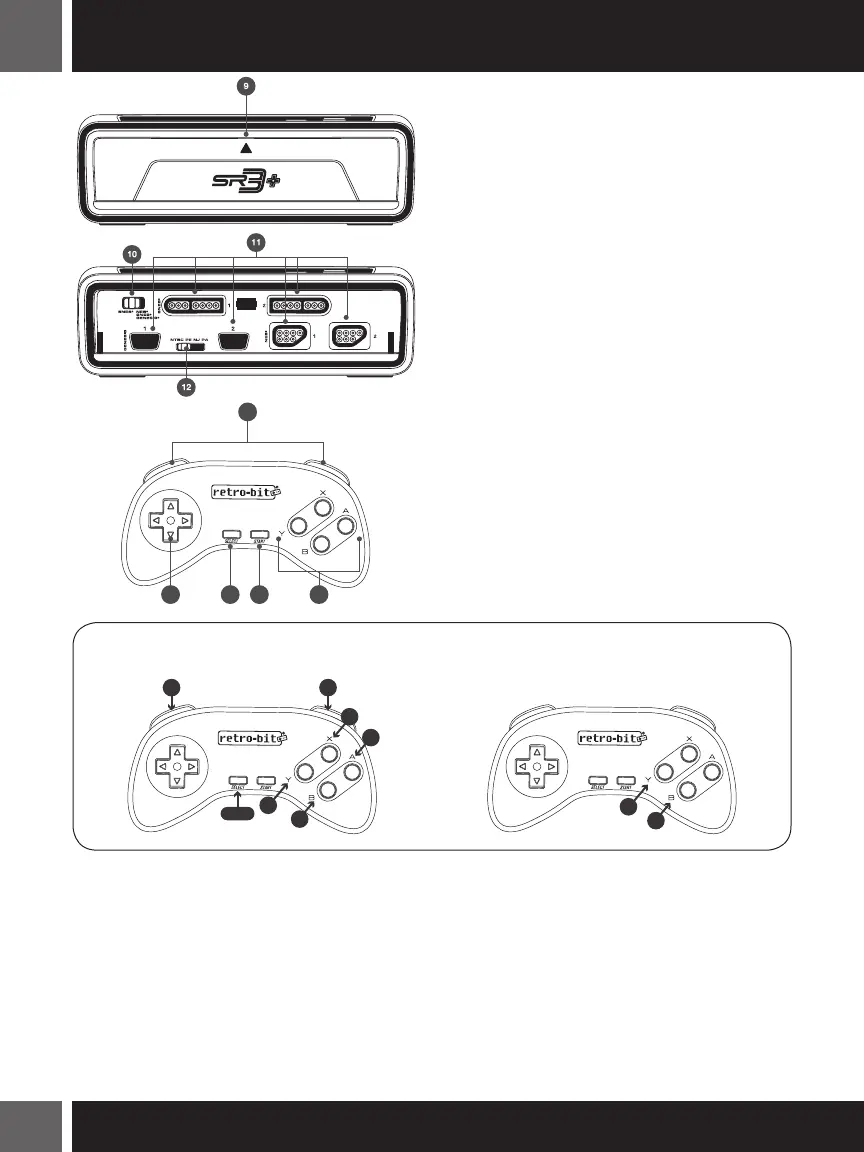
FRONT
9. Controller port door
10. SNES® & NES®/SNES®/Genesis®
Controller switch
11. Controller Slots – Connect original or third
party controllers
• SNES® Port
• NES® Port
• GENESIS® Port
12. Genesis® Region Switch
• NTSC
• PE
• NJ
• PA
CONTROLLER
13. L & R Buttons.
14. D-Pad
15. Select
16. Start
17. Operation Buttons (A,B,X,Y)
GENESIS® GAME
CONTROLLER MAPPING
NES® GAME
CONTROLLER MAPPING
13
14 15 16 17
X
MODE
Z
B
A
C
Y
A
B
 Loading...