2/25/2013 Retsch GmbH 17 0002
Inserting the drying vessels
6 litre drying vessels of glass or stainless
steel
The drying vessels of 6 litres capacity are not included in the items
supplied with the TG200. They are available as separate
accessories.
Art. No. 72.783.0001 – glass vessel
Art. No. 72.783.0002 - vessel of stainless steel
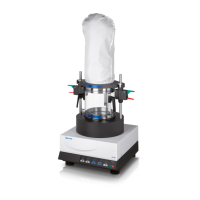
1. Place clamping lid in position, in doing so press the red
lever upwards – the clamping lid can now be moved
2. fits with the top edge of the support rod
3. Fill material to be dried. Place vessel in position
4. Tighten clamping lid
5. Press green lever downwards several times
We recommend that protective gloves are worn when removing
the vessel and the clamping lid after the drying process.
Risk of burns.
Verwendung der weicheren Dichtung
im Spanndeckel
Bei sehr feinen staubigen Materialien kann die weichere im
Lieferumfang enthaltene Dichtung eingesetzt werden.
Dichtung D im Deckel entnehmen und durch die weichere Dichtung
W ersetzen.
Use and installation of the 63µm disk as
additional filter
The disk are not included in the items supplied with the TG200.
They are available as separate accessories.
Art. No 03.648.0009 – sieve bottom Conidur 63 µm
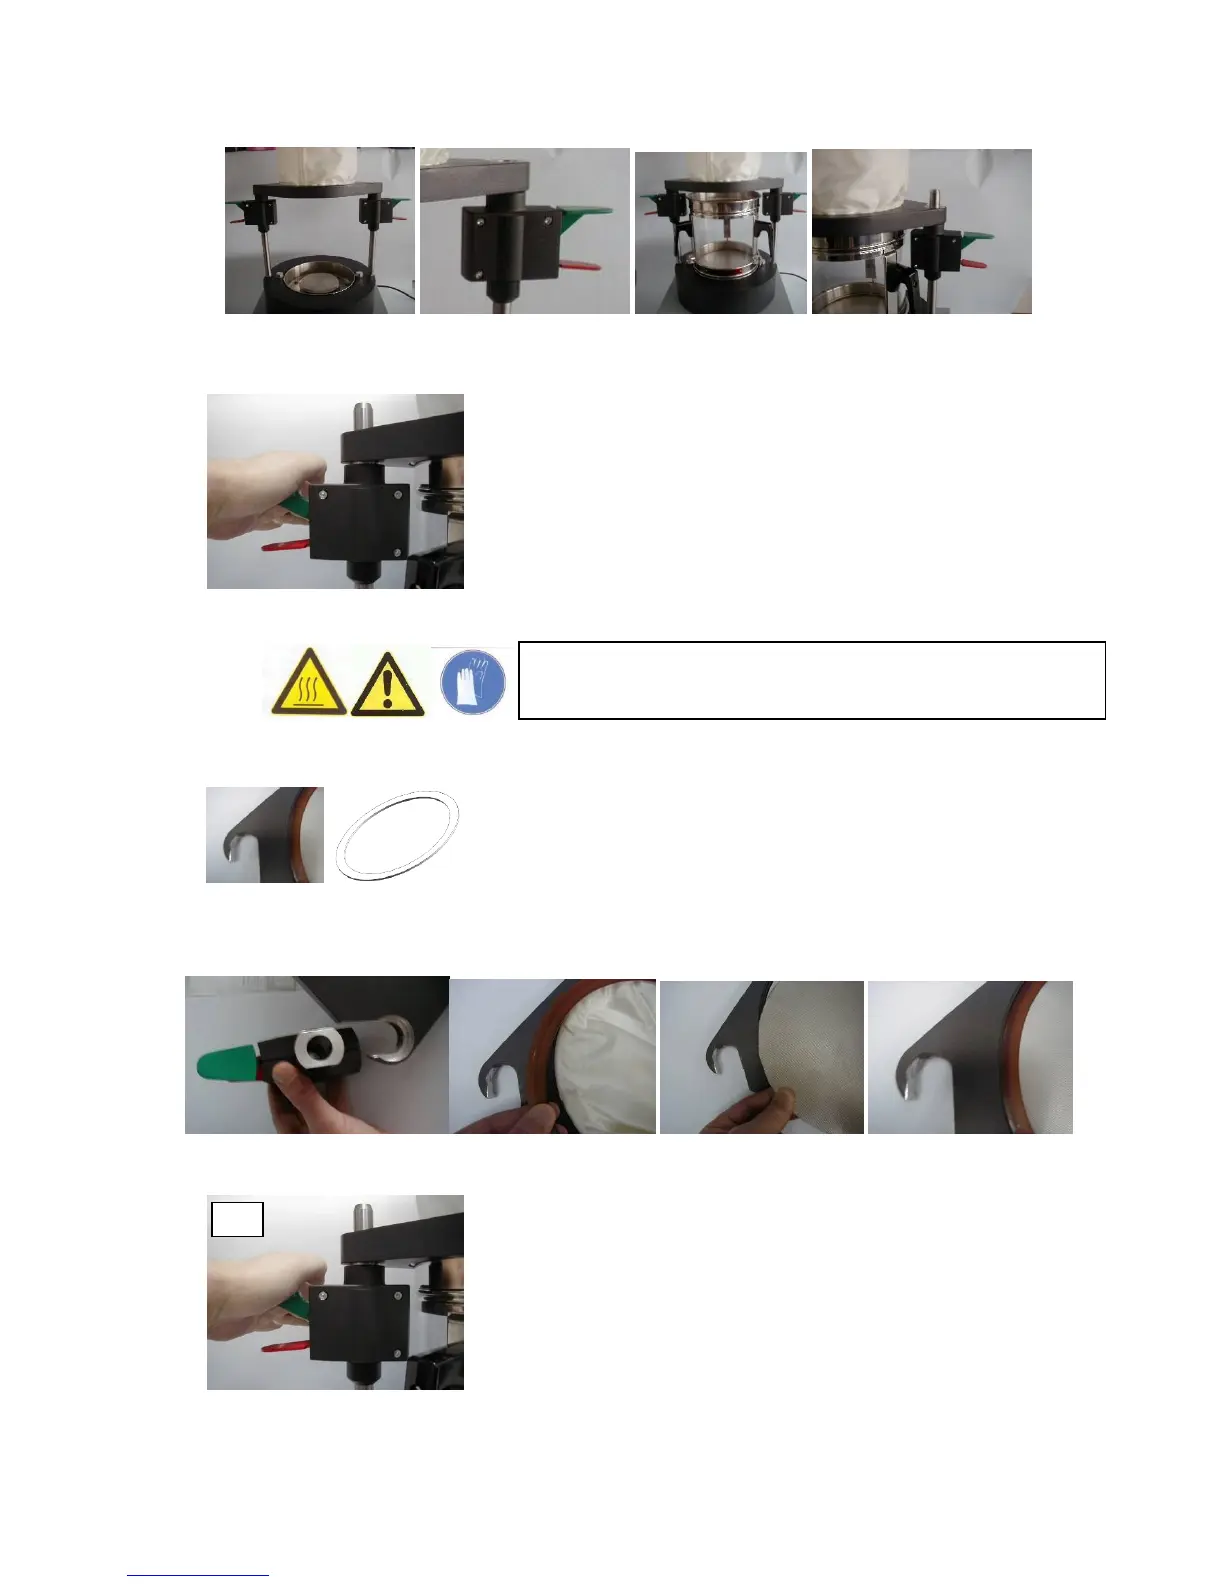
6. Remove clamping elements and seal
7. Insert sieve bottom, Conidur 63 µm, centrally
8. Replace seal
9. Insert clamping elements and clamping lid. In doing so
press the green lever downwards several times.