Do you have a question about the REXON 30A and is the answer not in the manual?
Maintain a clean work area, dress properly, use PPE, and avoid distractions.
Prevent electric shock, use tools correctly, maintain tools, disconnect power, and avoid hazards.
Use recommended accessories and ensure qualified repairs for the tool.
Use the drill press in dry conditions and handle workpieces securely.
Wear ear protection if the noise level exceeds 85dB(A).
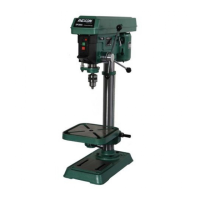
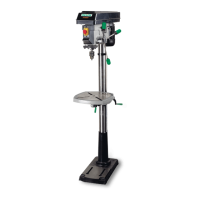
Identifies and lists components of the drill press with figures.
Assemble the column to the base using bolts.
Slide table assembly onto column, secure with handle.
Install worm gear, table lock handle, and rack into table bracket.
Attach bracket assembly to column, secure with collar and lock handle.
Install the table crank handle to the worm gear shaft.
Place table onto arm assembly and tighten lock handle.
Lift and slide the head onto the column, then tighten lock screws.
Screw feed handles into the hub.
Clean taper hole, open jaws, seat chuck using wood block.
Clean tapered surfaces, push chuck onto arbor, lower spindle to align slots.
Engage tang with spindle slot, open chuck jaws.
Adjust table height to 25mm below chuck tip for seating.
Lower chuck to contact table, apply pressure to seat.
Determine location, align holes, insert knobs and washers.
Slide T-blocks into channels, align holes, insert knobs and washers.
Bolt drill press securely to a workbench for maximum stability.
Mark bench, drill holes, bolt press using provided hardware.
Check power supply and receptacle compatibility with drill press.
Machine must be earthed to prevent electric shock.
Use appropriate extension leads and consult electrician for minimum wire size.
Do not connect plug until all installations and adjustments are complete.
Insert drill bit into chuck, ensure it's centered, and tighten with chuck key.
Unlock handle, turn crank to raise/lower table, then tighten handle.
Release set screw/lock bolt, tilt table to desired angle using scale.
Mark hole, align bit, turn on switch, pull handles to drill.
Mark depth, use depth stop or scale to control drilling depth.
Position fence, align stops, check accuracy for repetitive drilling.
Insert key to turn on, push to ON/OFF, remove key to lock OFF.
Use main switch or NVR switch to turn power ON/OFF.
Turn feed handles, tighten depth lock nut to hold chuck position.
Open jaws, carefully tap chuck to remove from spindle.
Adjust depth stop, align keys, tap wedge to release chuck and arbor.
Loosen cover and lock knobs, adjust belt tension, move belts to correct pulley positions.
Blow out dust and apply wax to table and column.
Lubricate gears, rack, and table elevation mechanism periodically.
Address issues with chuck attachment, spindle noise, and runout.
Resolve issues like bit burning, binding, poor feed, and low torque.
Fix workpiece splintering and power-related motion problems.
Detailed list of parts for DP-2000(A) model with part numbers and descriptions.
Technical specifications including chuck size, spindle taper, capacity, and weight for various models.
| Brand | REXON |
|---|---|
| Model | 30A |
| Category | Power Tool |
| Language | English |