6
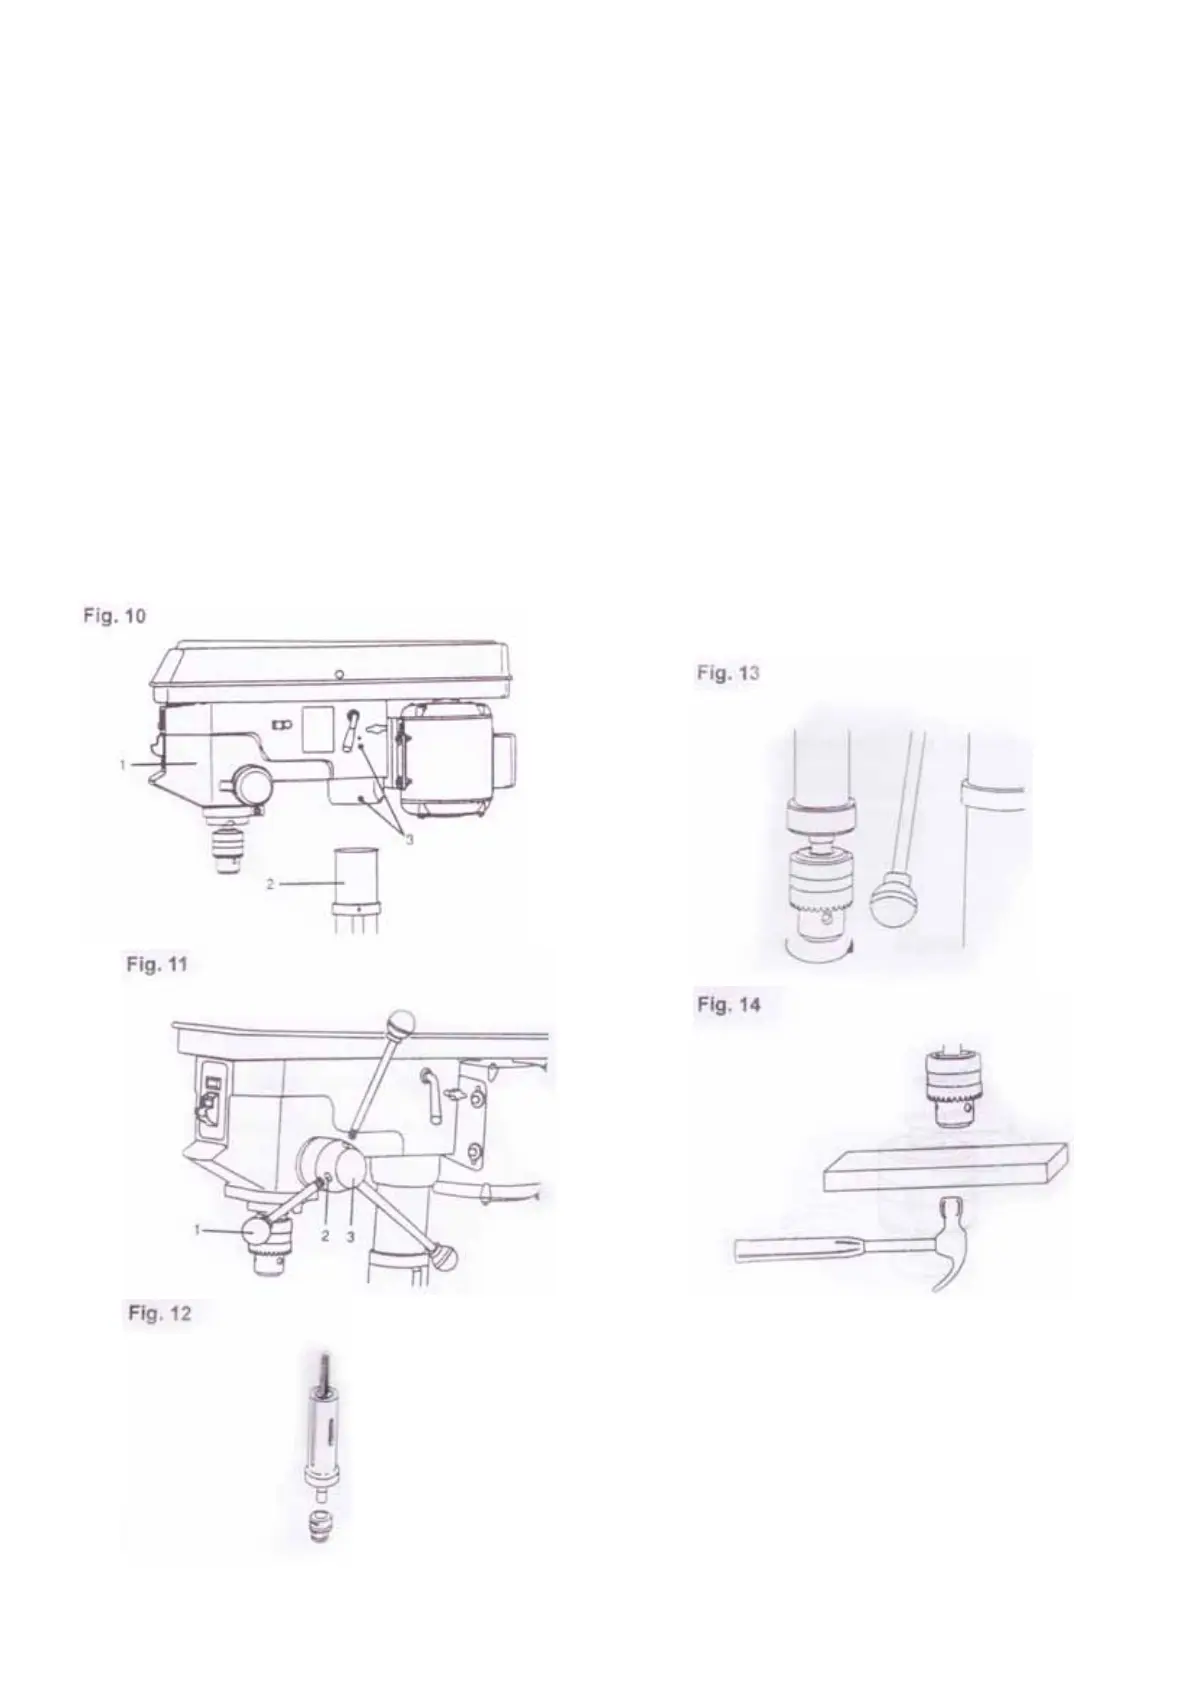
Installing the head to the column(Fig. 10)
Carefully lift the head(1) above the column(2) and slide it
onto the column. Make sure the head slides down over the
column as far as possible. Align the head with the base.
Using the supplied hex wrench, tighten the two head lock
set screws(3) on the right side of the head.
Installing the feed handles(Fig. 11)
Screw the feed handles(1) into the threaded holes(2) in the
hub(3). Tighten.
Installing the chuck
FOR THE SPINDLE WITHOUT ARBOR(FIG. 12, 13, 14)
1. Clean out the tapered hole in the chuck and clean the
spindle nose with a clean cloth before pushing up the
chuck onto the spindle nose. (Fig. 12)
2. Turn the chuck sleeve anticlockwise(when viewed from
above) and open the jaws in the chuck completely. (Fig. 13)
3. Place a block of wood on the drill press table and lower
the spindle until the chuck contacts the piece of wood.
Apply pressure to properly seat the chuck. (Fig. 14)
헤드를 기둥에 설치하기(그림. 10)
헤드(1)를 조심스럽게 기둥(2)에 올려 놓고 기둥에 밀어 넣으세요.
가능한 넣을 수 있을 때까지 밑으로 넣으세요. 베이스와 헤드의
균형을 맞춰주세요. 제공된 육각 렌치를 사용하여, 헤드의 오른쪽에
두 헤드 고정 스크류(3)를 조여주세요.
피드 핸들 설치(그림. 11)
피드 핸들(1)을 허브(3)의 구멍(2)에 넣고 돌려주세요. 조여주세요.
척 설치
아버 없는 회전축(그림. 12, 13, 14)
1. 스핀들 노스위에 척을 위로 밀어 넣기 전에 척의 탭이 된 구멍을
깨끗히 하고 스핀들 노스를 청소해 주세요. (그림. 12)
2. 척 슬리브를 시계반대방향(앞에서 봤을 때)으로 돌리고 척 안의
조를 완전히 열어주세요. (그림. 13)
3. 드릴프레스의 테이블 위에 나무를 놓고 스핀들을 척이 나무에
닿을 때까지 내려주세요. 척의 적당한 압력을 맞춰주세요. (그림. 14)