9
Connecting to the Power Supply
Check that the power supply and plug receptacle are in
accordance with your drill press. Have a look at the rating
place of the motor or the rating on the drill press. Any change
should always be carried out by a qualified electrician.
WARNING! This machine must must be earthed.
If not properly earthed this machine can cause an electrical
shock. Be sure that the power supply outlet is earthed. If
there is any doubt, have it checked by a quaified electrician.
WARNING! Avoid contact with the terminals on the plug
when installing(removing) the plug to(from) the power supply
outlet. Contact will cause a servere electrical shock.
Using an extension lead
The use of any extension lead will cause some loss of power.
To keep this to a minimum and to prevent overheating and
motor burn-out, ask advice from a qualified electrician to
determine the minimum wire size of the extension lead.
The extension lead should be equipped with an earthed type
plug that fits the power supply outlet at one end, and with
and earthed type socket that fits the plug of this machine at
the other end.
Operating the tools
WARNING! Never connect the plug to power source outlet
until all installations and adjustments are completed and you
have lead and understood the safety and operational
instructions.
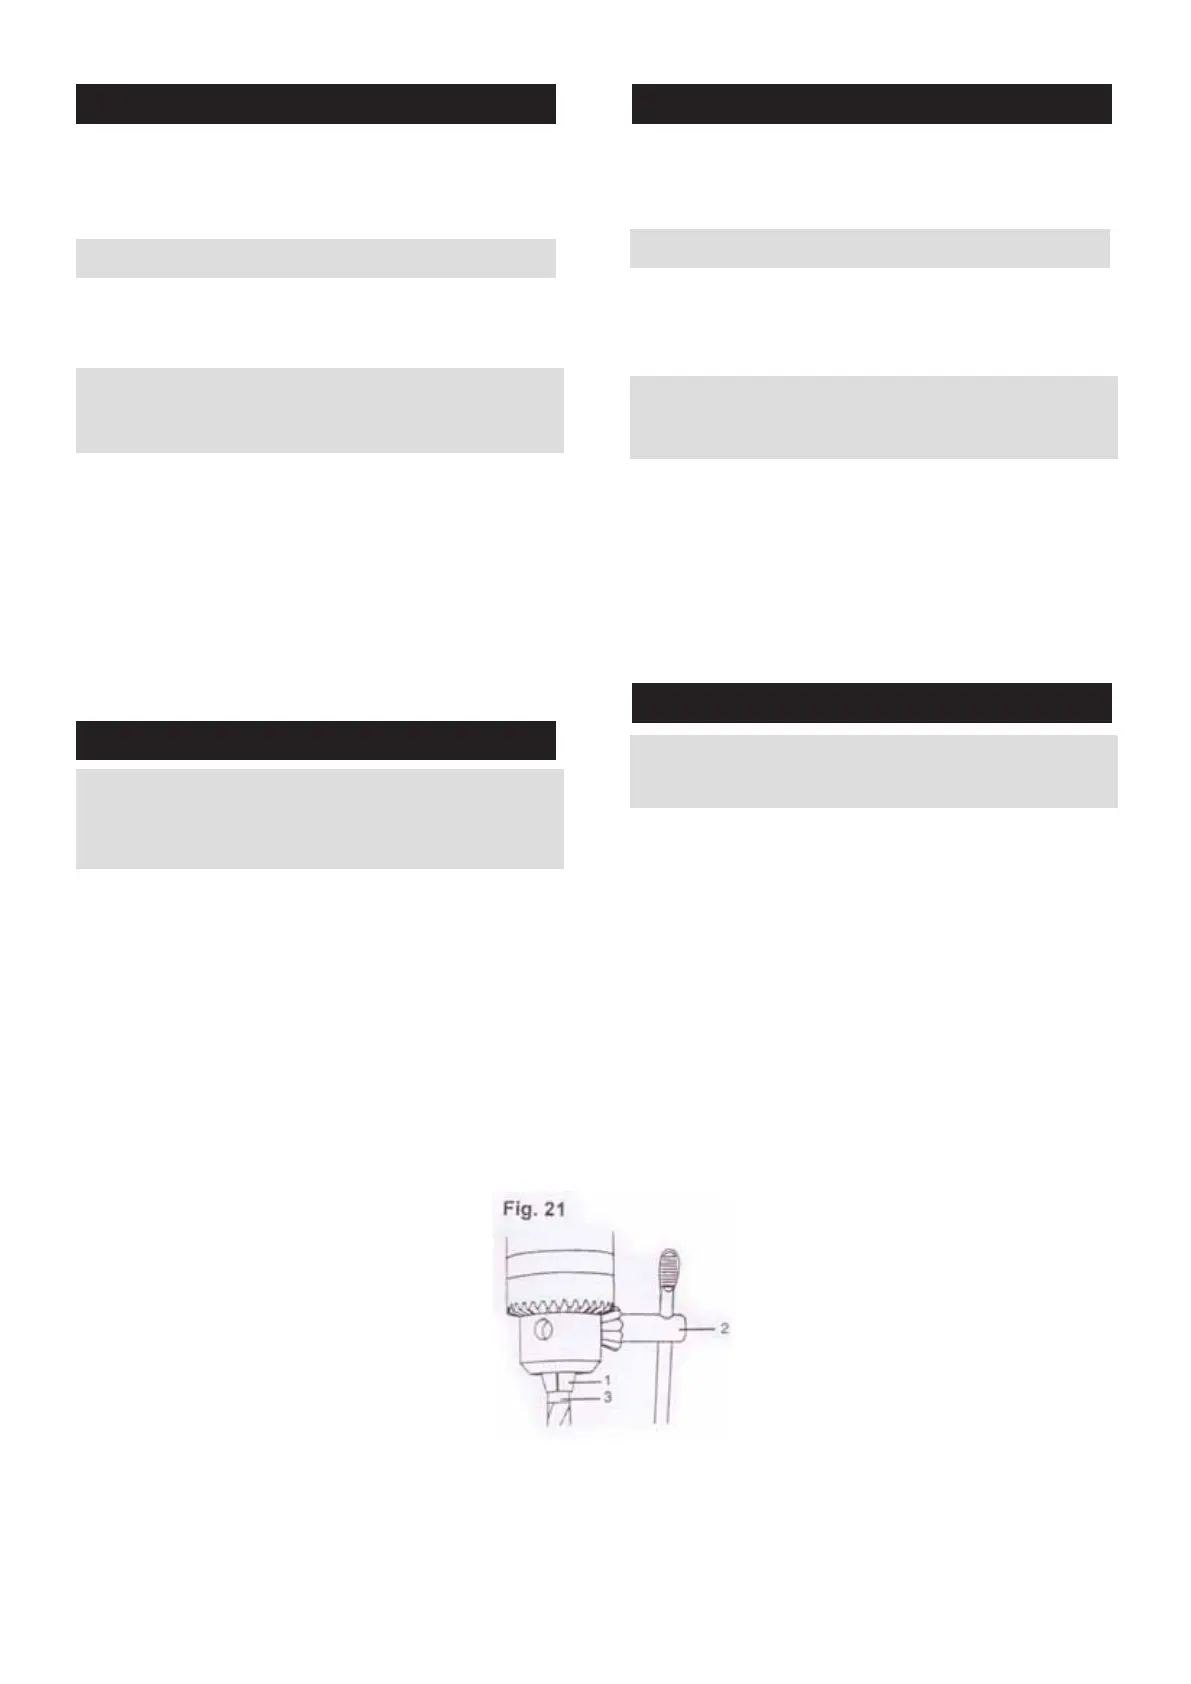
Installing the drill bit (Fig. 21)
1. Insert a drill bit(1) into the chuck far enough to obtain
maximum gripping of the chuck jaws(2). (When using a small
drill bit do not insert it so far that the jaws touch the flutes -
spiral grooves of the drill bit. )
2. Make sure the drill bit is centered, then tighten the chuck
equally with the chuck key(3) by using all three holes in
succession.
Note: The drill bit can be released by using one hole only.
헤드를 기둥에 설치하기(그림. 10)
전원과 플러그가 드릴프레스와 맞는지 점검하세요.
모터의 회전수와 드릴프레스의 회전수를 확인하세요. 변경을
원하시면 전기 전문가에게 맡기세요.
주의! 이 기계는 접지되어야 합니다.
만약 기계가 지면에 붙어 있지 않다면 전기 쇼크를 일으킬 가능성이
있습니다. 전원공급아울렛은 접지되어야 합니다. 문제가 있다면
전기 전문가에게 상의하세요.
주의! 설치(제거)시 플러그가 전원의 터미널과 접촉되는 것을
피하세요. 설치(제거)시의 접촉은 심각한 전기 쇼크를 일으킬 수
있습니다.
연장선 사용
어떠한 연장선의 사용도 전력의 손실을 가져올 수 있습니다.
손실을 최소화하고 과열과 모터가 타는 것을 방지하기 위해서
전기 전문가에게 문의 후 최소의 연장 선을 사용하세요.
연장선은 지면타입 플러그가 전원 공급 아울렛의 끝과 맞고,
지면 타입 소켓이 기계의 다른 끝과 맞습니다.
기계의 작동
주의! 설치와 조절이 끝나기 전에 절대로 플러그를 연결하지 마세요.
사용설명서를 읽고 완전히 이해하고 사용하세요.
드릴비트 설치 (그림. 21)
1. 척 안에 드릴비트(1)를 척 조(2)를 최대한 돌려 충분히 잡아
줄 수 있도록 넣어 주세요. (작은 드릴 비트를 사용할 때 너무 많이
넣으면 드릴비트의 회전 홈이 조에 닿을 수 있습니다. )
2. 드릴비트가 중앙에 있는지 확인하고, 척키(3)로 세 구멍을
통해서 척을 조여주세요.
알림: 드릴 비트는 구멍을 통해서만 풀 수 있습니다.
 Loading...