Specifications and illustrations subject to change without notice or incurring obligations.
Latest version of this manual is available at www.reznorhvac.com.
©2022 Nortek Global HVAC LLC, O’Fallon, MO. All rights reserved.
UBX-UBZ-UDX-UDZ-HX (02-22) 1037154-0
INSTALLATION—CONTINUED
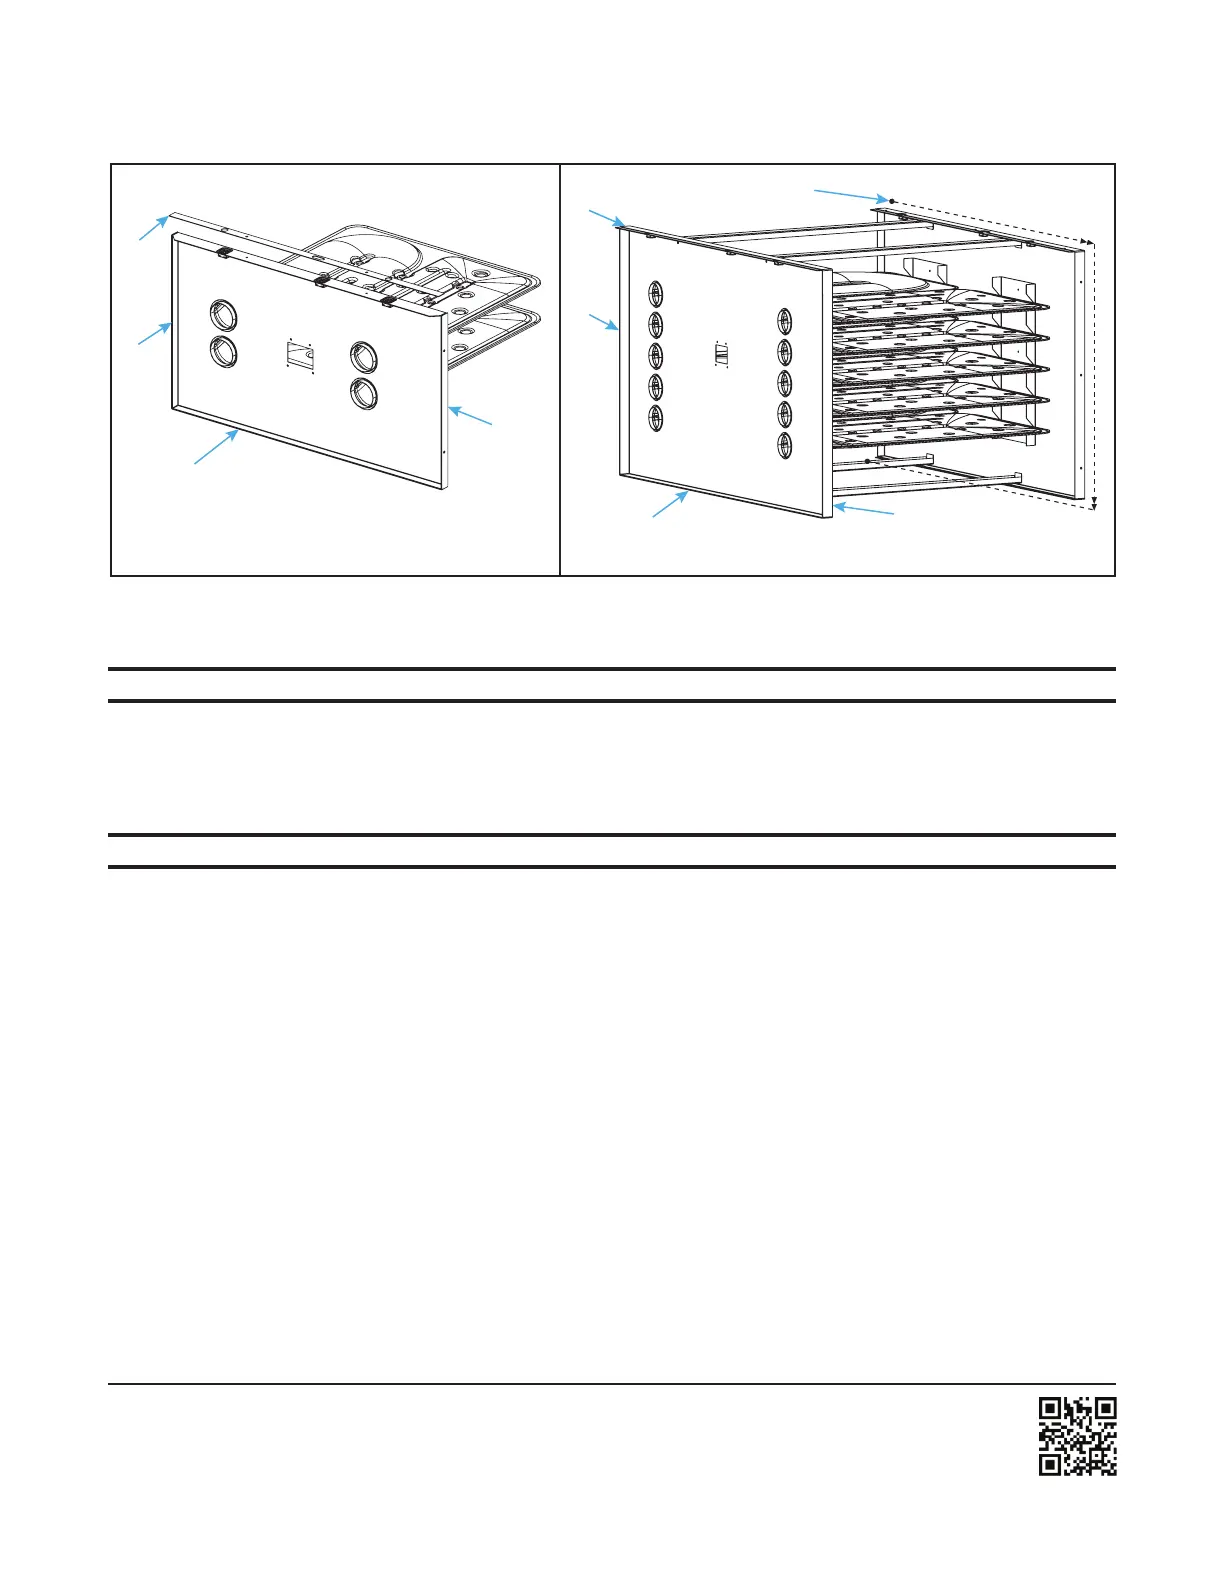
Figure 1. Heat Exchanger Gasket Locations (Refer to Table 1)
1. Install header panel gaskets:
NOTE: The header panel gaskets are sealing gaskets and must cover the full length of the surface.
a. Position top/bottom (1) and front/rear (2) gaskets on outer edges of header panel and align holes—ignore
large holes in bottom gasket.
b. To apply gasket(s), start at end and gradually peel backing from gasket as it is adhered. Repeat with each strip.
2. Install tube support gasket (unit sizes 150–400):
NOTE: The tube support gasket is required to prevent vibration but is not a sealing gasket.
a. Position tube supprt gasket (3) across top, rear, and bottom of tube support.
b. To apply gasket, start at end and gradually peel backing from gasket as it is adhered.
3. Complete replacement heat exchanger installation (refer to installation manual provided with heater):
a. Inspect and clean cabinet, burner, and vent system.
a. Replace any components that are not structurally sound.
4. When installation of replacement heat exchanger is complete, start up heater (refer to installation manual
provided with heater):
a. Follow instructions on lighting instruction plate to restart heater.
b. CHECK ALL SAFETY FEATURES FOR PROPER OPERATION.
UNIT SIZES 030–125
UNIT SIZES 150–400
1
1
2
2
2
3
1
1
2
 Loading...