A / C
F
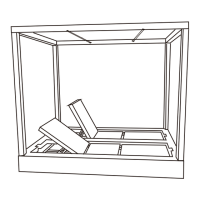
FIGURE 1
B
C
A
F i g . 2
FIGURE 2
1
5
4
3
2
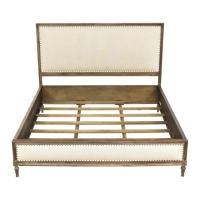
PARTS INCLUDED
ASSEMBLY INSTRUCTIONS
1. Lay the headboard (A) on a flat surface, then attach the legs (F) to the
bottom of the headboard by turning them manually. Repeat this step to
attach the legs to the footboard (C). See FIGURE 1.
2. Place the headboard upright in the location you wish the bed to be in when
fully assembled.
3. Secure the threaded rod (1) to the fixed nut on the headboard by simply
turning manually.
4. Raise the side rail (B) and place the rod to align with the holes on the end of
the side rail. Position the side rail against the headboard so the threaded
rods go through the holes. Insert curved washer (2), lock washer (3) and
hex nuts (4) on the threaded rod, then tighten the hex nuts with the wrench
(5), as shown in FIGURE 2.
5. Repeat the above procedure with the other side rail to attach it to the
headboard, and then repeat to connect side rails to the footboard.
A
B
C
D
E
F
[1]
[2]
[1]
[7]
[2]
[4]
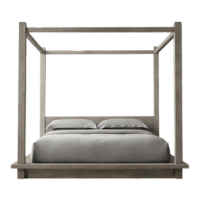
HEADBOARD
SIDE RAILS
FOOTBOARD
BED SLATS
SUPPORT SLATS
LEGS
HARDWARE INCLUDED
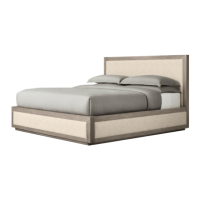
MAISON PANEL KING AND CAL KING BED INSTRUCTIONS
1
2
3
4
NO.
ITEM
DESCRIPTION QTY.
Lock Washer
Wrench
Threaded Rod
Curved Washer
Hex Nut
1 pc.
8 pcs.
8 pcs.
8 pcs.
8 pcs.
5
Page 1 of 2
11/1/18