10 11
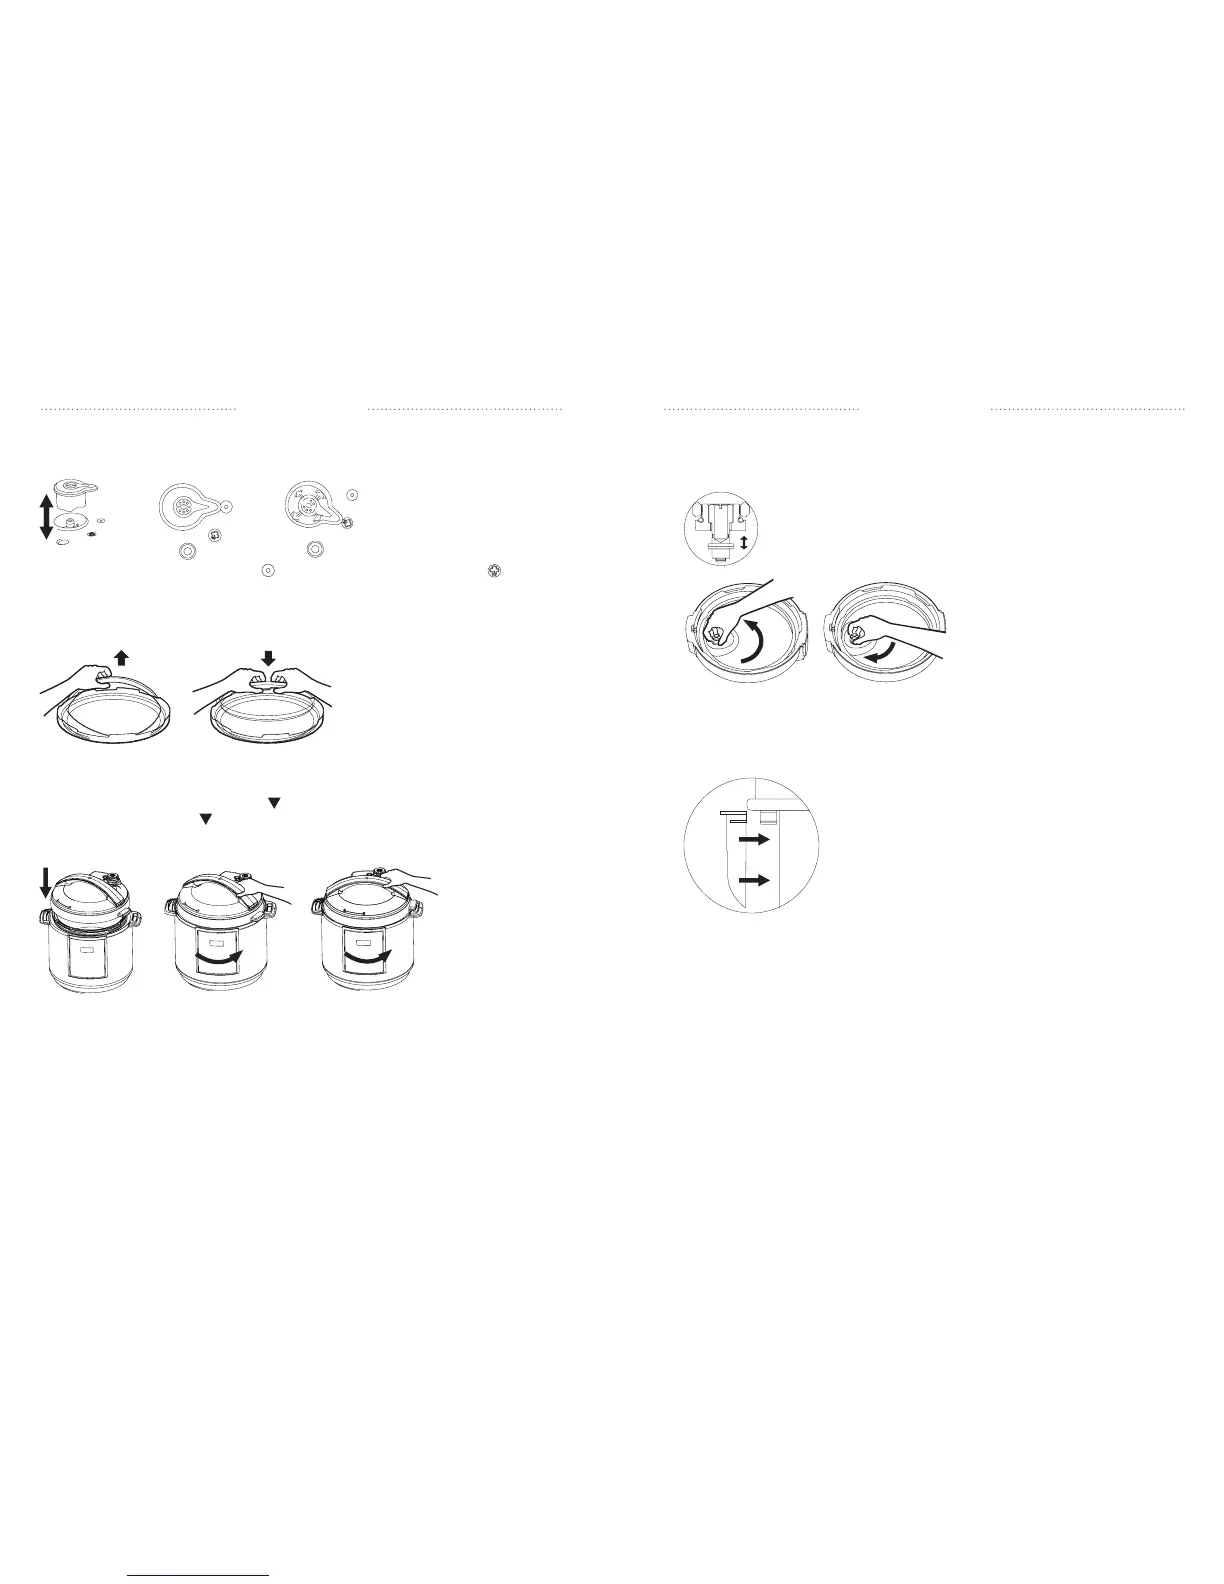
3- HOW TO REMOVE / INSTALL THE PRESSURE RELEASE VALVE
SEALING POSITION RELEASE POSITION
To remove, lift the valve upward.
Insert the pressure release valve back
into the outlet. It is normal that the
valve fits loose it is required for
pressure and temperature regulation.
Always point the valve to
“
sealing
”
position when operating and to
“
release
”
position to
manually release the pressure after cooking stage is completed. Pressure won’t build inside the
appliance if the pressure valve is not sealed properly.
4- HOW TO REMOVE / INSTALL THE SEALING RING
The sealing ring is located under the lid.
Remove the sealing ring from the rack
section by section. Ensure the sealing
ring is properly reinstalled back into
the rack before using the appliance.
Never operate the appliance with a
damaged sealing ring.
5- HOW TO CLOSE THE LID
Place the lid on the appliance and align the symbol with the unlocked icon on the body and turn
counter clockwise to align the symbol with the locked icon. Close the lid securely until a “click”
is heard. The appliance is equipped with a locking lid mechanism that prevents the appliance from
operating if lid is not properly locked.
6- CLEANING
WARNING: Ensure the appliance is unplugged from the electrical outlet and allow it to cool down
completely before handling or cleaning it.
WARNING: DO NOT immerse body, electrical cord or plug in water or any other liquid.
1- Remove the inner cooking pot, the pressure release valve, the sealing ring and wash in hot
soapy water with all other accessories. Rinse and dry thoroughly. Wash after each use.
2- Use a cleaning brush to clean the float valve (under the lid). Move the float valve up and down
to dislodge any food debris. If necessary, remove the silicone gasket from the float valve end.
NOTE: Reinstall the silicone gasket to the float valve, making sure the silicone
sits in the groove.
3-
Remove the anti-blocking nut by rotating
counter clockwise. Rinse it to dislodge any
food debris and replace tightly. Ensure the
anti-blocking nut is properly reinstalled
before using or storing the appliance.
4- Rinse the lid with hot water and dry thoroughly.
5- Wipe body with a damp cloth and dry thoroughly.
6- Install the condensation collector at the rear of the pressure cooker by aligning the top of the
collector with the guides on the cooker.
7- Reassemble the appliance.
NOTE
::: ALWAYS ensure the sealing ring is properly reinstalled under the lid and the pressure
release valve is back in the outlet.
::: Do not use abrasive cleaners or scouring pads or any other object that could scratch.
::: The inner cooking pot, serving spoon and steaming tray are dishwasher safe.


 To Next Page
 Loading...