46
MO-C1 Training
Slide 46
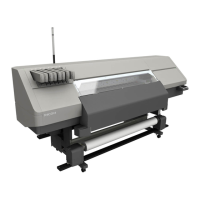
Recommended Order of Installation
1. Assemble the Scanner Stand
2. Assemble the Main Unit Stand
3. Mount the Scanner Unit
4. Mount the Main Unit
5. Install the Roll Unit 1 (Standard)
6. Install the Roll Unit 2 (Option)
7. Install the Controller Options
8. Connect the Scanner and the Main Unit
Connect Harnesses, Install Brackets, Connect the Host USB Cable
Connect and Clamp the Power Cord, Clamp the Main Harness
9. Remove Tapes and Shipping Materials
10. Install the Original Stacker and Guides
11. Attach the Ink Collector Tank Storage Shelf
12. Assemble and Install the Exit Stacker
13. Ink Filling
14. Set Roll Paper
15. Check the Printing: Nozzle Check Pattern
16. Final Adjustments: Adjust Head Position, Paper Feed, and Print Position
17. Final Settings: Paper Type, Date/Time, Enable MFP options/DOS unit
18. After Installation: Copy the factory setting sheet, copy the NVRAM data to an SD card
No additional notes