EasyManua.ls Logo

Ricoh SP C360SNw - User Manual

Ricoh SP C360SNw
2 pages
Print Icon
To Next Page IconTo Next Page
Loading...
Quick Reference Copy Guide
How to Make Copies
Press [Home] at the bottom of the
screen in the center.
Press the [Copy] icon on the
[Home] screen.
DUP250
Press [Reset].
Place the originals.
DUP251
DUP252
How to Use the Control Panel
1 2 3
14
15
4
5
6
12
789101113
DUP823
Flick the screen up and down, and
make desired settings.
Enter the number of copies.
Press [Start].
* The shape of the machine and screen displays varies according to models.
9. [Home]
Press to display the [Home] screen.
10. [Return]
11. [Media Information]
Press to remove the inserted SD card or
USB flash memory device from the media
slot.
12. Status indicator
Indicates the status of the system. It stays
lit when an error occurs or the toner runs
out.
13. [Check Status]
14. Icon/Widget display area
15. Name of the Log-in User
1. Display panel
2. [Login]/[Logout]
3. [Energy Save]
4. Main power indicator
5. Application list icon
Press to display the application list that
contains shortcuts to the applications on
the [Home] screen.
6. Icons to switch between screens
7. [Stop]
Press to stop a job such as copying if it is in
progress.
8. [Menu]
Displays the menu screen of the application
you are using. Depending on the
application, this key may be disabled.
Question and Answer IconNeed help?

Do you have a question about the Ricoh SP C360SNw and is the answer not in the manual?

Summary

How to Use the Control Panel

Display Panel

The main screen where operations are displayed.

Stop Button

Press to stop an ongoing job like copying.

Home Button

Returns the user to the main Home screen.

How to Use the [Copy] Screen

Color Mode

Selects the color output mode for copies.

Reduce;Enlarge

Adjusts the copy size by reducing or enlarging.

Quantity

Sets the number of copies to be made.

Adjust Density

Fine-tunes the darkness or lightness of the copy.

Overview

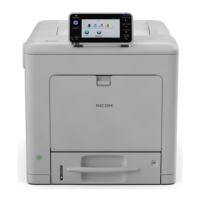
This document provides a quick reference guide for operating a multi-function device, focusing on copying functions and control panel usage.

Device Functions

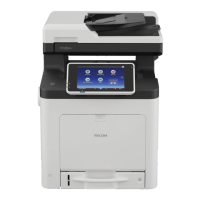
The primary function of this device, as detailed in the guide, is copying documents. It also appears to support scanning and faxing, indicated by dedicated icons on the home screen and control panel.

Control Panel and User Interface

The device features a comprehensive control panel with a display panel (1) that serves as the main interface. The display panel is an interactive touch screen, allowing users to select functions, adjust settings, and view status information.

Key elements of the control panel include:

  • Display Panel (1): The central interactive screen.
  • [Login]/[Logout] (2): Buttons for user authentication, indicating that the device supports user accounts and potentially access control. The "Name of the Log-in User" (15) is displayed, confirming this feature.
  • [Energy Save] (3): A button to activate power-saving modes, highlighting an energy efficiency feature.
  • Main Power Indicator (4): A visual cue for the device's power status.
  • Application List Icon (5): Pressing this icon displays a list of applications, including shortcuts to functions like Copy, Scanner, and Fax, which are also accessible directly from the home screen. This suggests a modular or app-based system for device functionalities.
  • Icons to Switch Between Screens (6): These icons facilitate navigation between different views or menus on the display panel.
  • [Stop] (7): A crucial button to immediately halt any ongoing job, such as copying, providing quick control over operations.
  • [Menu] (8): This button displays the menu screen specific to the application currently in use. Its functionality may vary or be disabled depending on the active application.
  • [Home] (9): A dedicated button to return to the main home screen from any other menu or application.
  • [Return] (10): A navigation button to go back to the previous screen.
  • [Media Information] (11): This button is used to safely remove inserted SD cards or USB flash memory devices from the media slot, indicating support for external storage.
  • Status Indicator (12): A light that provides visual feedback on the system's status. It illuminates to signal errors or when toner levels are low, serving as a maintenance alert.
  • [Check Status] (13): A button to access detailed information about the device's current operational status, including job progress, error messages, and supply levels.
  • Icon/Widget Display Area (14): This section of the display panel shows various icons and widgets, providing quick access to information or functions.
  • Name of the Log-in User (15): Displays the name of the currently logged-in user, reinforcing the user authentication feature.

Copying Features and Settings

The guide provides a step-by-step process for making copies and details a wide array of settings available on the [Copy] screen.

Basic Copying Steps:

  1. Press [Home].
  2. Press the [Copy] icon.
  3. Press [Reset] (to clear previous settings).
  4. Place originals on the document glass or in the automatic document feeder.
  5. Flick the screen up/down to access and adjust settings.
  6. Enter the desired number of copies.
  7. Press [Start].

Advanced Copying Settings (accessible on the [Copy] screen):

  • Color Mode (1): Allows users to select between color and monochrome copying.
  • Reduce/Enlarge (2): Enables scaling of the original document, with a default of 100% (actual size).
  • Quantity (3): Specifies the number of copies to be made, adjustable via a numeric keypad or +/- buttons.
  • Adjust Density (4): Controls the lightness or darkness of the copy, allowing users to compensate for faint originals or desired output.
  • Select Tray (5): Allows selection of the paper tray to be used for printing, indicating support for multiple paper sources and sizes.
  • 2 Sided/Combine (6): Offers options for two-sided copying (e.g., 1-sided to 2-sided, 2-sided to 2-sided) and combining multiple originals onto a single sheet.
  • Sort (7): Provides options for sorting copied sets, useful for multi-page documents.
  • Original Size (8): Allows specification of the original document's size (e.g., A4), which helps the device optimize scanning and copying.
  • Original Type (9): Enables selection of the original document type (e.g., Text/Photo), allowing the device to apply appropriate image processing for optimal quality.
  • Other Settings (10): This section includes additional advanced settings such as:
    • Series: Potentially for creating multiple sets or batches.
    • Adjust Color Balance: Fine-tuning color output.
    • Original Orientation: Specifying how the original is placed.
    • ID Card Copy: A specialized function for copying identification cards, often involving scanning both sides onto a single sheet.

Technical Specifications (Inferred)

While explicit technical specifications are not provided, several features can be inferred:

  • Document Handling: The presence of an automatic document feeder (implied by "Place the originals" and the visual representation of placing documents) suggests the ability to process multiple pages automatically. The document glass is also available for single-page or delicate originals.
  • Paper Handling: Support for various paper sizes (e.g., A4) and multiple paper trays is indicated by the "Select Tray" option.
  • Connectivity: The "Media Information" button and support for SD cards and USB flash memory devices confirm direct media connectivity for printing from or scanning to external storage.
  • User Management: The [Login]/[Logout] feature indicates robust user management capabilities, potentially including user tracking, quotas, and secure access.
  • Energy Efficiency: The [Energy Save] button highlights a commitment to reducing power consumption.
  • Display: The interactive display panel is a touch screen, enhancing user interaction.

Usage Features

  • Intuitive Interface: The guide emphasizes ease of use with clear, step-by-step instructions and a visually organized control panel.
  • Customizable Settings: Users can extensively customize copy settings to meet specific needs, from basic quantity and density to advanced sorting and color adjustments.
  • Quick Access: Dedicated icons for core functions (Copy, Scanner, Fax) and a "Home" button ensure quick navigation.
  • Error Reporting: The Status Indicator and [Check Status] button provide immediate feedback on device issues, aiding in troubleshooting.
  • Multi-language Support: The copyright information shows "EN GB EN US," indicating support for multiple English language variants.

Maintenance Features

  • Status Monitoring: The Status Indicator (12) alerts users to critical maintenance needs, such as low toner or system errors.
  • [Check Status] (13): Provides detailed information that can assist in diagnosing and resolving maintenance issues.
  • Media Ejection: The [Media Information] button (11) ensures safe removal of external storage devices, preventing data corruption.

The device appears to be a versatile multi-function printer designed for office environments, offering a comprehensive set of copying features, an intuitive user interface, and robust management capabilities. The "Note" section on page 2 also highlights that "Settings vary depending on the models or options you use," suggesting a customizable or modular design for the device series.

Ricoh SP C360SNw Specifications

General IconGeneral
BrandRicoh
ModelSP C360SNw
CategoryPrinter
LanguageEnglish

Related product manuals