Do you have a question about the ricoo S0722 and is the answer not in the manual?
Official installation guide for the TV wall mount, version v.17.10.
Caution to not exceed the maximum weight capacity to prevent injury or property damage.
Instruction to check VESA hole distance on the display before installation.
Details the compatible horizontal and vertical VESA hole distances for the mount.
Emphasizes reading and understanding all instructions and warnings before starting assembly.
Highlights that the product is for indoor use only and must be installed as specified.
Advises on checking supporting surface and specific requirements for different wall types.
Informs customers on how to request replacement parts for missing or damaged items.
Instruction to ensure all components are received according to the checklist before proceeding.
Lists screws, washers, and spacers included in Package M for mounting.
Lists screws and anchors included in Package W for wall mounting.
Instructions to unscrew front panel nuts and secure plastic washers for later use.
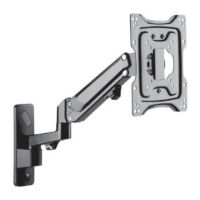
Illustrates the process of attaching the mounting plate to the main arm structure.
Details pilot hole drilling and screw selection (W-C, W-A, W-D) for wood beam attachment.
Instruction to screw the wall mount onto the wooden beams with correct orientation.
Instructions for drilling pilot holes and inserting anchors (W-B) into concrete.
Instruction to screw the wall mount onto the wall using anchors and correct orientation.
Shows how to attach the mounting plate to the display using specific screws (M-A, M-B, M-C, M-F).
Guidance on choosing appropriate screws, washers, and spacers for curved TV backs.
Instruction to screw the selected adapter brackets onto the TV, ensuring proper fit.
Details placement of plastic washers and nuts on the top screw of the front panel.
Instructions for hanging the display onto the wall mount and securing with screws/nuts.
Guidance to align the display using a bubble level and tighten all three screws nuts.
Instructions for connecting display cables and running them through the cable guide.
Attention note on leaving cable slack for movement and routing cables to avoid interference.
Explains the front panel rotation function (+/- 2.5 degrees) for horizontal alignment.
Guidance on loosening or tightening screws to adjust the rotation function's free-moving.
Instructions on how to loosen, set, and tighten screws to adjust the tilt angle.
Instruction to adjust the display to the desired final position or tilt.
Advice to check bracket security and safety at regular intervals (e.g., every three months).
| Brand | ricoo |
|---|---|
| Model | S0722 |
| Category | Racks & Stands |
| Language | English |