EasyManua.ls Logo

ricoo S1944 User Manual

ricoo S1944
12 pages
Go to English
To Next Page IconTo Next Page
Page #1 background imageLoading...
Page #1 background image
S1944
45kg
(99lbs)
MAX
ACHTUNG: NIEMALS DAS MAXIMAL
ZULÄSSIGE BELASTUNGSGEWICHT
ÜBERSCHREITEN. MISSACHTUNG
KANN ZU SACHSCHÄDEN ODER
SCHWEREN VERLETZUNGEN FÜHREN!
200x100
200x200
300x200
300x300
400x300
400x400
Wandhalterung für TV / Monitor
MONTAGEANLEITUNG
v.17.01
Die TV-Halterung kann um 120° geschwenkt, um +/-15° geneigt oder um +/-3° gedreht werden.
Wartung
• Prüfen Sie in regelmäßigen Abständen (mindestens alle drei Monate), ob alle Schrauben an dem Produkt fest
angezogen sind.
• Bei Fragen kontaktieren Sie Ihren Händler.
Diese Wandhalterung besitzt eine Drehfunktion der Frontplatte. Somit ist der Bildschirm in Horizontaler / Waagerechten um +/- 3°
drehbar. Dies hat den Vorteil, dass Sie den Bildschirm jederzeit horizontal ausrichten können.
Um dies zu ermöglichen müssen die drei Fixierschrauben an der Frontplatte mittelfest angezogen werden (Schritt 6). Dadurch wird
es möglich sein den Bildschirm jederzeit mit den Händen ohne die Schrauben lockern zu müssen und ohne großen Kraftaufwand
waagerecht gerade stellen können, was das Ausrichten ohne Extra-Werkzeug ermöglicht.
Mit dieser Funktion richten Sie Ihren Bildschirm beim Ausziehen oder Einklappen der Halterung gleichzeitig mit den Händen in eine
waagerechte oder Ihrem Wunsch entsprechende Position aus.
Schwer- oder Leichtgängigkeit der Drehfunktion können Sie durchs Lockern oder Zuziehen der gezeigten Schrauben Ihrem
Wunsch entsprechend regulieren.
+/- 3°
VESA Befestigungslöcher
Bildschirm Rückseite
Bitte überprüfen Sie VOR der Montage den Lochabstand zwischen den Befestigungs-löchern an Ihrem Bildschirm!
!
Horizontal / Waagerecht
Vertikal /
Senkrecht
Diese Wandhalterung unterstützt folgende Lochabstände:
Horizontal / Wageerecht
Vertikal / Senkrecht
min. 200mm - max. 440mm
min. 100mm - max. 410mm
Question and Answer IconNeed help?

Do you have a question about the ricoo S1944 and is the answer not in the manual?

ricoo S1944 Specifications

General IconGeneral
Brandricoo
ModelS1944
CategoryRacks & Stands
LanguageEnglish

Summary

Product Features and Safety Information

Horizontal Screen Rotation

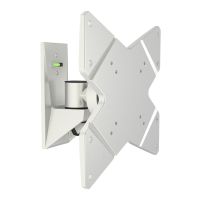
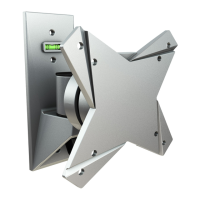
Allows precise horizontal screen alignment using the front plate's rotation capability.

Swivel and Tilt Capabilities

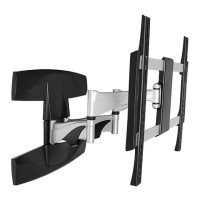
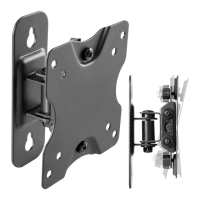
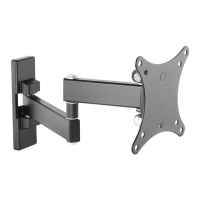
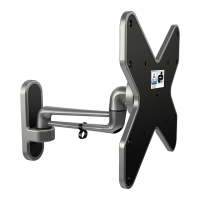
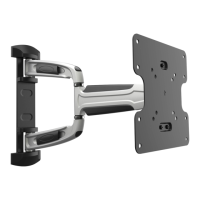
Screen can be swiveled 120° and tilted +/-15° for optimal viewing angles.

VESA Mounting Compatibility

Details supported VESA hole patterns and dimensions for screen compatibility.

Critical Weight Limit Warning

Strict caution against exceeding maximum weight capacity to prevent damage or injury.

Component Checklist and General Warnings

Component Checklist

Lists all included hardware parts for assembly, categorized by packages.

General Installation Warnings

Provides critical safety and installation guidelines before starting the assembly process.

Wall Mounting Installation

Decorative Cover Removal

Initial step to remove decorative covers from the mount before wall attachment.

Wood Stud Wall Mounting Procedure

Step-by-step guide for securely attaching the mount to wood studs.

Concrete Wall Mounting Procedure

Step-by-step guide for securely attaching the mount to concrete walls.

Wall Mounting Support & Safety Checks

Emphasizes verifying stud integrity and supporting surface weight capacity for safety.

Display Attachment to Wall Mount

Installing Decorative Covers

Process of fitting decorative covers onto the mounting bracket assembly.

Front Panel Attachment (Flat Back)

Attaching the front panel to displays with flat backs using specified hardware.

Mounting Display to Wall Bracket

Front Panel Attachment (Curved Back)

Specific instructions for attaching the front panel to displays with curved backs.

Hooking Display onto Wall Mount

Steps for safely hanging the TV assembly onto the installed wall bracket.

Final Setup and Adjustments

Cable Management

Guides on routing and securing cables for a neat and functional installation.

Mount Adjustment and Tightening

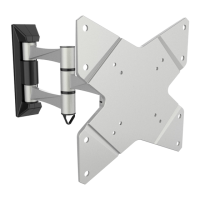
Instructions for fine-tuning the mount's tension and position using an Allen key.

Related product manuals