Do you have a question about the RIDGID D Series and is the answer not in the manual?
General advice including disconnecting power sources before servicing electrical systems.
Remove or loosen specific bolts on the bumper brace to allow it to dangle for installation.
Install the RIGID fog light bracket using provided hardware and an M6 bolt/washer.
Install the provided M6 carriage bolt and M6 flange head nut, but do not fully tighten yet.
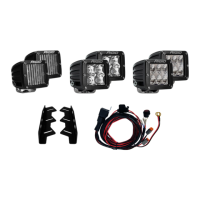
Install (6) extended drop mount brackets, ensuring carriage bolts are pre-installed.
Mount the lights to the bracket, adjust for fitment, then fully tighten all bolts.
| Brand | RIDGID |
|---|---|
| Model | D Series |
| Category | Automobile Accessories |
| Language | English |