Do you have a question about the RIDGID R350RHE and is the answer not in the manual?
Always wear eye protection and dress properly, keeping hair and clothing away from moving parts.
Use the correct tool, maintain it properly, and check for any damage or misalignment before use.
Tool service must be performed only by qualified repair personnel using identical replacement parts.
Know your tool, wear eye protection, protect lungs and hearing, and ensure the hose is free of snags.
Handle the tool with care, never point it at yourself or others, and ensure proper workpiece contact.
Use only appropriate air sources and couplings, and always disconnect air supply before servicing or moving.
Do not load fasteners with controls activated, keep body parts clear of discharge areas, and never point at anyone.
Explains the meanings of DANGER, WARNING, CAUTION, and NOTICE signal words for hazard identification.
Provides meanings for symbols related to safety alerts, eye protection, hearing, and keeping hands away.
Warns about chemicals in product and dust known to cause cancer or reproductive harm.
Move an operating control to a position that allows tool actuation.
System using trigger, workpiece contact, or controls to actuate the tool.
An obstruction in the feed or drive areas of the tool.
A tool operating control activated by a tool operator's fingers.
Lists operating pressure, magazine capacity, air consumption, and other technical specifications.
Emphasizes understanding the tool and manual for safe and effective use.
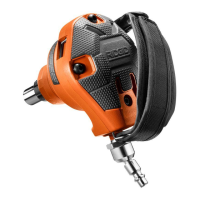
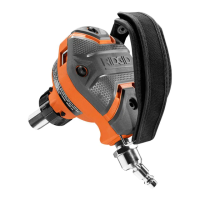
Allows directing exhaust to a variety of positions based on operator preference.
Tool-free adjustment for selecting precise driving depth of fasteners.
Prevents operation when the magazine is low to avoid missing fasteners and extend motor life.
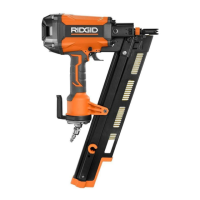
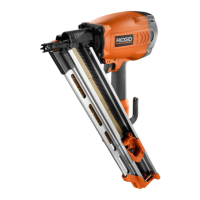
Ergonomic handle with overmold for improved comfort and grip.
Self-cleaning filter to keep debris out, extending the life of the tool.
Delivers consistent driving power for reliable fastening.
Provides quick access to the nose for clearing infrequent jams.
Accommodates a wide range of fasteners, adjusting automatically to nail sizes.
Reduces noise levels during tool operation.
Prevents marring and denting when used on softer woods.
Helps prevent hose tangles for easier maneuverability.
Allows hanging the tool from a rafter when disconnected and not in use.
Operator can choose between Contact Actuation and Single Sequential Actuation.
Reduces slipping during angled nailing operations.
Do not use if not completely assembled or if parts are missing/damaged; do not modify the tool.
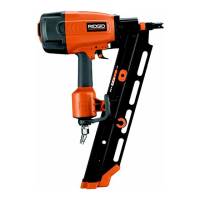
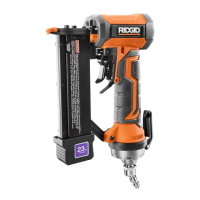
Lists approved uses such as framing, decking, fencing, and assembly.
Warning to avoid carelessness, disconnect air supply when moving, and wear proper eye protection.
Lubricate the tool daily, check air pressure (70-120 psi), and ensure it is operational.
Details on the no-mar pad for surface protection and how to remove/replace it.
Instructions on how to turn the exhaust cap to direct exhaust as preferred.
Connect using a 1/4 in. quick connector; ensure couplings discharge air when disconnected.
Load nails with the tool nose pointed away; ensure magazine is empty before connecting to air supply.
Load nails with the nose away from you, push the pusher back, and ensure the tool is pointed correctly.
Instructions for switching between Single Sequential and Contact Actuation modes.
Provides accurate fastener placement; requires specific sequence of controls.
Allows fast, repetitive fastener placement; operates by contact and trigger.
Point tool correctly and away from others; avoid tilting forward to prevent misses or ricochets.
Feature prevents operation when magazine is nearly empty, requiring reload to resume.
Test pressure with similar material, starting at 90-95 psi, adjusting to the lowest effective setting.
Adjust nail depth by turning the selector; test each adjustment on scrap material.
Press pusher release button, slide nails over stop tab, and remove nail strip.
Disconnect air supply, unlock jam mechanism, and remove obstruction with pliers or screwdriver.
For severe jams, use a screwdriver and hammer; always ensure the jam-clearing mechanism is closed.
Clean with cloths; avoid solvents on plastic parts and keep chemicals away from them.
Lubricate frequently with appropriate oil via air line; avoid detergent oil or additives.
Use air tool oil or antifreeze; do not store tools in cold environments to prevent ice formation.
Ensure adequate air volume and pressure (70-120 psi); check for restrictions in the supply system.
Check tool components, actuation, and trigger function daily; repeat after damage.
Order parts and kits by phone; use only manufacturer-recommended attachments/accessories.
Addresses leaks near the top, trigger area, or bottom of the tool due to lubrication or loose parts.
Troubleshoots tools that do nothing or operate sluggishly due to air supply or lubrication.
Resolves frequent jams caused by incorrect/damaged fasteners, loose or dirty magazines, or worn drivers.
Contact nearest authorized service center for parts or service; provide model and serial numbers.
Record model and serial numbers from the motor housing plate for future reference.