10
children, aphasics and people with eye diseases are at a higher risk. The risk may be
increased if the patient has already been examined with this or another ophthalmo-
logical instrument during the last 24 hours. This is especially true when the eye has
been exposed to retinal photography.
The light of this instrument may be harmful. The risk of eye damage increases with
the duration of irradiation. An irradiation period with this instrument at maximum
intensity of longer than >5 min. exceeds the guideline value for hazards.
This instrument does not pose a photobiological hazard according to DIN EN 62471.
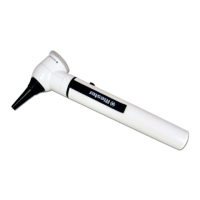
4.3. Lens wheel with correction lenses
The correction lenses can be adjusted using the lens wheel. The following correction
lenses are available:
D+ 1 | 2 | 3 | 4 | 6 | 8 | 10 | 15 | 20
D- 1 | 2 | 3 | 4 | 6 | 8 | 10 | 15 | 20
The values can be read off in the illuminated eld of view. Plus values are indicated by
black numbers, minus values by red numbers.
4.4. Aperture wheel
Using the aperture wheel and lter wheel, the following apertures or lters can be
selected:
Aperture Function
Semi circle: For examinations with turbid lenses.
Small circle For reduction of reexes of small pupils.
Large circle: For standard fundus examination.
Fixation star: For denition of central and eccentric xation.
Filter Function
Red-free lter: To increase contrast for assessment of (green lter)
changes in ne vessels, i.e. retinal haemorrhages.
Blue lter: for improved recognition of vascular abnormalities or
bleeding, for uorescence ophthalmology.
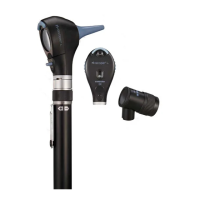
4.5. Replacing the bulb
e-scope® ophthalmoscopes
Remove the instrument head from the battery handle. The LED/incandescent bulb is
located at the bottom of the instrument head. Remove the lamp from the instrument
head using your thumb and forenger or a suitable tool. When switching from an LED
to an incandescent bulb, an optionally available adapter must also be used; when
changing from an incandescent bulb to an LED, this must be removed from the lamp
compartment. Insert the new LED/incandescent bulb rmly.
CAUTION!
The pin of the lamp must be inserted into the guide groove on the adapter and the
adapter must be inserted into the guide groove on the instrument head.
e-xam
Remove the instrument head from the battery handle. The XL or LED lamp is located
in the lamp head.
Turn white insulation counter clockwise. Remove insulation with contact.
Lamp will fall out. Insert new lamp, turn contact with insulation clockwise.
4.6. Technical data of the ophthalmoscope lamp
XL 2.5 V, 750 mA, average lifespan 16.5 h
LED 3.7 V 38 mA avg. lifespan 20,000 h
Technical data for the e-xam lamp
XL 2.5 V, 750 mA, average lifespan 16.5 h
LED 2.5 V 120 mA 5,000-5,500 Kelvin, CRI 72 avg. lifespan 20,000 h
4.7. Care instructions
General note
The cleaning and disinfecting of the medical devices serve to protect the patient, the
user and third parties and to maintain the value of the medical devices. Due to the
product design and the materials used, a dened limit for the maximum possible
number of reprocessing cycles cannot be determined. The service life of medical de-
vices is dened by their function and careful handling.
Before return for repair, defective products must have undergone the prescribed re-