ID – Tick the box and enter the ID you wish your
LID to show when used in a program. Three
letters give a nice result.
Colour – You may also select a colour for your ID
too.
Name – You can provide a short name also.
Figure 45 - LID Graphic Change
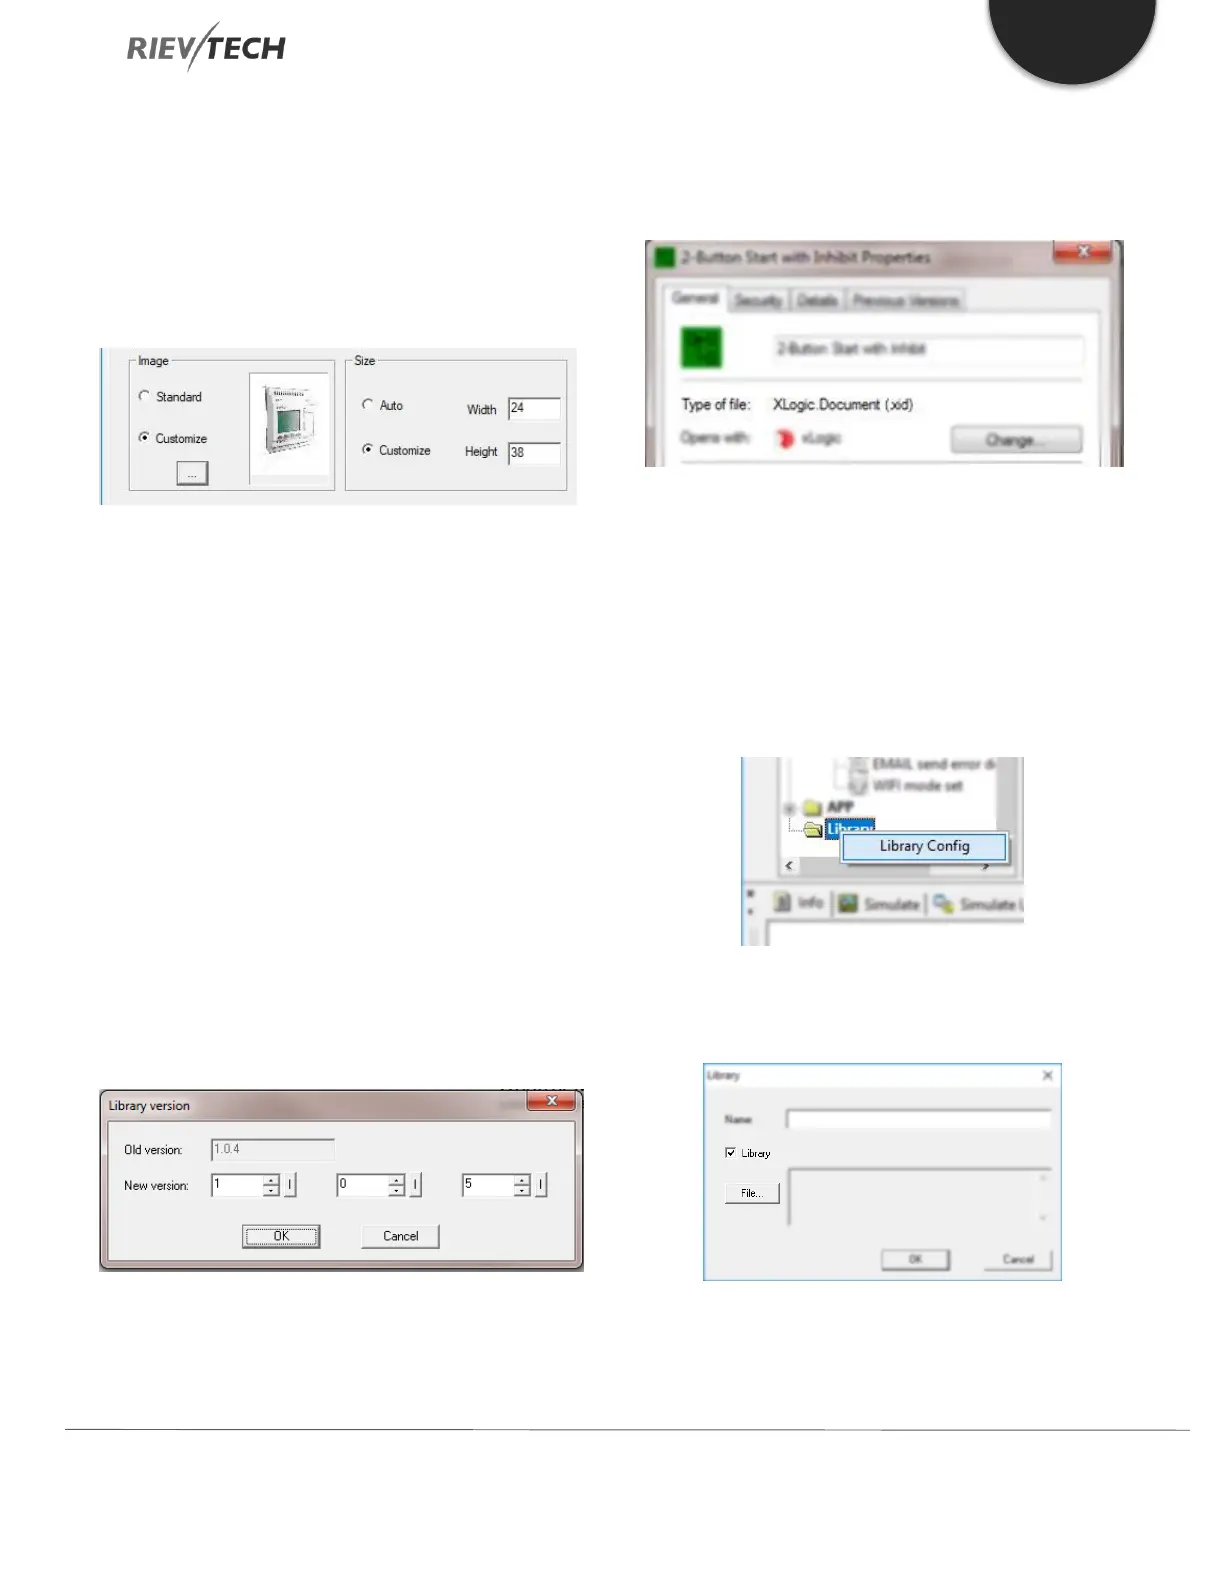
Image – Click on the ‘Customise’ option and
browse for the image you wish to select. Note:
This MUST be a bitmap (.bmp) image NOT jpeg.
Size – ‘Select Customise’ and enter the Width and
Height you wish the LID block icon to be. You
don’t want this to be too big, so something like
24 x 38 for example.
Saving a Library Function
Once you have placed the blocks you require into your
new Library block, then simply Save it by clicking
‘File…Save’ or Ctrl-S and give it a meaningful name. Every
time you work on the Library function and re-save it, the
software will prompt you to enter a new version number:
Figure 46 - LID Version Control
Your new Library function will be saved with a ‘.xid’
extension rather than the standard program which uses
‘.xlg’.
Figure 47 - LID Saved as xid
Once you have saved your LID file, you need to Add it to
your Library.
1. Right click on Library in the tree menu and select Library
Config. Click on Add button in the dialogue window that
appeared.
2. Enable the Library check box by placing a tick in it and
click File to browse to where you saved your LID block:
 Loading...