The above is the default serial settings for the xLogic
CPU and should be left as shown above.
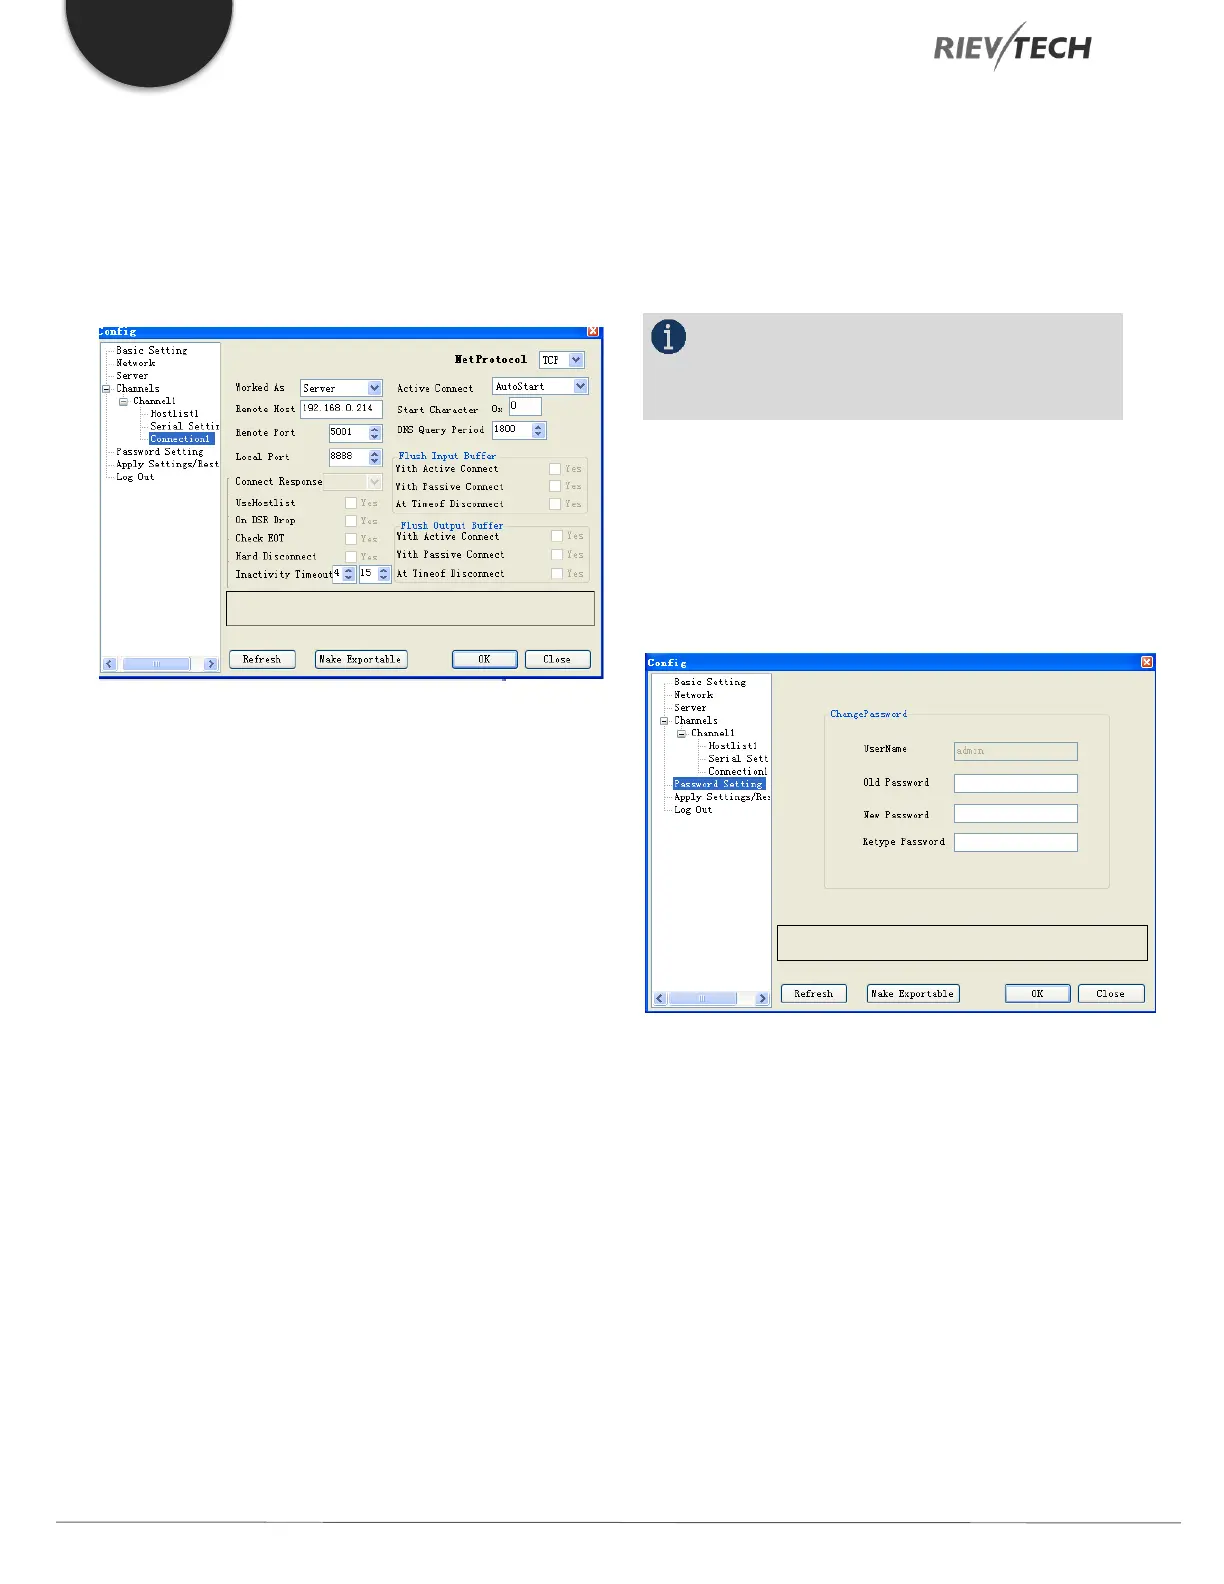
Connection Settings
The xLogic Ethernet CPU can work either as a Client or as
a Server but
NOT BOTH
.
The following fields can be adjusted here:
Net Protocol – Default is TCP and should NOT be
changed.
Worked As – Choose either Server or Client
depending on whether the xLogic CPU will be
communicating as a Slave (Server) or Master (Client) in
the Ethernet network– Default is Server.
Remote Host: The remote PC IP address. When the
xLogic CPU is configured to be a Client then it will
automatically try to connect to the IP address entered
here.
Active Connect – Default is Auto Start and should be
left unchanged
Remote Port – When the xLogic CPU is configured to
be a Client then it will automatically try to connect on
the port number set here.
Local Port – When the xLogic CPU is configured to be
a Server then it will only accept communication on the
port number set here. For example, if the xLogic CPU was
being used in a Modbus/TCP network as a Server and
the Modbus Client used a port setting of 502 (Standard
Ethernet Modbus Port number), then this field must be
set to 502.
NOTICE:
All other fields should be left with their default
values unless you are fully familiar with their settings.
Ensure any changes made are written to the xLogic CPU
by pressing the OK button.
Password Setting
A password must be provided to communicate via the
xLogic CPU Ethernet port and can be changed here. The
default password is admin. The password must contain at
least one character.
To change the Ethernet password, enter the Old Password,
enter a New Password and enter the New Password again
to confirm, then click the OK button.
Ensure any changes made are written to the xLogic CPU
by pressing the OK button.
 Loading...