3. Using a screwdriver in the eyelet, carefully lever it
downward.
4. Lift the expansion unit off the DIN rail swinging the
unit up from the bottom.
5. Repeat steps 1 to 4 for all other units.
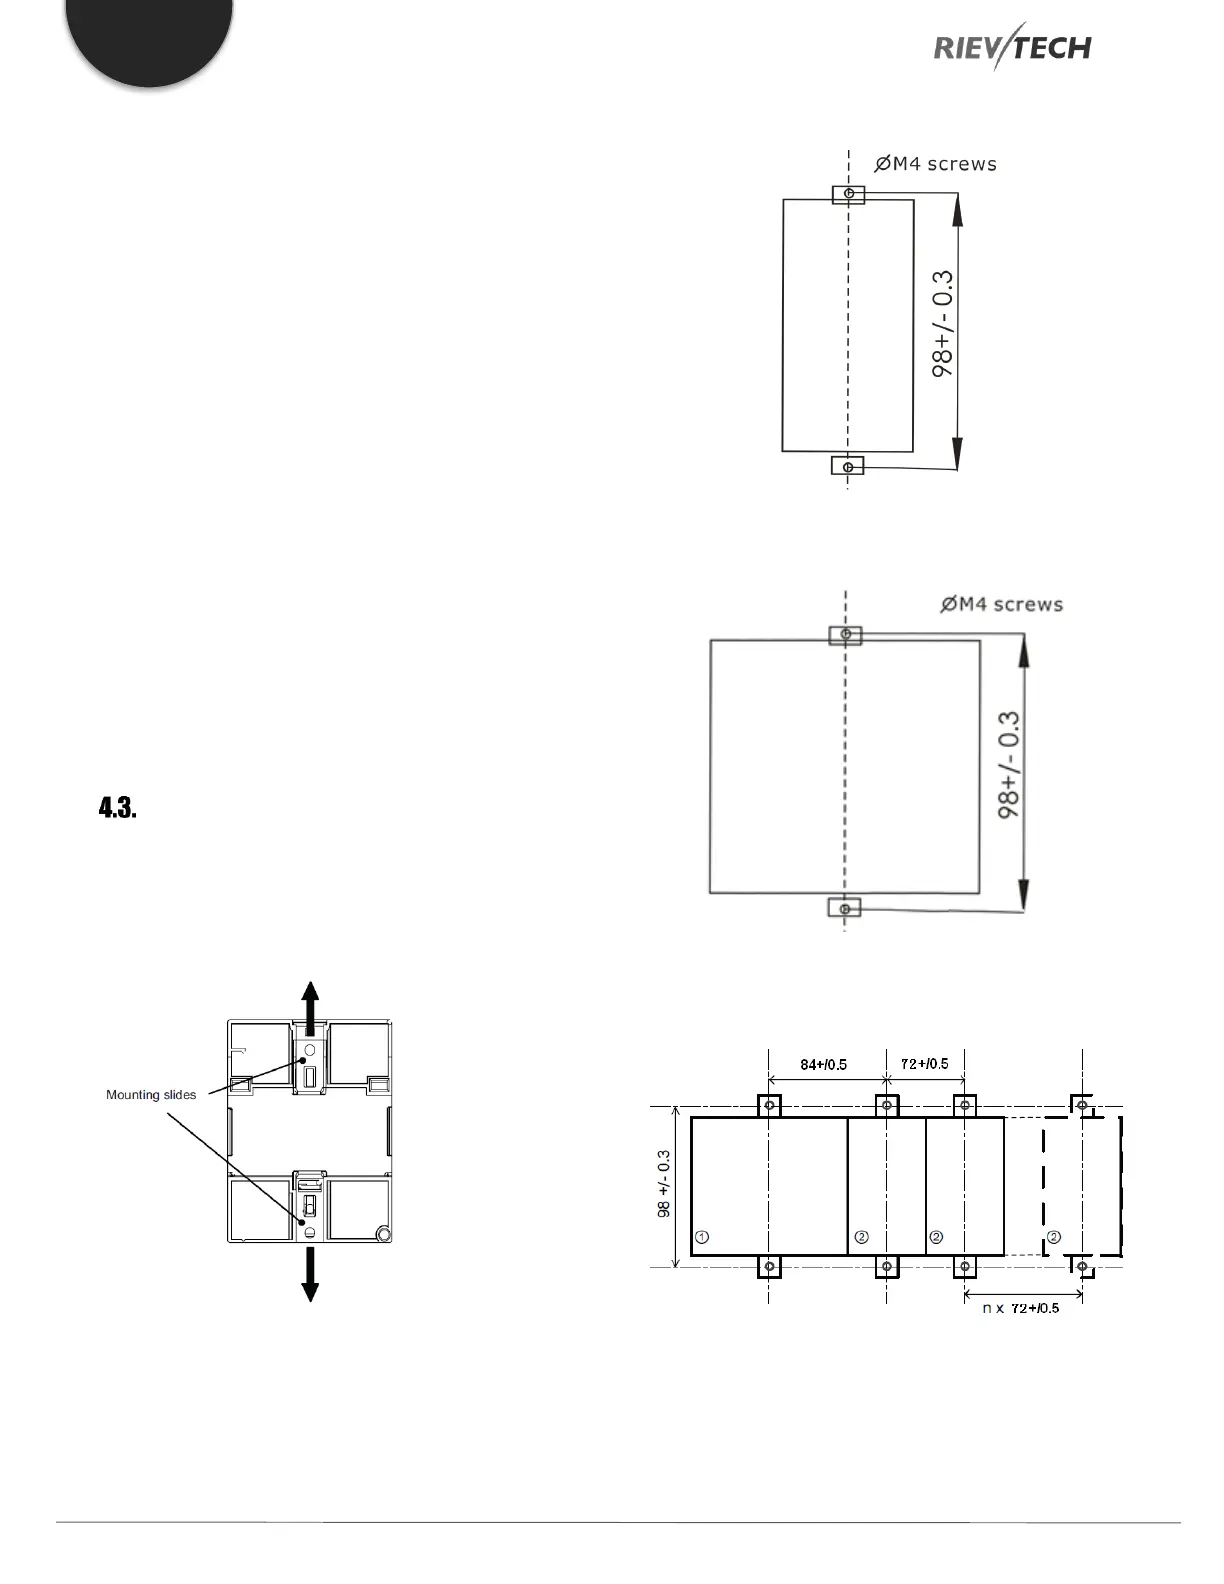
Wall Mounting
For wall-mounting, first, slide the mounting slides on the
rear side of the devices towards the outside. You can
now wall-mount xLogic by means of two mounting slides
and two M4 screws (tightening torque 0.8 to 1.2 Nm).
4.3.1. Drilling Templates for Wall
Mounting
Use the templates below for mounting your Rievtech
hardware on a wall.
Figure 12 PR-6 Wall Mounting
Figure 13 PR-12 Wall Mounting
Figure 14 PR-18 & Expansions Wall Mounts