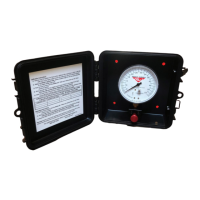
The Right Weigh Exterior Analog Onboard Load Scale, 310-PP Series, is designed to provide real-time weight information for vehicles with air suspension systems, helping operators drive more efficiently and scale less frequently. This manual guides users through the installation, calibration, operation, and troubleshooting of the device, ensuring accurate and reliable performance.
Function Description
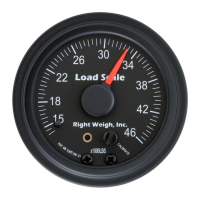
The Right Weigh 310-PP Series is an onboard load scale specifically engineered for axle groups equipped with a single height control valve (HCV) suspension system. It provides an analog display of the axle group's weight, allowing drivers to monitor their load in real-time. By connecting directly to the vehicle's air suspension system, the gauge measures the air pressure in the air bags, which correlates to the weight being carried. This enables operators to ensure their vehicle is loaded within legal limits, optimize payload, and prevent overloading, which can lead to fines, increased wear and tear on the vehicle, and safety hazards. The device is housed in a durable, black polypropylene enclosure, designed for exterior mounting and protection against environmental elements. Different models within the 310-PP series are available to accommodate various axle group configurations, such as single axle, tandem axle, and tri-axle, with specific gauges calibrated for different weight capacities in kilograms. There's also a specialized model for vehicles with larger air bags (340mm or larger).
Usage Features
The Right Weigh 310-PP Series is designed for straightforward operation, making it accessible for all users. Before operation, the scale must be properly installed and calibrated.
Installation:
The installation process involves several key steps to ensure accurate readings and proper functioning. First, a suitable mounting location for the scale must be chosen. This location should be easily accessible and safe from potential damage, such as from forklift posts or tire caps. It's crucial not to mount the scale directly to the chassis or any other main beam unless approved by the vehicle manufacturer, as this could void the vehicle's warranty. Once the mounting location is determined, the existing air line connected to one of the air bags in the suspension group to be monitored needs to be cut. A tee fitting assembly is then installed into the cut air line. This assembly includes a male branch tee, a 1/4" tube to female NPT fitting, and a 1/4" NPT to 1/4" tube elbow. The tube sizes and thread types must match the existing air line and the load scale's input. Teflon tape or an equivalent sealant should be used on threads to ensure a secure and leak-free connection. After the tee fitting is installed, a new 1/4" air line is routed from the tee fitting to the gauge, secured with zip ties, and connected to the gauge using the 1/4" NPT elbow fitting. Finally, the suspension system is aired up, and all fitting connections are checked for leaks to ensure system integrity. The red push/pull valve on the gauge should be pulled to confirm that air pressure is reaching the gauge.
Calibration:
Accurate calibration is essential for the load scale to provide reliable weight readings. The calibration process requires the vehicle to be fully loaded, ideally with a weight within 1500 lbs or 750 kgs of the typical axle group weight. It is important not to calibrate the scale when the vehicle is empty. The vehicle should be taken to a certified in-ground scale to obtain an accurate loaded weight for the axle group attached to the gauge. For calibration, the vehicle must be parked on a level surface, with the transmission in neutral and parking brakes set. The wheels should be chocked to prevent any unexpected movement. After these safety measures are in place, the parking brakes are released. It's important to ensure that the Height Control Valve (HCV) has fully inflated the air bags. If necessary, the air from the suspension should be briefly dumped and allowed to refill to ensure the system is at its proper operating height. The red push/pull valve on the gauge is then pulled to its fully open position. Using a flathead screwdriver, the calibration screw on the dial face is turned until the gauge's reading matches the certified axle group weight obtained from the in-ground scale. This sets the baseline for accurate weight measurement.
Operation:
Once installed and calibrated, operating the Right Weigh 310-PP Series is straightforward. To obtain a weight reading, the vehicle should be parked on a level surface, with the transmission in neutral and parking brakes set. The wheels must be chocked to prevent movement, and the parking brakes then released. Similar to calibration, it's crucial to ensure the HCV has fully inflated the air bags; if not, briefly dump and refill the air from the suspension. The red push/pull valve on the gauge is pulled to its fully open position. The load scale will then display the on-the-ground axle group weight. After obtaining the reading, the push/pull valve should be pushed back to its full closed position. This simple procedure allows drivers to quickly and accurately check their load weight before departing, helping to avoid overweight violations and optimize their operations.
Maintenance Features
The Right Weigh 310-PP Series is designed for durability and reliability, but like any precision instrument, it benefits from proper maintenance and troubleshooting when issues arise.
Troubleshooting:
The manual provides a comprehensive troubleshooting guide for common problems that may affect the accuracy or functionality of the load scale.
- Erratic / Inaccurate Weight Readings: This can be caused by several factors.
- Vehicle not parked on a level surface: Parking on sloped or banked surfaces, or with wheels in potholes, can shift weight distribution and apply additional pressure or torque to the air bags, leading to inaccurate readings. The solution is to park on level concrete ground.
- Vehicle's brakes are on: When parking brakes are set during weighing or calibration, they can apply additional pressure or torque to the suspension air bags, causing inaccurate readings. The solution is to release the parking brakes.
- Significant air leak in the suspension system: A leak can cause the HCV to constantly refill the suspension to maintain ride height. This results in the gauge display slowly decreasing in value and then quickly increasing when the HCV refills. The solution is to check air lines for leaks and repair them.
- Malfunctioning or broken Height Control Valve (HCV): An HCV that isn't functioning correctly can lead to inconsistent or erratic air pressure in the suspension system. To test this, obtain a weight reading from the Right Weigh gauge, drive the vehicle around, and then take a second reading from the same location. If the two readings are significantly different, the HCV may be malfunctioning and require attention.
By following these troubleshooting steps, users can identify and resolve common issues, ensuring the continued accuracy and reliability of their Right Weigh load scale. Regular checks for air leaks and proper vehicle positioning during weighing and calibration are key to maintaining optimal performance.