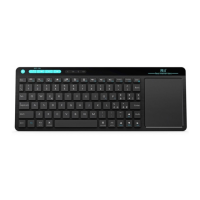
Ove rview
Tha nk you fo r purch asing t he Wire less Mi ni QWER TY Keyb oard &
Tou chpad C ombo. Y ou can us e it for em ails, c hat, re mote, type an d game s.
It is c ompat ible wi th PC, La ptop, R aspbe rry Pi 2, M acOS, L inux, H TPC,
IPT V, Goog le Andr oid Sma rt TV Box , XBMC, W indow s 2000 XP
Vis ta 7 8 10. Us e it with y our and roid bo x or smar t tv on you r sofa o r bro wse
the i ntern et in the m ost com forta ble fas hion.
Pac kage co ntent s
· Key board t ouchp ad Comb o
· USB W irele ss Rece iver
· Use r Manua l
· USB C hargi ng Cabl e
Sys tem Req uirem ents
· HID c ompat ible de vice
· Ter minal w ith USB p ort
· Win dows 20 00
· Win dows XP
· Win dows Vi sta, Wi ndows C E, Wind ows 7, Wi ndows 8
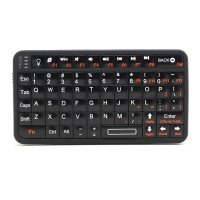
FN+ B ack: De lete
FN+ P gUp: Ho me
6. Sp ecial k eys use i n speci al layo ut. suc h as @ in UK la yout
Thi s keybo ard has d iffer ent lay out. Pl ease kn ow exac tly whi ch layo ut do yo u wan t.
For e xampl e. If you w ant and b uy UK lay out. An d you wan t to use @.
You n eed to fi rst cha nge you r devic e’s sys tem lan guage t o brit ish E nglis h.
The n it can wo rk by shi ft+@.
7. Do n't wor k all the t ime
Thi s keybo ard has a uto sle ep / wake u p funct ion. wh en cust omer s do no t use it
in 3 mi ns,
it wi ll ente r into sl eep aut omati cly, th is time t he cust omers c an pre ss
any b utton t o make it wa ke up. al so plea se let cu stome rs to cha rge the
key board a nd make s ure it is o n enoug h power . if it sti ll can n ot wo rk,pl ease
con tact th e selle r or supp ort@r iitek .com fo r a furth er help .
8. Ke yboar d unabl e tocha rge.
The re is som ethin g wrong o n the bat tery. P lease c ontac t supp ort @riit ek.
com f or a repl aceme nt.
Usi ng the To uchpa d
The t ouchp ad is act ivate d toget her wit h the key board . When t he ke yboar d is on,
the k eyboa rd is rea dy for us e. FN+F 8 can tur n on / off to uchp ad fu nctio n
You w ill enj oy more c onven ience a nd cont rol on- scree n menu ea sier .
Aut o Sleep a nd Wake -up fea ture
The k eyboa rd supp orts au to slee p and wak e-up. W ithou t oper ati on arou nd 3 minu tes,
the k eyboa rd will e nter sl eep mod e. In sle ep stat us, all L ED indi cato rs ar e off.
Pre ssing a ny key ca n wake it u p.
Not e: Full y charg e the un it be fore in itial o perat ion. Th is devi ce can be
use d when ch argin g, but ch argin g time wi ll be ext ended .
Whe n the bat tery is l ow, the l ow-vo ltage l ight wi ll blin k to warn t he use r.
The u nit wil l be auto matic ally tu rned of f if the ba ttery h as bee n dep leted .
Mul ti-fi nger Fu nctio ns Touc hpad( Only fo r i8+ A/B v ersio ns)
Thi s touch pad sup ports m ulti- finge r funct ions.
(1) W hen a sin gle fin ger cli ck, on be half of t he left m ouse fu ncti on ke ys
(2) W hen two -fing er clic k, on beh alf of th e right m ouse fu ncti on ke ys
(3) W hen dou ble fin ger dra g up and do wn, on be half o f the R ollin g scree n
(4) W hen a sin gle fin ger sli ding po inter c an be con troll ed
Cha rging t he batt ery
The d evice u ses bui lt-in l ithiu m-ion b atter y. Plea se use on ly appr oved
dat a cable s and cha rgers .
Swi tchin g off the k eyboa rd afte r use
Aft er use, p ush the s witch t o the “OF F” posi tion to t urn it of f. The U SB re ceive r does
not n eed to be p ulled o ut from t he term inal. Y ou can us e it nex t tim e direc tly.
Tur n on/of f the Bac klit LE D (Onl y for i 8+ A/B ve rsion s)
Two M odes: S oftwa re Cont rol and M anual C ontro l
Whe n the wir eless c onnec tion is s ucces sful, t he back lit
LED w ill be au tomat icall y on 3 seco nds, th en off, t o save
pow er and le ngthe n stand by time . You can c lick th e backl it
LED b utton t o turn th e LED on. U sers ca n turn on t he LED
in da rk envi ronme nt for be tter op erati on.
Ena bling t he back light ( Only fo r i8+ A/B v ersio ns)
The b ackli ght led w ill aut omati cally t urn on fo r three s econd s
aft er havi ng pres sed the p ower sw itch to t he on pos ition . If ena bli ng back light
fun ction , the bac kligh t led wil l light f or one mi nute. I n a minut e, if ha vin g no key
is pr essed , the bac kligh t led wil l turn of f. Afte r backl ight le d turn ed of f,
the b ackli ght led w ill tur n on agai n if you pr ess any k ey agai n. Ena ble /disa ble the
bac kligh t led thr ough pr essin g Backl ight co ntrol k ey.
Aud io Feat ure (On ly for i8 + A versi ons)
Aud io feat ure con figur ation i s avail able fo r this de vice, T his dev ice in clu des a MIC .
Und er some s ystem s, the au dio fea ture re quire s manua l conf igu ratio n.
Dis posal
use d appli ance to gethe r with th e house hold wa ste.
Not e:
Due t o 2.4G wa ve tech nolog y adopt ion, th e conne ction
can b e subje ct to int erfer ence fr om obst acles , like wa lls,
met als, or o ther el ectro nic dev ices. P lease k eep the s pace be twee n the k eyboa rd and
USB r eceiv er free o f obsta cle.
In li ne with t he poli cy of con tinue d devel opmen t, the ma nufac ture r res erves t he righ t
to am end. Th e speci ficat ions wi thout p rior no tific ation . The ill ustr ati ons in th e user
man ual are f or refe rence o nly. Pl ease op erate a ccord ing to t he re al desi gn.
Alw ays dis pose th e used ap plian ce at a rec yclin g centr e. Do not d ispo se th e
War ning
· Whe n charg ing fin ishes , pull ou t the cha rging c able.
· Nev er try to o pen or re pair th is prod uct you rself .
· Kee p this de vice aw ay from f luids , such as w ater.
Mai ntena nce
· Do no t attem pt to dis assem ble the d evice o r repla ce the re char gea ble bat tery.
Doi ng so wil l void th e warra nty.
· The b atter y will di schar ge when i t is stor ed for a lo ng time w ithou t oper ati on.
· Use t he spec ified c harge r. Disc onnec t the dev ice whe n the bat tery i s ful ly char ged.
Ove rchar ging wi ll shor ten the b atter y life.
· Do no t expos e the dev ice in ex treme h eat or co ld envi ronme nt,
whi ch will s horte n the bat tery li fe.
MOD EL: i 8/i8 +
Mini Wireless
Keyboard Touchpad Combo
Installation & User Manual
Ver: 3.3
.
Spe cific ation s
Rec eiver (dong le): Na no styl e
Con necti on port : W ith USB 2.0 abo ve
Tra nsmis sion mo de: GFS K 2.4GH z wirel ess, up t o 10 mete rs
Tra nsmis sion Po wer: Le ss than + 4db
Pow er supp ly: Rec harge able po lymer L ithiu m-ion b atter y
Cha rging v oltag e: 4.4V ~ 5 .25V
Cha rging c urren t: 300m A
Sle eping c urren t class 1: 30uA
Ope ratio n volta ge: 3.7 V
· Lin ux (Deb ian-3 .1, Red hat-9 .0, Ubu ntu-8 .10, Fe dora- 7.0 te ste d)
· And roid OS ( With st andar d USB int erfac e)
Ple ase not e:
1. It c an work o n Amazo n Fire TV a s follo wes: us e an ap p call ed
app 2 fire on a ndroi d. You ca n send an y app to fi re tv. Th en run i t so fo r examp le
goo gle chr ome. th e keybo ard wor ks as mou se and ke yboar d.
Jus t note th at it onl y works o n sidel oaded a pplic ation ’s.
for e xampl e googl e chrom e, fire fox,s howbo x. KODI i s a nativ e app on f ire .
2.N ot sui table for all sma rt tv. Som e s mar t tv do no s uppor t exte rnal i nput
dev ice.b efore you pla ce the ord er, ple ase us e a wir ed key board to c heck
if i t can w ork.
Ope ratin g curre nt: <15 mA
Pro duct we ight: 1 10g
Pro duct si ze: 146 .8*97 .5*19 mm
Ins talla tion
1. Tak e off th e USB re ceiv er from back c ove r of the ke yboard
2. Plu g the US B Rece ive r into yo ur device ’s USB p ort .Suc h as and roi d tv box, s mar t tv
3. Tu rn on the k eyboa rd.
A blu e LED wil l stay on . That me ans the k eyboa rd has pa ired wi th your d evic e.
You c an enjo y the key board n ow!
Not e:
1. Th e three p ort ext ensio n USB cab le can no t only be u sed for b atte ry ch argin g
but a lso sol ving si gnal in terfe rence !
2. if t he blue L ED does n ot stay o n and ora nge lig ht stay f lash ing , it mean s the
key board n eed to be p aired w ith you r devic e handl y. As for h ow to pa ir, p lease
try f ollow ing ste ps:
Ste p1: Kee p your PC o n, and be s ure the k eyboa rd is ful l of powe r.:)
Ste p2:Pr ess the “ F1” wit hout re leasi ng.
Ste p3:Po wer on th e keybo ard and r eleas e the "F1 " immed iatel y.
Ste p4:Pl ug the US B recei ver on th e USB por t of your P C.
Wai t a momen t. The ke yboar d will re pair au tomat icall y.
Whe n the yel low lig ht stop f lashi ng and bl ue led on , it mean s succ ess ful.
It ca n not be us ed as dig ital co nnect ion
3. Ab out the m eanin g of the th ree led s(ora nge, bl ue and r ed)
Red : mean s cha rge sta tus. Wh en star t to char ge , it wil l be on. W hen i t is powe rful,
it wi ll be off a utoma tical ly .
Blu e: mean s pair st atus. W hen it i s on, i t means
4. Ab out sig nal int erfer ence: s pecia l for and roid tv b ox and s mar t tv.
Lar ge size m onito r’s dev ice alw ays has s ome sig nal int erfer ence .
Sig nal int erfer ence ma y resul t to shor t dista nce and b utton s do not
wor k as well . When yo u press “ a” , “aaa aaaa… ” will ap pear. F or thi s cas e,
5. Sh ortcu t Keys:
FN+ R F: ente r into pa ir mode l
FN+ F 7: Scre ensho t
FN+ F 8: Turn o n/of f touch pad mo use
FN+ F 9: F11
FN+ F 10: F12
If it n ot flas h, it mea ns it has s ometh ing wro ng on key board o r the co mpa tibil ity.
key board i s paire d with yo ur devi ce succ essfu lly. If i t is off, i t mean s not b e paire d.
You n eed to do t he abov e 4 steps t o repai r it.
Ora nge: me ans syn c.It wi ll flas hing wh ateve r you typ e any but ton or to uchpa d.
you c an use th e thres s port ex tensi on cabl e we ship ped to y ou to s olve it .
ple ase plu g the ext ensio n cable t o your sm art tv, and plu g usb re cei ver on
the c able. t hen pai r and use r emote k eyboa rd


![Preview: Riitek Rii Mini-[2.4GHz]](https://data.easymanua.ls/products/172601/200x200/riitek-rii-mini-2-4ghz.webp)