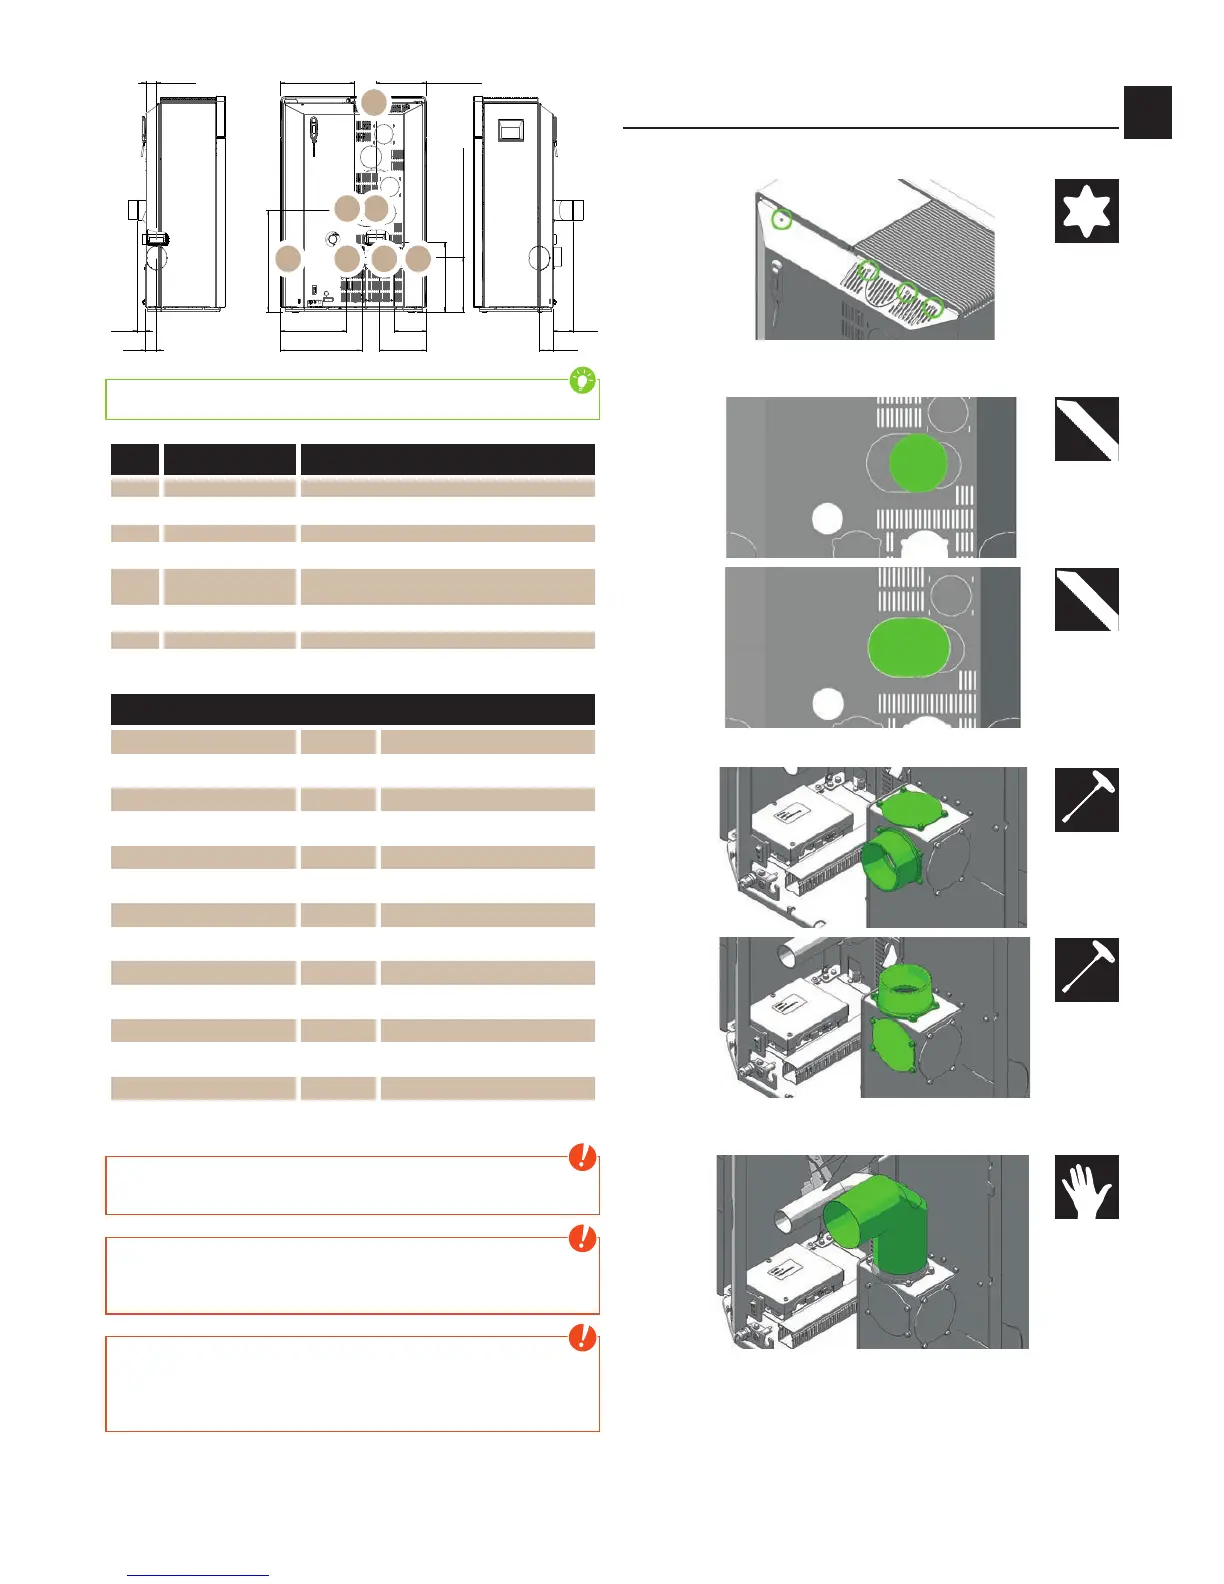
RO
R6R5
R4R3 R2 R1
Tip
Right / Left according to standing in front of the stove!
Nr. Connection Parts
R1 Rear -
R2 Rear center Domo-accessory elbow
R3 Right side range straight flue pipe*
R4 Left side range straight flue pipe*
R5
Rear center top
range
90 degree elbow with cleaning lid + 45°
elbow*
R6 Rear top range 90 degree elbow with cleaning lid*
RO Top range straight flue pipe*
*from the standard RIKA flue pipe
Dimensions of options flue gas connection
R1 = RH2 = RH3 = RH4 [cm] 28
RS1 [cm] 26
RS2 [cm] 36
RS3 [cm] 42
RT3 [cm] 7
RS4 [cm] 16
RT4 [cm] 6
RH5 = RH6 [cm] 53
RS5 [cm] 40
RT5 [cm] 11
RS6 = RO-S [cm] 28
RT6 [cm] 4
RO-H [cm] 37
RO-T3 [cm] 6
Note
Only work on the unit when the mains plug has been disconnected and the
stove has cooled completely.
Note
During assembly / dismantling do not allow objects (screws etc.) to fall into
the pellet container – they can block the screw conveyor and damage the
stove.
Note
During any conversion work, take particular care of your fingers and any
panels and stove attachments.
Select soft bases to prevent scratches to your living space furniture and
stove panels.
Converting to top connection rear R6 and top
connection rear in the center R5
Loosen the screws on the rear panel. The back wall tilts backwards and then
you can lift it off.
Cut with a saw along the marked perforation of the rear wall for the option you
need.
Replace the flue gas stack and the top cover against each other.
Place the elbow with cleaning lid to the flue gas stack. Make sure that everything
is tight!