Do you have a question about the Rilu POGO 7D and is the answer not in the manual?
Details the 6061 Aluminium alloy frame and high-strength aluminium alloy front fork.
Specifies Acera 7 Speed Shimano gears and front/rear disc brakes.
Notes the height-adjustable aluminium alloy stem and quick adjust seat post clamp.
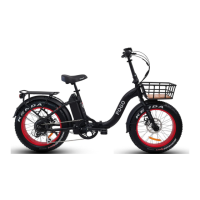
Describes 20" x 136 x 36H alloy rims with double wall and 4" Kenda tires.
Highlights the VELO Wide Saddle and the 36V/250W motor with Thumb + PAS.
Details the LED display with 5 modes and the thumb start throttle.
Specifies the 36V/14AH Lithium Ion battery and 36V/2A smart charger.
Indicates front and rear lights that are independently powered.
Range depends on rider weight, terrain, weather, and assistance level.
Provides estimated distances for Level 2 (60-70 Km) and Level 5 (40-50 Km) assist.
The battery requires 5-6 hours for a full charge.
Net weight is 20 Kg (24 Kg with battery), with a rated load capacity of 120 Kg.
Explains the 'Easy Start' function for starting from a standstill, acting as walk assist.
Details the Pedal Assistance Sensor and PAS level selection (0-5) for motor output.
Recommends initial rides without electrical assistance to learn controls.
Highlights warnings against pressure washers, oiling motor, and importance of turning off.
Advises recharging the battery every 3 months and using only a bike pump.
Instructions for turning the bike on/off and activating the LCD backlight.
Shows the default motor assistance level and includes a warning for low assist during push.
Procedure for resetting the trip meter by holding '+' and 'M' buttons.
How to set PAS and Throttle to OFF (Mode 0) using the '-' button.
Guide to setting Pedal Assist System (PAS) to the maximum level 5 using the '+' button.
Instructions to activate the 6Km/h Walk Assist function by holding the '-' button.
Explains the battery capacity gauge and factors affecting its accuracy.
Describes the flashing LED for low battery (<10%) and advises prompt recharging.
Lists common error codes and their corresponding faults for troubleshooting.
Steps for folding pedals down, aligning them, and unlocking the safety latch.
Instructions to pull the 'Folding Lever' forward to complete the folding process.
Details twisting the stem lock and folding the stem down.
Guide for tightening or loosening the folding clamp for a secure frame fit.
Recommends using a service stand and turning off the electric system for adjustments.
Steps to adjust the derailleur for uneven shifts or chain slippage in lower gears.
Procedure to align the gear pulley for correct shifting into gear #7.
Procedure to align the gear pulley for correct shifting into gear #1.
Step-by-step guide for changing the tire, including cable disconnection and wheel nut arrangement.
Key warnings: do not oil motor, keep motor cable tight, and check spoke tension regularly.
Warnings: do not cover charger, do not charge below zero, ensure ventilation.
Recommendations for storage: avoid direct sunlight and dispose according to regulations.
Identifies the Pedal Assist Sensor (PAS) as a one-piece unit on the left of the bottom bracket.
Procedure to diagnose PAS issues, including using the 6Km/h walk function.
Checks for damage to the pedal assist cable and sensor LED flashing.
Ensures O-Ring spacers are correct and there's no gap between PAS sensor and crank.
Advises against 'hard starts' and recommends engaging throttle while in motion.
Instructions for tightening a loose throttle using a 4mm Allen screw.
Template for recording service entries for the first year of ownership.
Template for recording service entries for the second year of ownership.
Details warranty periods for various components like frames, brakes, and electrical parts.
Notes that distance travelled can override time-based warranty periods.
| Motor Power | 350W |
|---|---|
| Max Speed | 25 km/h |
| Max Range | 25 km |
| Max Load | 120 kg |
| Wheel Size | 8.5 inches |
| Brakes | Disc brake |