Do you have a question about the ring Flood and is the answer not in the manual?
Explains the Ring Flood/Freeze Sensor's role in monitoring home flooding and freezing conditions and notifying users.
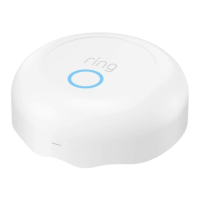
Visual guide to the Flood/Freeze Sensor's parts: LED Ring, Setup Button, and Flood Sensors.
Steps to begin sensor setup within the Ring app, including device selection and adding the sensor.
Instructions for pairing the sensor via QR code or manual PIN entry, including troubleshooting for unreadable codes.
Guide to activating the sensor by removing the battery tab, initiating automatic connection to the Base Station.
Explains how to interpret LED indicators during pairing and what to do if the sensor fails to connect.
Procedure to test the sensor's connection to the Base Station at its intended location before final placement.
Instructions for properly closing and locking the sensor lid after setup and testing.
Guidance on selecting the optimal location for the sensor, near potential water sources and in a stable, accessible spot.
Steps for removing the sensor from the Ring system and performing a factory reset for troubleshooting.
Instructions on replacing the sensor's battery and understanding various LED indicator lights for status and alerts.
This document describes the Ring Flood/Freeze Sensor, a smart sensor designed to integrate with your Ring Alarm system to help prevent water and ice damage at home.
The Ring Flood/Freeze Sensor is a security device that monitors for both flooding and dangerously low temperatures. It is equipped with flood sensors on its bottom surface that can detect the presence of water. Internally, it houses a temperature sensor that keeps watch for temperatures around 40°F (4.4°C), which could indicate freezing conditions. When either a flood or a freeze condition is detected, the Ring app will send a notification to your device, allowing you to take timely action to address the issue. This proactive alert system helps protect your home from potential damage caused by water leaks or freezing pipes. The sensor is designed to be placed in areas prone to such events, providing an extra layer of security and peace of mind.
To begin using your Ring Flood/Freeze Sensor, you first need to set it up within the Ring app. The setup process should be initiated near your Ring Alarm Base Station to ensure a smooth connection. In the Ring app, you will tap "Set Up a Device," then navigate to "Security Devices," select "Sensors," and finally choose "Ring Flood/Freeze Sensor" before tapping "Add Device." The app will then guide you through the remaining setup instructions.
During the setup, you will be prompted to scan a QR Code or enter a PIN. This information is located on the back of your sensor and within the product packaging. Scanning the QR Code initiates the pairing process. If you encounter difficulties scanning the QR Code, the app provides an alternative: on the scanning screen, tap "Not working? Enter number instead." You can then manually enter the 5-digit PIN code found below the QR code.
To put the sensor into manual pairing mode, you will need to open the sensor, remove and then reinstall the battery, and finally press the Setup Button.
When prompted by the app, you will need to open the lid of the sensor and pull out a clear tab. To do this, twist the lid to the left to unlock it, then lift it off. Pulling out the clear battery tab activates the sensor, and your Base Station should automatically detect it.
As the sensor pairs with your Base Station, its LED ring will blink slowly, then quickly. Once successfully paired, the LED will glow blue for three seconds. If the sensor fails to pair, the LED ring will glow red. In this case, you should remove and reinstall the battery inside the sensor and try the pairing process again.
After the sensor is set up, you should test it in its intended location. Bring the sensor to the area you wish to monitor. To test its connection to your Alarm Base Station, push the Setup button inside the sensor. If the LED blinks blue, the sensor is connected and ready for placement. If it blinks red, try repositioning the sensor, even by a few inches, as this can improve reception. If connection issues persist, consider installing a Ring Range Extender between your sensor and the Base Station.
Once testing is complete, close the lid of the sensor. Align the semi-circle on the rim of the lid with the "open" semi-circle on the base, then twist the lid clockwise to lock it in place.
The sensor should be placed on the ground next to potential sources of flooding, such as water heaters, sinks, or refrigerators. It's important to choose a location where the sensor is unlikely to be accidentally kicked or moved. If the surface is not flat, place the sensor at the lowest point to ensure optimal flood detection.
To remove the sensor from your Ring Alarm system, open the side menu in the Ring app, tap "Devices," then "Base Station." Select your sensor, tap the gear-shaped icon, and then tap "Remove Device." The app will prompt you to open the sensor and remove and reinstall the battery to finalize the removal process.
If your Flood/Freeze Sensor stops working or cannot connect, even with a good battery, you can perform a factory reset. To do this, press and hold the Setup button for 10 seconds. The sensor will reset when the LED ring stops blinking. This action disconnects the sensor from Ring Alarm. To use the sensor again, you will need to repeat the setup process in the Ring app.
Replacing the battery is a straightforward process. Twist the lid on the sensor counter-clockwise and lift it to remove. Replace the old battery with a fresh CR123A cell. After battery replacement, the sensor will automatically reconnect to your Ring Base Station.
The sensor uses LED status patterns to communicate its status:
For information on other LED patterns and further assistance, you can visit ring.com/help.
| Motion Detection | Yes |
|---|---|
| Operating Humidity | non-condensing |
| Wireless Range | Up to 250 ft (76 m) to Ring Bridge |
| Compatibility | Works with Alexa |
| Weight | 0.68 kg |