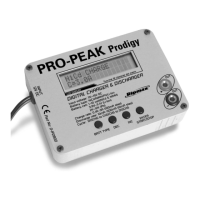
The Ripmax PRO-PEAK Prodigy is a microprocessor-controlled digital charger and discharger designed for various battery types. It is capable of charging and discharging Nickel Cadmium (NiCd), Nickel Metal Hydride (NiMH), Lead Acid (Pb), and Lithium Ion (Li-Ion) batteries. The device features Delta Peak fast charge termination, ensuring efficient and safe charging.
Technical Specifications:
- Input Voltage: 11V-15V DC
- Battery Types Supported: NiCd, NiMH, Pb, Li-Ion
- Battery Cell Count:
- NiCd & NiMH: 1-10 cells (1.2V to 12V)
- Li-Ion: 3.6V-11.1V
- Pb: 2V-12V
- Charge Rate: 0.1A-3A (adjustable in 100mA steps)
- Discharge Rate: 10mA-500mA (adjustable in 10mA steps)
- Display: Two-line, 16-character dot matrix LCD screen
- Cycle Modes: DISCHG to CHG (Discharge to Charge) / CHG to DISCHG (Charge to Discharge) (for NiCd & NiMH only)
- Safety Features: Reverse polarity protection on both input and output
Usage Features:
The charger's operation is guided by a two-line LCD display and multi-function buttons (BATT TYPE, DEC, INC, ENTER/START/STOP). The ENTER/START/STOP button's function is time-dependent: a press of less than one second performs one action, while a press of more than one second performs another.
Initial Setup:
- Connect Power: Connect the input leads to a 12V DC supply (e.g., a 12V car battery or a high-quality power supply capable of 4.0-7.0 Amps). Ensure correct polarity: RED clip to POSITIVE, BLACK clip to NEGATIVE.
- Connect Battery: Connect the charge leads to the spring sockets on the end of the charger, ensuring correct polarity. Use shrouded contacts to prevent short circuits on the metal case.
- Select Battery Type: Press the BATT TYPE button for less than one second. The battery type part of the display will flash for about 5 seconds. During this period, repeatedly pressing BATT TYPE will cycle through NiCd, NiMH, Li-Ion, and Pb settings. Once the desired type is displayed, leave the button unpressed for 5 seconds to confirm the selection.
Charging:
- Select CHARGE Mode: Use the INC or DEC buttons to navigate to the CHARGE screen.
- Set Charge Current: Press ENTER (START/STOP) for less than one second. The charge current figure will flash for about 5 seconds. Use the DEC or INC buttons to adjust the charge current in 100mA steps (0.1A to 3A).
- Confirm Current: Leave the button unpressed for 5 seconds to confirm the selected current.
- Start Charging: Press ENTER (START/STOP) for more than one second to begin charging. The display will show charging progress (e.g., "CHG 0.00 NC + 3.0 00000 10.350").
- Termination: Charging terminates automatically via Delta Peak detection, signaled by repeated beeps. The display will show the fast charge time, accepted mAh, trickle charge current, and actual battery voltage. The battery is then ready for use.
- Stop Charging: To terminate charging at any stage, press ENTER (START/STOP).
Discharging:
- Select DISCHARGE Mode: Use the INC or DEC buttons to navigate to the DISCHARGE screen. (Note: Li-Ion and Pb settings only offer CHARGE and DISCHARGE options, not cycle modes).
- Set Discharge Current: Adjust the discharge current in a similar manner to setting the charge current. The maximum discharge current is 500mA.
- Set Discharge Cutoff Voltage:
- NiCd & NiMH: 1.0V per cell (range 0.1V to 12.0V).
- Pb & Li-Ion: Set to the nominal voltage of the battery being discharged (e.g., 2V, 4V, 6V, 8V, 10V, 12V for Pb; 3.6V, 3.7V, 7.2V, 7.4V, 10.8V, 11.1V for Li-Ion).
- Confirm Settings: Leave the buttons unpressed for 5 seconds to confirm.
- Start Discharging: Press ENTER (START/STOP) for more than one second. The display will show discharge time, capacity in mAh, discharge current in Amps, and battery voltage.
- Termination: Discharge terminates automatically when the set voltage is reached, signaled by beeps. The display will show discharge time and capacity supplied.
- Stop Discharging: To terminate discharging at any stage, press ENTER (START/STOP).
Cycle Mode (NiCd & NiMH only):
- Select CYCLE Mode: Navigate to the CYCLE screen using INC or DEC.
- Set Currents and Cycles: Set charge and discharge currents as described above. You can also program between 1 and 5 cycles and choose between Charge-Discharge (C-D) or Discharge-Charge (D-C).
- Start Cycle: Once currents and cycles are set, press ENTER (START/STOP) for more than one second.
- Adjust Cycle Parameters: Press ENTER to change C-D/D-C type, cycle rate, and number of cycles. Use DEC-INC buttons to adjust.
Data Display:
During charging or discharging, the display shows real-time information.
- Main Display: Shows current charge/discharge status, time, accepted mAh, current, and voltage (e.g., "CHG 030:25 00000 NC +3.00A 10.75V"). Pressing ENTER (START/STOP) briefly allows parameter changes. Pressing it long finishes the operation.
- Competition Display: Shows a simplified view (e.g., "CHG 030:00 00000 NC 100mA 10.75V"). Press ENTER (START/STOP) to return to the main display.
- Detailed Data Display: Shows input/output voltage, charge peak, discharge average, and total charge/discharge capacity (e.g., "INPUT =12.00V OUTPUT =13.18V ChgCAPA=00000mAh DchCAPA=00000mAh"). Use INC and DEC to scroll through data. This display disappears after 3 seconds of inactivity.
Error Messages:
The charger provides error messages for various issues:
- INPUT BATTERY VOLTAGE ERROR: Input voltage is under 11.0V or exceeds 15V.
- OUTPUT BATTERY VOLTAGE ERROR: Battery is connected to the output in reverse.
- CHECK THE BATTERY OPEN CIRCUIT: Battery becomes disconnected during an operation.
- NO BATTERY: Battery is not connected to the charger's output.
- OUTPUT CIRCUIT PROBLEM: Charger's internal circuit has a problem.
Maintenance Features / Safety Precautions:
- Placement: Always place the charger on a firm, level surface for charging.
- Ventilation: DO NOT cover the charger to prevent overheating.
- Polarity: Always observe correct battery polarity and follow manufacturer's recommendations.
- Battery Type: Only charge rechargeable NiCd, NiMH, Pb, and Li-Ion battery packs.
- Short Circuits: Avoid short circuits at all times.
- Overheating: NiCd/NiMH cells will become warm during charging. If a pack feels HOT, disconnect it immediately. Severely overcharged NiCd/NiMH/Li-Ion packs can become very HOT; place them on an insulated, heat-resistant surface.
- Connection Order: Connect the input leads to the 12V supply FIRST, then connect the battery to be charged.
- Disconnection: ALWAYS disconnect all batteries when NOT charging, as they may self-discharge.
- Input Clips: DO NOT allow the input crocodile clips to touch each other or the charger case when a battery is connected, as this may cause a short circuit.
- Environment: The charger must ONLY be used in completely dry conditions.
- Disassembly: DO NOT disassemble the charger.
- Cool-down Period: Allow the Prodigy to cool for about 10 minutes after two consecutive fast charge cycles.
- Supervision: NEVER leave the charger unattended while charging.
- Temperature: DO NOT fast charge batteries immediately after use while they are still warm; allow them to cool to ambient temperature before charging.