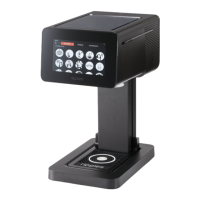
1. Connect the AC cord to the power supply, route the
other end of the power supply into the power input
located at the back of the Ripple Maker II and the other
end to the electrical outlet.
2. The Ripple Maker II needs an internet connection in
order to get the full functionality; There are 2 options
- either plug in the LAN cable to machine or use the
Ripple Maker II embedded Wifi.
3. Route the power supply cable and LAN through the
cable holder.
4. Place the mat on the drink tray.
5. Turn on the Ripple Maker II
using the power botton and
follow the onscreen steps.
Follow safety instructions regarding
the AC connection.
See Ripple Maker II safety instructions.
2.2 Power & Internet Connection
#2
#1
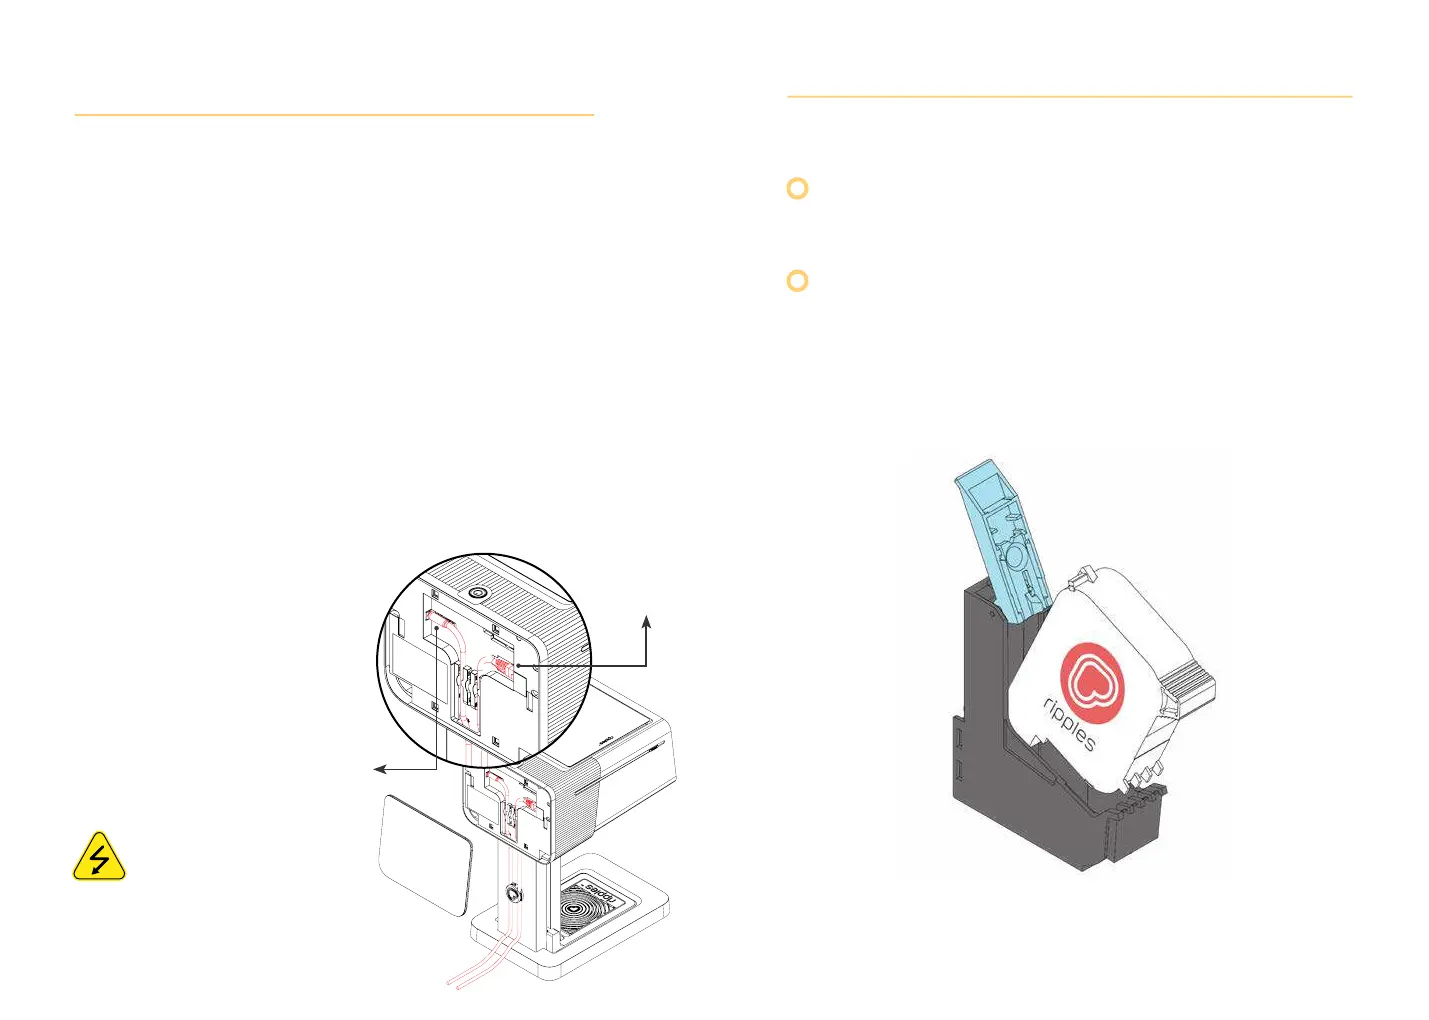
2.3 Pod Installation
Tap Menu --> Maintenance --> Pod replacement and
follow onscreen wizard
When replacing it gently slide the pod into the
correct position without force. When removing the
pod wiggle gently to slide it out.
-5- -6-