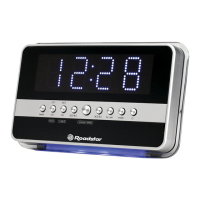
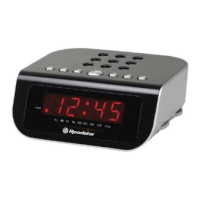
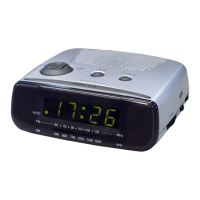
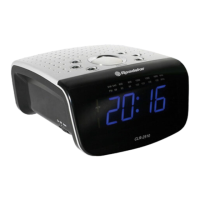
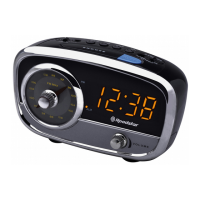
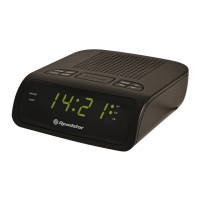
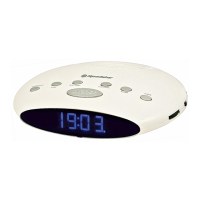
This document provides the instruction manual for the Roadstar CLR-2618 AM/FM Digital Alarm Clock Radio. It outlines the device's functions, usage, and maintenance guidelines.
The CLR-2618 is a versatile clock radio designed for audio enjoyment and timekeeping. Its primary functions include an AM/FM radio, a digital alarm clock, and an external audio line-in feature. The device is equipped with a clear LCD display for easy viewing of time and settings.
Function Description
The core functionality of the CLR-2618 revolves around its AM/FM radio and digital alarm clock features.
- AM/FM Radio: The device allows users to tune into both AM and FM radio bands. It features a TUNING Knob (9) for precise station selection and a Band Selector (7) to switch between AM and FM. The radio can be turned ON or OFF using the RADIO ON/OFF Button (12). For optimal FM reception, the FM wire antenna (19) should be fully extended. The AM band utilizes a built-in directional aerial, which may require rotating the clock radio for the best reception.
- Digital Alarm Clock: The CLR-2618 includes a comprehensive alarm system. Users can set the current time and a wake-up time using the TIME SET Button (2), HOUR Button (6), and MINUTE Button (4). The alarm can be configured to wake the user either with a buzzer sound or by turning on the radio. The ALARM RADIO/BUZZ SWITCH (3) allows selection between these two modes. The ALARM ON/OFF Button (5) is used to activate or deactivate the alarm, indicated by a clock icon on the display.
- Snooze Function: When the alarm sounds, pressing the SNOOZE Button (11) temporarily stops the alarm for approximately 5 minutes. The alarm will then sound again, and this cycle continues until the ALARM ON/OFF Button (5) is pressed to turn the alarm off completely.
- Sleep Function: This feature allows users to fall asleep while listening to the radio. By pressing the SLEEP Button (10), the radio turns on and automatically turns off after a set period, which can be adjusted from 90 minutes down to 10 minutes by repeatedly pressing the button. To turn off the radio during the sleep period, the RADIO ON/OFF Button (12) should be set to OFF.
- External Audio Line-In: The device is equipped with a LINE IN JACK (17), enabling users to connect external audio devices such as CD or MP3 players. This allows the audio from these external sources to be amplified and played through the clock radio's speaker (16).
- Display Dimmer: The DISPLAY LOW/HIGH DIMMER (18) switch allows users to adjust the illumination level of the LCD display (14) to their preference, offering either a low or high brightness setting.
Usage Features
The CLR-2618 is designed for straightforward operation, with clearly labeled controls and intuitive setting procedures.
- Power Supply: The unit operates on a main supply of 230V ~ 50Hz. The AC POWER CORD (20) connects to a household outlet. It is crucial to ensure that the voltage matches the rating plate on the rear of the unit.
- Battery Back-up Power Failure Protection: A battery back-up circuit is integrated to preserve time and alarm settings during temporary power interruptions. This requires a 3V CR2032 flat lithium battery (not included) to be installed in the BATTERY DOOR (15) located on the bottom of the unit. If power is interrupted and the battery is present, the display will blink, and the radio will not play, but the clock and alarm settings will be maintained. Upon power restoration, the correct time and settings will reappear without adjustment. However, if there is no battery or the battery is exhausted during a power interruption, the time and alarm settings will be lost, and the clock will flash, indicating the need for correction.
- Setting the Correct Time: With the radio off, press and hold the TIME SET button (2). Use the HOUR button (6) and MINUTE button (4) to adjust the time. Release the TIME SET button once the correct time is displayed.
- Setting the Wake-Up Time: Press and hold the ALARM SET button (8). Use the HOUR button (6) and MINUTE button (4) to set the desired wake-up time. Release the ALARM SET button.
- Waking to Buzzer Alarm: Set the alarm time as described. Move the ALARM SWITCH (3) to the BUZZER position. Ensure the ALARM ON/OFF button (5) is set to ON (the clock icon should appear on the display).
- Waking to the Radio: Set the alarm time as described. Move the ALARM SWITCH (3) to the RADIO position. Select the desired radio band using the Band Selector (7) and tune to a station using the TUNING Knob (9). Adjust the VOLUME KNOB (1) to a comfortable level that will wake you.
- Turning Off the Alarm: To turn off the alarm completely, select ALARM OFF with the ALARM ON/OFF button (5). The clock icon will disappear from the display.
- Listening to the Radio: Set the RADIO ON/OFF button (12) to the ON RADIO position. Select the desired band (FM or AM) with the Band Selector (7). Tune to the desired station using the TUNING Knob (9). Adjust the VOLUME KNOB (1) to a comfortable listening level. To turn off the radio, set the RADIO ON/OFF button (12) to the OFF position.
Maintenance Features
Proper care and maintenance ensure the longevity and optimal performance of the CLR-2618.
- Environmental Protection: To prevent fire or shock hazards, the clock radio should not be exposed to rain or moisture. It should also be protected from direct sunlight, extreme temperatures (very high or low), excessive moisture, vibration, or dusty environments.
- Cleaning: Avoid using abrasive cleaners, benzine, thinners, or other solvents on the surfaces of the clock radio. Instead, clean the unit with a mild non-abrasive detergent solution applied to a clean, soft cloth.
- Safety Precautions: Never attempt to insert wires, pins, or other objects into the ventilation holes or openings of the clock radio.
- Time Setting Reminder: When setting the clock or alarm times, remember that this clock radio operates in a 24-hour clock mode.
- Power Connection: For safety, carefully read the instructions before connecting the clock radio to the mains. The unit is designed for a 230V~50Hz supply only; connecting it to other power sources may cause damage. Always verify that the supply voltage matches the information on the rating label located on the bottom of the unit.
- Servicing: To reduce the risk of electric shock, do not remove the cover of the unit. There are no user-serviceable parts inside. All servicing should be referred to qualified personnel.
- Battery Insertion: Ensure the battery for the back-up power is inserted according to the proper polarity.