No. 8488
Operating Instructions
LiPo TopEqualizer 6S
Please read right through the operating instruc-
tions and the safety notes at the end of the
instructions before using the Equalizer for the
first time.
Typical LiPo battery packs consist of series-
wired Lithium or LiPo cells. The purpose of the
Top Equalizer is automatically to bring the indi-
vidual cells in the pack to the same voltage
when the battery is on charge; this is known as
the equalizing process.
Equalizing, or balancing, is necessary because
the individual cells tend to decline to different
states of charge (voltage levels) when they are
discharged; the magnitude of the effect varies
according to the application.
Both overcharging and deep-discharging cause
permanent damage to Lithium cells, and for this
reason it is generally advisable to ensure that
the cells are brought to the same voltage level.
If the charger is a suitable type (e.g. Power Peak
Compact or Infinity 3), the voltage of the indivi-
dual cells can be displayed on the charger’s
integral screen.
The Equalizer sensor lead must be connected
to the charger for this feature to work.
The Top Equalizer is connected between the
Lithium charger and the battery pack.
The parameters for final charge voltage and
charge curr
ent must be set on the charger
itself.
• Connect the sensor lead (attached to the
battery) to the Equalizer; the black wire (bat-
tery negative terminal) must be aligned with
the arr
ow on the case.
• Locate the connecting lead attached to the
Equalizer, and connect it to the charger out-
put, taking care to maintain correct polarity
(red = + terminal, black= - terminal).
• Connect the battery charge lead to the
Equalizer output, again with correct polarity
(red = + terminal, black = - terminal).
• Connect the Equalizer sensor lead to the
Equalizer and a charger (for example: PP
Infinity 3)this connection is required for dis-
playing the individual cell voltages on your
charger’s integral screen.
The device is protected against reversed pola-
rity, but this error should still be avoided.
You will find a set of wiring diagrams on the
pages 8-11 of these instructions.
12
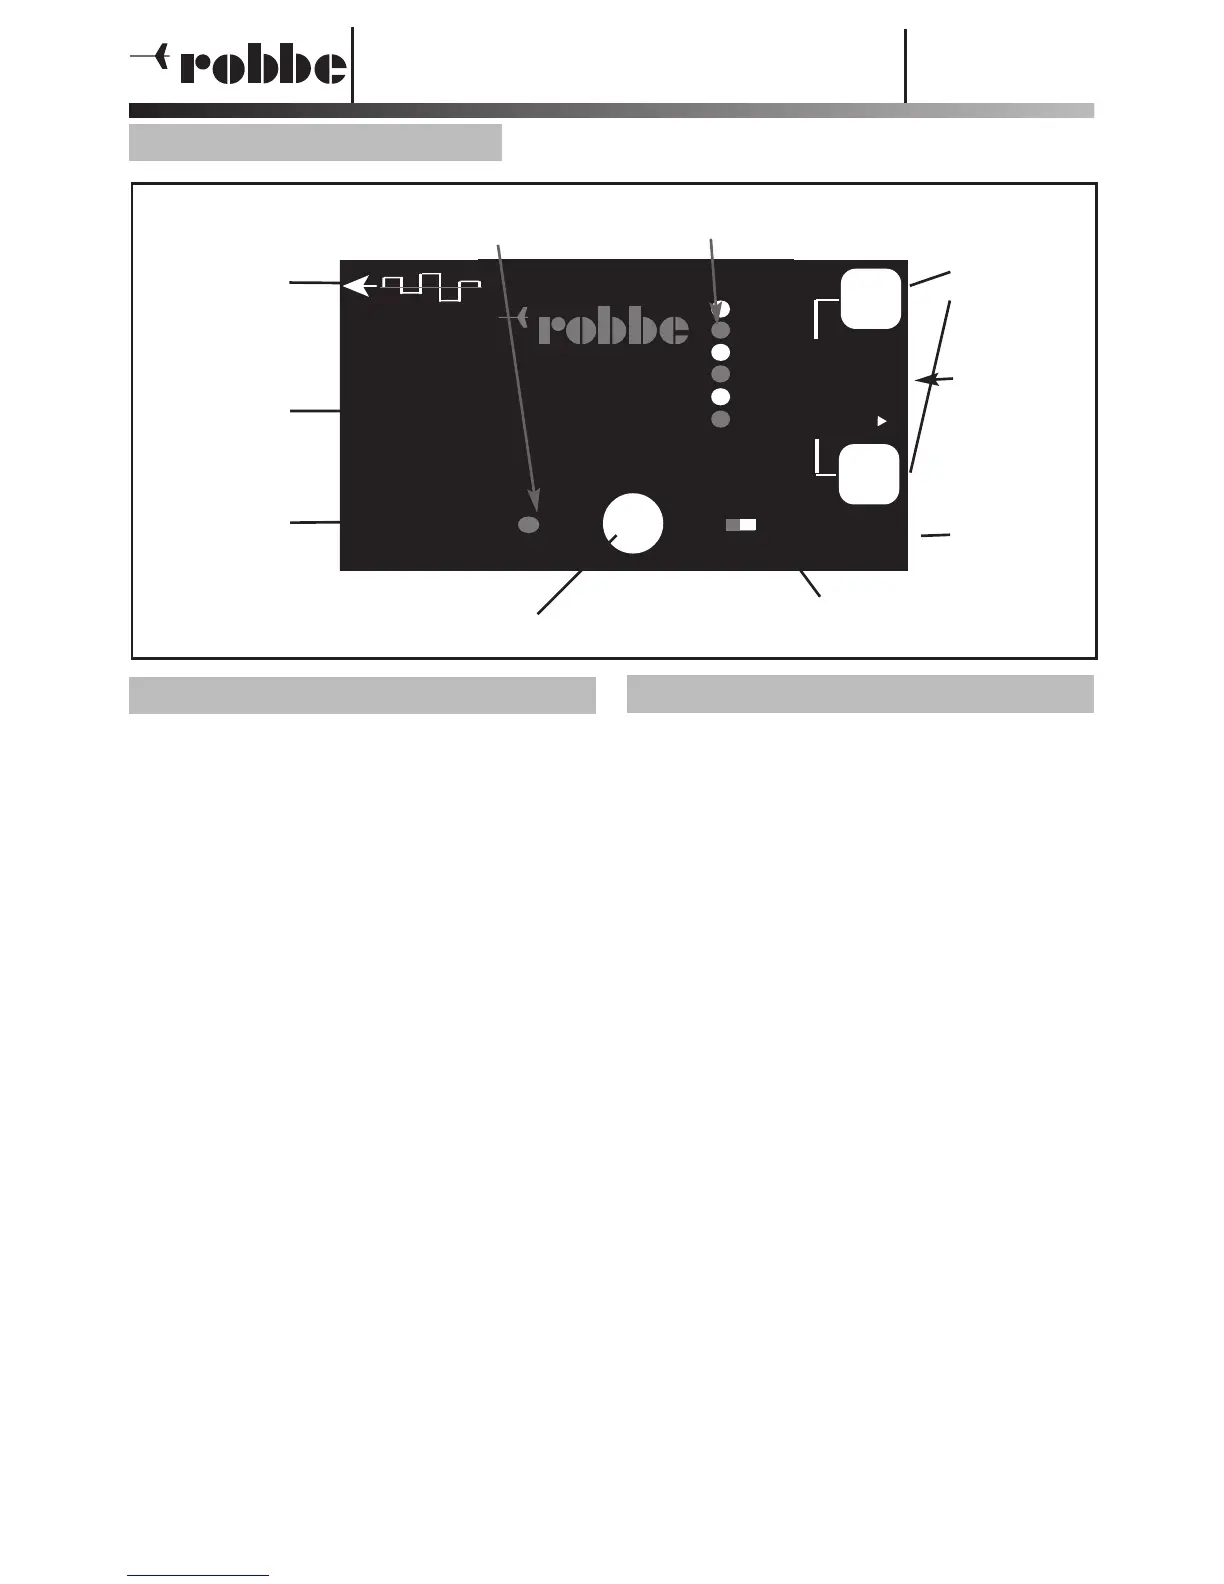
2. General description
1. Controls and sockets
3. Connections, using the unit for the first time