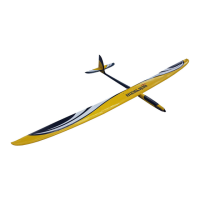
WINDSTAR
15
Bauanleitung, Assembly instructions, Notice de montage
1087
No.
Baustufe 4, RC-Einbau, Teile 4.1 - 4.16
Nr. Bezeichnung, Maße in mm Stück
4.1 Aufdopplung, 3 2 Stzt
4.2 Aufdopplung, 3 1 Stzt
4.3 RC-Einbauplatte, 3 1 Stzt
4.4 Servohalterung 1 n.e.
4.5 Winde 1 n.e.
4.6 Blechschraube, ø 2,2 x 11 4
4.7 Servo 1 n.e.
4.8 Umlaufschot-Hälfte, ø 1 x ca. 1500 1 links
Takelgarn
4.9 Umlaufschot-Hälfte, ø 1 x ca. 700 1 rechts
Takelgarn
4.10 Servohebel 1 bei 4.7
4.11 Schraube, M 2 x 4 2
4.12 Stellring, ø 5 x 7 1 Alu
4.13 Empfänger 1 n.e.
4.14 Leiste, 3 x 3 x 700 1 n.e.
4.15 Power-Pack 1 n.e.
4.16 Doppelklebeband 2 n.e.
- Die Aufdopplungen 4.1 und 4.2 auf die RC-Einbauplatte 4.3 kle-
ben.
- Die Servohalterung 4.4 aufschrauben.
- Die Flansche der Winde 4.5 mit ø 2,5 mm nach Detailzeichnung
bohren.
- Die Winde aufsetzen und probeweise mit den Blechschrauben 4.6
befestigen. Die Winde wieder abnehmen.
- Die Empfangsanlage betriebsbereit zusammenstecken, die Winde
auf minimalen Wickelweg einstellen (ca. 2 Umdrehungen).
- Die Winde in die Stellung „dichtgeholt“ fahren (Knüppel und
Trimmung am „Bauch“).
- Das Servo 4.7 in Neutralstellung bringen.
- Die 2 Hälften 4.8 und 4.9 der Umlaufschot ablängen, durch die
Bohrungen der Windentrommel führen und jeweils mit einem
Knoten sichern.
- Die linke Schot 4.8 dreimal um die vordere Trommelnut schlingen.
- Die rechte Schot 4.9 einmal um die hintere Trommelnut schlingen
- Wickelrichtung beachten.
- Die Nuten mit Klebeband verschließen, um ein Abspringen der
Schoten zu verhindern.
- Die RC-Einbauplatte in den Rumpf setzen, nicht verkleben. Die
Winde aufschrauben.
- Die Schoten durch die Schotdurchführungen auf das Deck führen.
- Die RC-Platte so verschieben, daß Schoten,
Schotdur
chführungen und Windentr
ommel fluchten.
- RC-Platte einkleben.
Stade 4, installation de l’ensemble de réception, pièces 4.1 à 4.16
N° désignation, cotes en mm nombre
4.1 renfort, 3 2 est.
4.2 renfort, 3 1 est.
4.3 platine de réception, 3 1 est.
4.4 support-servo 1 n.c.
4.5 treuil 1 n.c.
4.6 vis autotaraudeuse, Ø 2,2 x 11 4
4.7 servo 1 n.c.
4.8 demi renvoi d’écoute, Ø 1 x 1500 approx. 1 gauche, fil
4.9 demi-renvoi d’écoute, Ø 1 x 700 approx. 1 droite, fil
4.10 palonnier du servo 1 avec 4.7
4.11 vis, M 2 x 4 2
4.12 bague d’arrêt, Ø 5 x 7 1 alu.
4.13 récepteur 1 n.c.
4.14 baguette, 3 x 3 x 700 1 n.c.
4.15 alimentation du récepteur 1 n.c.
4.16 adhésif double face 2 n.c.
- Coller les renforts 4.1 et 4.2 sur la platine de réception 4.3
- Visser le support-servo 4.4.
- Percer les brides 4.5 selon les indications du schéma de détail
avec une mèche de 2,5 mm.
- Mettre le treuil en place et la fixer provisoirement avec les vis auto-
taraudeuses 4.6 puis retirer de nouveau le treuil.
- Brancher les différents éléments de l’ensemble de radiocomman-
de et régler le treuil sur la mi-course de son débattement (environ
2 tours).
- Amener le treuil en position „embraquée“ (manche et trim en
butée vers le „ventre“).
- Amener le servo 4.7 au neutre.
- Couper les deux demi-écoutes 4.8 et 4.9 et les passer dans les
trous du tambour de treuil et les y bloquer avec un nœud.
- Enrouler l’écoute gauche 4.8 trois fois autour de l’encoche avant
du tambour.
- Enrouler l’écoute droite 4.9 une fois autour de l’encoche arrière du
tambour - tenir compte du sens de l’enroulement.
- Fermer les encoches avec du ruban adhésif pour éviter que les
écoutes sautent.
- Installer la platine de réception dans la coque sans la coller. Visser
le tr
euil.
- Amener les écoutes par les guides d’écoute sur le pont.
- Glisser la platine de réception de telle manière que les écoutes,
les guides d’écoute et le tambour du tr
euil soient sur une ligne.
- Coller la platine de réception.
Stage 4, RC installation, parts 4.1 - 4.16
No. Description, size in mm No. off
4.1 Doubler, 3 2 Die-cut
4.2 Doubler, 3 1 Die-cut
4.3 RC installation plate, 3 1 Die-cut
4.4 Servo mount 1 N.I.
4.5 Sailwinch 1 N.I.
4.6 Self-tapping screw, 2.2 Ø x 11 4
4.7 Servo 1 N.I.
4.8 Endless sheet, 1 Ø x approx. 1500 1 L.H.,
thread
4.9 Endless sheet, 1 Ø x approx. 700 1 R.H.,
thread
4.10 Servo output arm 1 With 4.7
4.11 Screw, M2 x 4 2
4.12 Collet, 5 Ø x 7 1 Alu
4.13 Receiver 1 N.I.
4.14 Wooden rail, 3 x 3 x 700 1 N.I.
4.15 Receiver battery 1 N.I.
4.16 Double-sided foam tape 2 N.I.
- Glue the doublers 4.1 and 4.2 to the top of the RC installation
plate 4.3.
- Screw the servo mount 4.4 to the plate.
- Drill 2.5 mm Ø holes in the mounting flanges of the sailwinch 4.5
at the points shown in the detail drawing.
- Place the winch in position and temporarily secure it with the self-
tapping screws 4.6. Remove the winch again.
- Connect the receiving system and set the winch winding travel to
minimum (approx. 2 revolutions).
- Run the winch to the „close-hauled“ position (transmitter stick and
trim back towards you).
- Set the servo 4.7 to neutral from the transmitter.
- Cut the two halves of the endless sheet 4.8 and 4.9 to length, run
them through the holes in the winch drum and tie a knot in each
one to secure them.
- Wrap the left-hand sheet 4.8 three times round the front channel
in the drum.
- Wrap the right-hand sheet 4.9 once round the rear channel in the
drum - note the direction of winding.
- Seal the channels with tape to prevent the sheets jumping off.
- Place the RC installation plate in the hull, but do not glue it yet.
Screw the sailwinch to the plate.
- Route the sheets up onto the deck through the sheet guides.
- Adjust the position of the RC plate so that the sheets, the sheet
guides and the winch drum line up corr
ectly
.
- Glue the RC plate to the hull in this position.
 Loading...