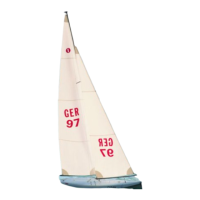
WINDSTAR
5
Bauanleitung, Assembly instructions, Notice de montage
1087
No.
Der Bau des Modells
Baustufe 0, der Bootsständer, Teile 0.1 - 0.8
Nr. Bezeichnung, Maße in mm Stück
0.1 Schenkel, 10x 20 x 500 4 n.e
0.2 Einschlagmutter, M 3 2 n.e
0.3 Schraube, M 3 x 20 2 n.e.
0.4 Unterlegscheibe, ø 3,2 innen 2 n.e.
0.5 Buchenrundstab, ø 10 x 400 4 n.e.
0.6 Auflagegurt, 350 lang 2 n.e.
0.7 Blechschraube, ø 2,9 x 13 4 n.e.
0.8 Unterlegscheibe, ø 3,2 innen 4 n.e.
- Die Schenkel 0.1 nach Zeichnung beschneiden und bohren.
- In zwei der Schenkel 0.1 eine Einschlagmutter 0.2 eindrücken.
- Die Schenkel 0.1 paarweise mit den Schrauben 0.3 und den
Unterlegscheiben 0.4 zum Kreuz zusammenschrauben.
- Die Kreuze mit den Buchenrundstäben 0.5 verbinden und verkle-
ben.
- Auflagegurte 0.6 nach Bohren der Löcher ø 2 mm mit den
Blechschrauben 0.7 und den Unterlegscheiben 0.8 montieren.
La construction du modèle
Stade 0, le berceau, pièces 0.1 à 0.8
N° désignation, cotes en mm nombre
01 montant, 10 x 20 x 500 4 n.c.
0.2 écrou noyé, M 3 2 n.c.
0.3 vis M 3 x 20 2 n.c.
0.4 rondelle, Ø 3,2 intér. 2 n.c.
0.5 baguette de hêtre, Ø 10 x 400 4 n.c.
0.6 courroie, 350 de long 2 n.c.
0.7 vis autotaraudeuse Ø 2,9 x 13 4 n.c.
0.8 rondelle, Ø 3,2 intér. 4 n.c.
- Couper et percer les montants 0.1 selon les indications du cro-
quis.
- Dans deux des montants 0.1, planter les écrous noyés 0.2.
- Visser les montants 0.1 par paires avec les vis 0.3 et les rondelles
0.4 en formant une croix.
- Raccorder les croix avec la baguette de hêtre 0.5 et coller.
- Fixer les sangles 0.6 à l’aide des vis autotaraudeuses 0.7 et des
rondelles 0.8 après avoir percé les trous de Ø 2 mm.
Building the model
Stage 0, the boatstand, parts 0.1 - 0.8
No. Description, size in mm No. off
0.1 Main strut, 10 x 20 x 500 4 N.I.
0.2 Captive nut, M3 2 N.I.
0.3 Screw, M3 x 20 2 N.I.
0.4 Washer, 3.2 I.D. 2 N.I.
0.5 Beech dowel, 10 Ø x 400 4 N.I.
0.6 Support strap, 360 long 2 N.I.
0.7 Self-tapping screw, 2.9 Ø x 19 4 N.I.
0.8 Washer, 3.2 I.D. 4 N.I.
- Cut the main struts 0.1 as shown in the drawing and drill the holes
required.
- Press a captive nut 0.2 into two of the main struts 0.1.
- Use the screws 0.3 and washers 0.4 to join the main struts 0.1 in
pairs to form cross-shaped supports.
- Glue the crossed supports to the beech dowels 0.5.
- Drill 2 mm Ø holes in the main struts as shown and fix the support
straps 0.6 to them using the self-tapping screws 0.7 and washers
0.8.