Inactive Standby - set your radio to turn after
2-8 hours of no user input.
1 Apply a long press on the Alarm button to
access the alarm settings. Select which to
set by rotating and then pressing the Tuning
control.
2 Choose ‘Frequency’ to set what days
the alarms come on from ‘Daily’, ‘Once’.
‘Weekends’ or ‘Weekdays’.
3 Choose ‘Wake Up time’ to rst set the hour
and then the minutes.
4 Choose ‘Source’ to select either ‘Buzzer’, ‘DAB’
or ‘FM’’. If ‘Alarm Mode’ is set to either ‘DAB’
or ‘FM’, an option to set a radio ‘Preset’ is
available. Select either ‘Last listened’ or one
of the saved presets ‘01-20’ (‘Empty’ cannot
be selected).
5 Next, select the‘Volume’ to set the alarm
volume level from 1-32.
6 Choose ‘Save’ to store the alarm settings.
Snooze the alarm for 9 minutes by pressing any
button except the Power/ Volume dial.
Press the Power/ Volume dial when snoozing to cancel the alarm.
Other information
Circuit features
DAB+ /FM RDS/ Bluetooth Portable Radio
Rambler Classic
Headphone socket 3.5mm dia. stereo
Aux In socket 3.5mm dia. stereo
Aerial System DAB/FM Telescopic aerial
Bluetooth standards A2DP, AVRCP, Bluetooth codecs supported SBC & AAC
Bluetooth BLE EIRP POWER (MAX.) -0.07dBm
Bluetooth EDR EIRP POWER (MAX.) -0.01dBm
Frequency coverage FM 87.5 - 108MHz, DAB 174.928 - 239.200MHz
Bluetooth 5.2 frequencies 2.402 - 2.480GHz
Product markings
DC Power input 13.5V / 2.0A USB output 5V /1A
This symbol indicates AC voltage. This symbol indicates DC
voltage.
Mains adaptor
Manufacturer of AC Adaptor: Teka, Model:TEKA-TD135200XX, Input voltage:
AC100 - 240V, Input AC frequency: 50/60Hz, Output voltage: DC13.5V,
Output current: 2.0A, Output power: 27.0W, Average active efciency:
86.62%, Efciency at low load (10%) 77.3%, No-load power consumption:
< 0.1W
Please handle with care. The leather-cloth nish may be susceptible to
damage if mistreated. Avoid all contact with any abrasive material, chemical
substances or cleaning solutions. Your radio may be wiped with a clean
lightly damp cloth. Please ensure that the product is unplugged from the
mains socket outlet before attempting this procedure.
Battery operation
Please read the safety leaflet
provided before using batteries.
• When the Rambler Classic is low on battery, the low battery indicator
will be displayed on the screen. The radio will then switch itself off.
It may not be possible to switch the radio back on until the battery
is recharged, or until the radio is connected to the mains adaptor.
• If the radio is not to be used for any extended period of time it is
recommended that the battery is removed from the radio.
Specications
Power requirements
Mains (adaptor): 100 - 240V 50/60Hz
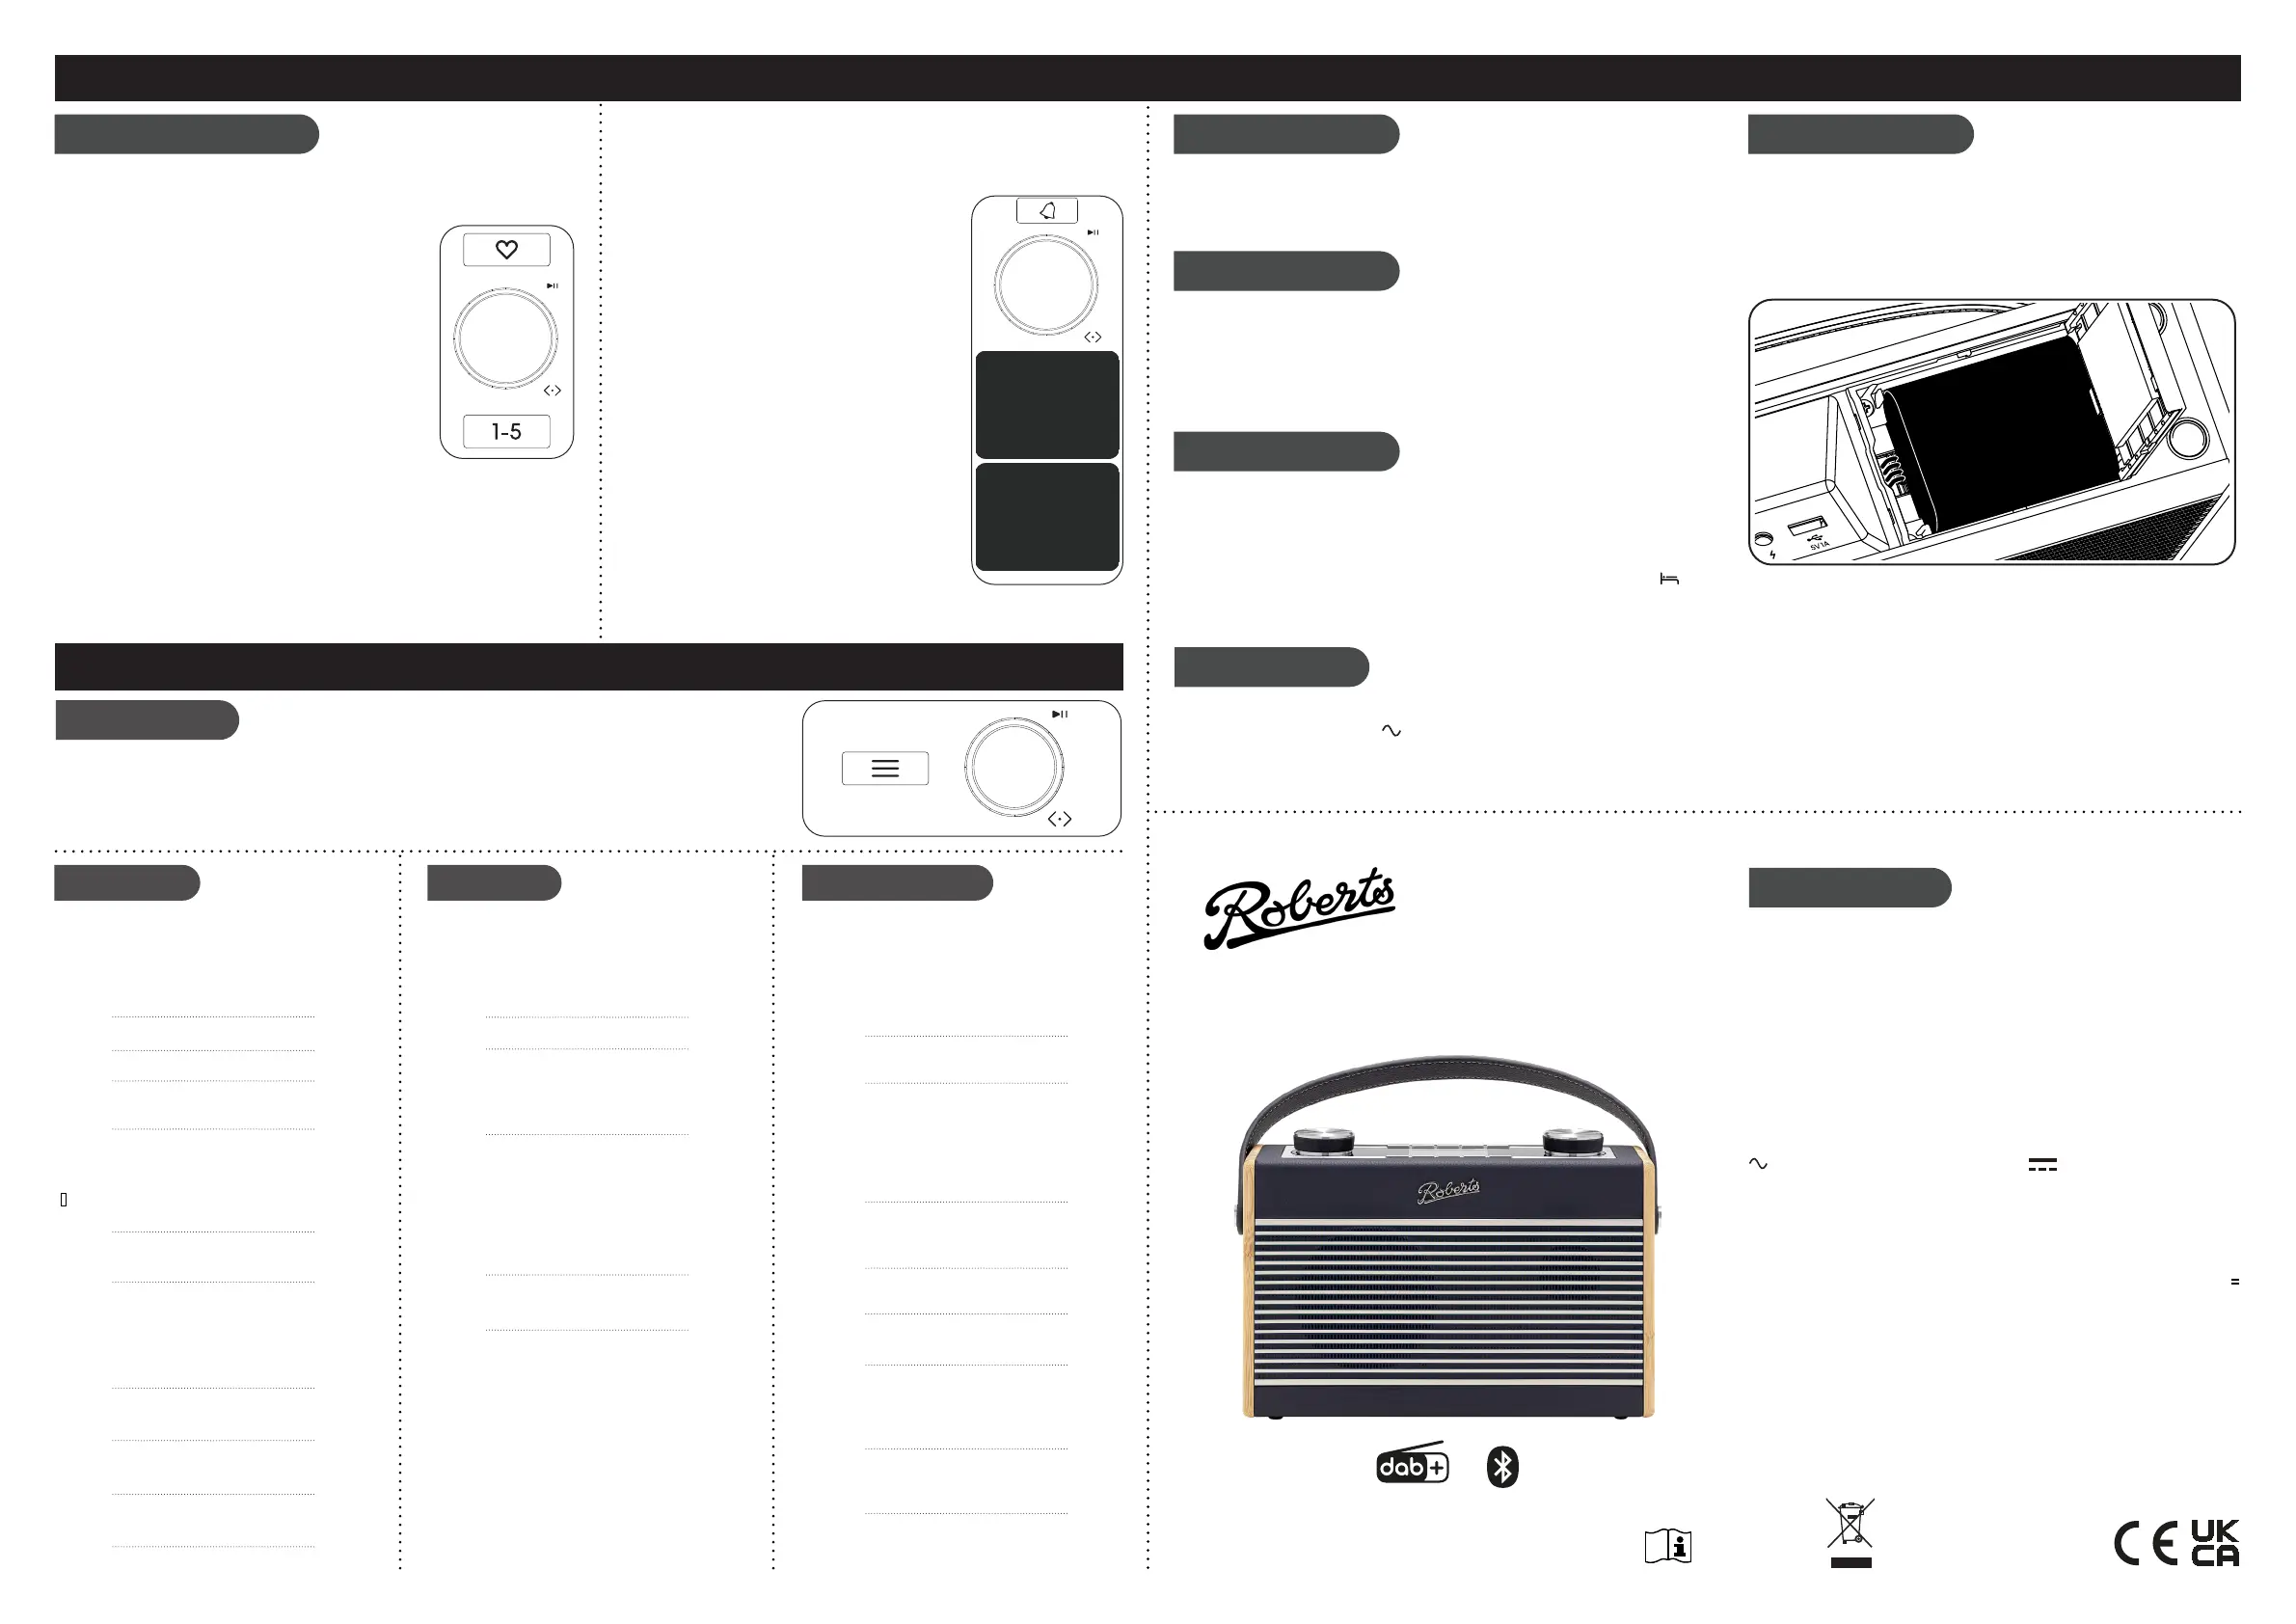
Batteries: Roberts BP3 Lithium Ion battery (not included)
Battery life: Between 8 and 10 hours
To connect the optional Lithium Ion battery pack,
1. Disconnect the unit from power.
2. Slide and rotate open the battery door.
3. Connect the battery cable to the socket inside.
4. Position cable under the battery and close door.
STEP 6 - Menu options
To recall a preset
1. Choose DAB or FM mode.
2 Apply a short press on the Favourites button.
3 Use the Tuning control to scroll to the desired preset.
4 Press the Tuning control to select it.
If you want to select preset 1-5 from the favourites list, apply a short
press on button 1-5.
Preset radio stations
There are 40 memory presets, 20 for DAB and 20 for FM. Presets are
remembered in the event of a power failure.
To store a preset
1 Tune to the required radio station.
2 Apply a long press on the Favourites button
3 Use the Tuning control to scroll to an unused
preset or a preset you wish to change.
4 Press the Tuning control to store. ‘Preset 2
Saved’ will be displayed. The preset number will
be shown on the playing display.
Buttons 1-5 enable quick access to the rst ve
stored presets on the favourites list. A long press on
buttons 1-5 will store a tuned in radio station.
When in standby or switched on, the display will show a clock and
the alarm state.
Apply a short press to the Alarm button to toggle the alarm 1 and alarm
2 on and off.
STEP 4 - Presets STEP 5 - Alarms
11:43Alarm 1
Enable:
Time:
Mode:
Preset:
Volume:
Save
O
08:00
DAB
Last Listened
12
Save
11:43Alarm 1 Info.
Alarm:
Frequency:
Wake Up time:
Source:
Preset:
Volume:
O
Daily>
08:00>
DAB>
Last Liste>
12>
Alarm 1
Alarm 1:
Alarm 2:
O (08:00)>
O (07:30)>
11:43Alarms
Alarm 1:
Alarm 2:
O (08:00)>
O (07:30)>
11:43
Backlight - 2 settings enable adjustment of
display brightness when on and in standby.
Time/Date - Options in this setting include:
Set Time/Date | Auto Update | Set 12/24 hour |
Set Date Format.
Your radio will usually set the time using ‘Any’
signal, which is either DAB or FM.
DAB menu
FM menu
System settings
When in DAB mode, press the Menu button to
access the following DAB menu options. Rotate
the control and press to select an option.
When in FM mode, press the Menu button to
access the following FM menu options. Rotate
the control and press to select an option.
Press the Menu button to access the current
menu options. Rotate the control to ‘System’
and press to select.
Full Scan - Choose ‘Scan’ to scan the band III
DAB channels.
Recall Preset - Access the favourites list. Recall Preset - Access the favourites list.
Save Preset - Access the favourites list.
Station List - Access the station list.
Save Preset - Access the favourites list.
Manual tune - Choose ‘Manual Tune’ and then
choose the desired DAB channel. The signal
strength will be displayed. The signal marker
( ) shows the minimum strength needed for
good DAB reception.
Station order - Choose ‘Station Order’ and
then choose either ‘Alphanumeric’, ‘Ensemble’.
Slideshow - Choose between ‘Small Image’
and ‘Full Screen’
DRC - Choose from ‘DRC Off’, ‘DRC High’ or
‘DRC Low’. The DRC facility can make quieter
sounds easier to hear when your radio is used
in a noisy environment. Note: Not all DAB
broadcasts use the DRC function.
Scan Setting - Choose ‘Scan Setting’ and then
choose ‘Distant’ (your radio will scan for both
weak and strong signals) or ‘Local’ (your radio
will scan for stations with good reception).
Audio Setting - Allows selection of ‘Auto’
or ‘Mono’. ‘Auto’ enables stereo to be played
through headphones if a strong enough signal
is present. If a station has a weaker signal
and alternates between stereo and mono
playback, selecting ‘Mono’ forces the signal
to play mono.
Loudness - Choose ‘On’ to accentuate bass at
low volume levels.
Language - Choose ‘System’, ‘Language’ and
then choose a desired language from the list.
Factory Reset - to completely reset your radio
to its initial state perform a factory reset.
Choose, ‘Factory reset’ then ‘Yes’. All user
entered settings will be erased.
Software Version - The software display
cannot be altered and is just for your reference.
Choose ‘Software Version’.
Menu options
1 Press the Menu button to access your
radio’s menu system.
2 Rotate the Tuning control to show menu
options.
Software Update - Software updates may be
avaible in the future. Do not update unless
recommended by customer support.
Prune - Choose ‘Yes’ to remove any stations
that are no longer available.
3 Press Tuning control to select menu
options.
4 To exit a menu, press the Menu button as
needed.
Alarms - Access the alarm settings.
Alarms - Access the alarm settings.
ROBERTS RADIO LIMITED
www.robertsradio.com
© 2024 Roberts Radio Limited
Issue 2
2024-07-23
Please read this guide, safety/warranty
and streaming leaet before use
Designed & Engineered in the UK
Roberts Radio Ltd, Roberts House, Hanworth Lane, Chertsey, KT16 9JX, UK
Glen Dimplex Europe Ltd, Airport Road, Cloghram, Co. Dublin, K67 VE08, Ireland
Backlight
Equaliser
Sleep
To set the brightness of the display, there are 2 settings.
ON LEVEL - to adjust the brightness when the radio is in use
DIM LEVEL - to adjust the brightness when the radio is in standby.
The sound on your radio can be adjusted to suit your personal taste for
the material that you are listening to.
Select from 7 different proes,
Normal | Classic | Jazz | Pop | Rock | News | My EQ.
My EQ Setup enables ‘Treble and ‘Bass’ levels to be set.
Your radio can be set to turn off after a preset time has elapsed. With the
unit switched on, press and hold the Power/ Volume control.
Rotate the Tuning control to push to select the required sleep time between
15-120 minutes.
An indicator on the base of the display shows the active sleep timer .
To cancel the sleep timer, enter the ‘Sleep’ menu and select ‘OFF’ or press
the power button to cancel the sleep timer and switch your radio off.
Sleep - Your radio can be set to turn off after
15-120 minutes has elapsed.
Sleep - Your radio can be set to turn off after
15-120 minutes has elapsed.
Equaliser - Choose from 7 sound proles to suit
the material that you are listening too.
 Loading...