It is very important to make sure that the coupler nuts that these limit switches sit on are always
seated in the cavity of the X brackets on both sides (They may come off durring transportation or
rough handling) otherwise the auto leveling feature will not work.
Z Offset-Gaps in Bottom Surface
If the offset on your printer is somehow not calibrated correctly, it may be too low or too high.
This should never be below 1.
Z offset measures the distance between “On” and “Off” in your Z endstops for auto leveling.
There is sometimes a tolerance to this because of the way that the endstop parts are
manufactured. R1 3D printers come standard with a Z offset of 1.
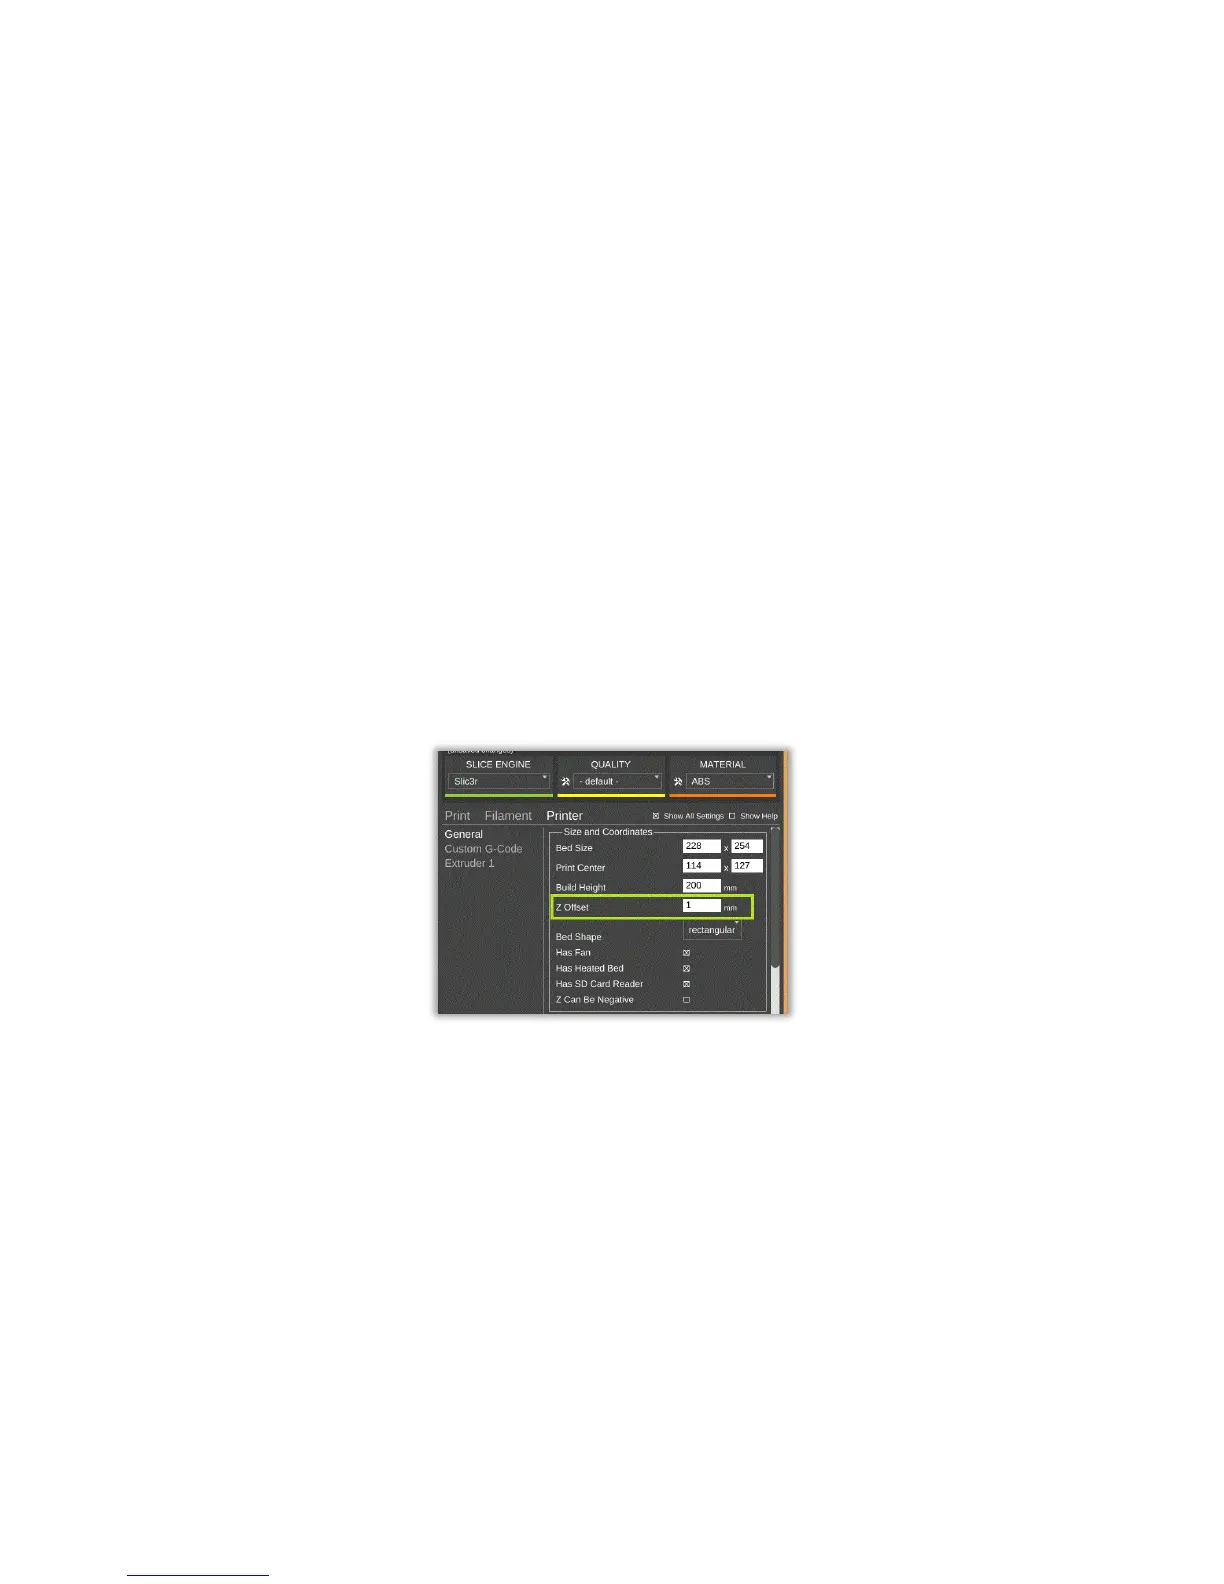
You can adjust this in your Slice Settings under the “Printer” tab.
In each of the 3 slice engines that are included in the software, the are two different ways to set
your Z offset as explained below:
1. In the General tab under “Printer”.
- Whatever value you put into this field will change your .gcode to include it at
the beginning of the print.
- Default for this is 1mm.
- If you need to have a higher offset (because your first layer is too low) move up
by .2mm (to 1.2) and try again.
- The same goes for lowering your Z offset if it is too high.
- A value of 0 will turn this setting off if you wish to add the coding to a custom
firmware build.


 To Next Page