14
INTRODUCTION TO YOUR
NEW R 201 • R 201 Ultra
BOWL CUTTER/VEGETABLE
PREPARATION ATTACHMENT
The R 201/R 201 Ultra is perfectly geared to
professional needs. It can perform any number of
tasks, which you will gradually discover as you use it.
This food processor consists of a bowl cutter and
a vegetable preparation lid with ejection into
the bowl. In cutter mode, it can be used to process
meat, vegetables, fine stuf fing, mousse, grinding,
kneading,… in less than 5 minutes for even the
longest tasks. In the vegetable preparation version,
the device has a wide range of discs for thin slicing,
grating and julienne vegetables.
Its numerous functions will open the door to a whole
new culinary world.
Thanks to its simple design, all components requi-
ring frequent handling for maintenance or cleaning
can be fitted and removed in a trice
To make things easier for you, this manual gives a
breakdown of all the various fitting operations.
This manual contains important information designed
to help the user get the most out of his or her R 201/
R 201 Ultra bowl cutter/vegetable preparation device.
We therefore recommend that you read it carefully
before using your machine.
We have also included a few examples to help you
get the feel of your new machine and appreciate its
numerous advantages.
SWITCHING ON
THE MACHINE
• ADVICE ON ELECTRICAL CONNECTIONS
Before plugging in, check that your power supply
corresponds to that indicated on the machine’s
identification plate.
The R 201/R 201 Ultra is fitted with various types
of motors : 230 V / 50 Hz /1
115V/60Hz/1
220V/60HZ/1
The machine comes with a single phase plug
connected to a power cord.
• CONTROL PANEL
R 201
Red switch = Off switch
Green switch = On switch
R 201 Ultra
Red switch = Off switch
Green switch = On switch
Black switch = Pulse switch
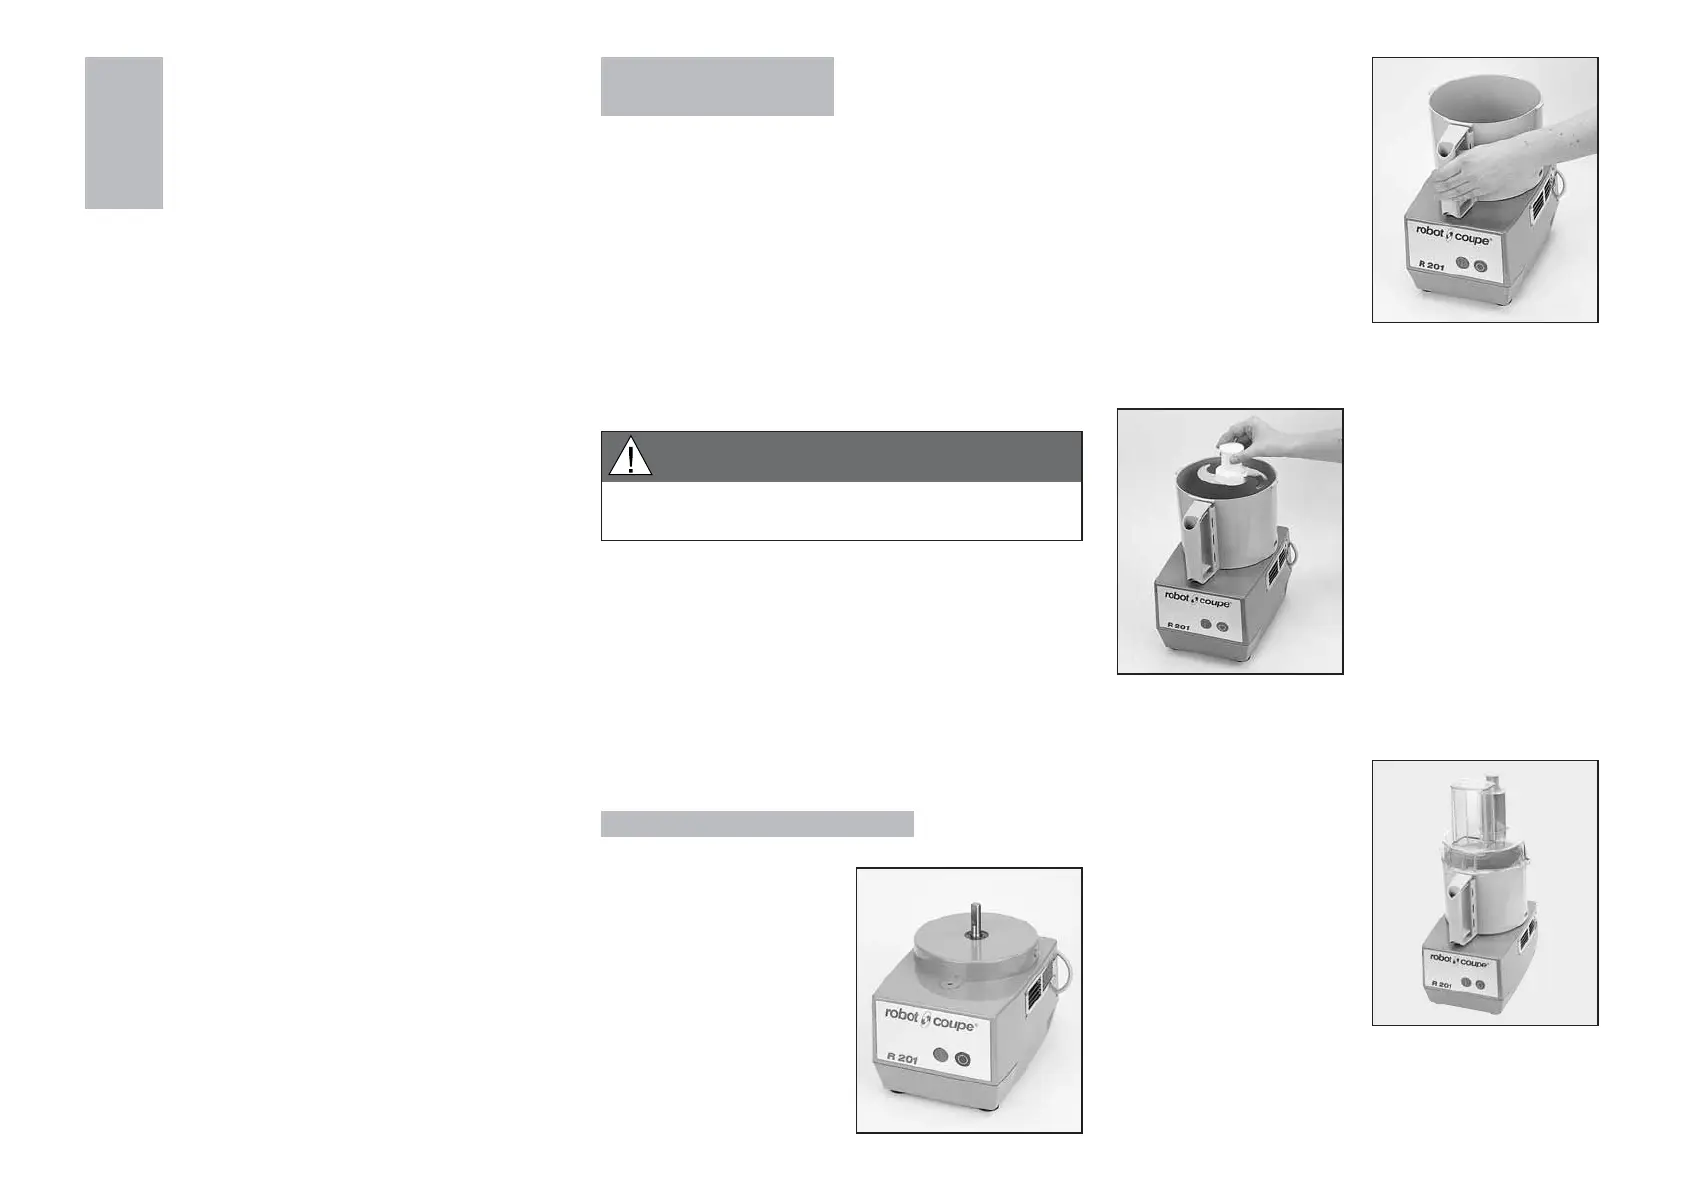
ASSEMBLY
• BOWL CUTTER
ATTACHMENT
1) With the motor base
facing you, make sure
that the bowl is straight
in relation to the motor
shaft, with the safety pin
moved slightly to the left.
3) Engage the blade on
the motor shaft and
lower it right to the
bottom of the bowl.
Make sure that it is
correctly positioned, by
rotating it in the bowl.
2) Turn the bowl to the
right until the motor base
connectors are securely
positioned in their soc-
kets. The safety pin
should now be straight in
front of you, in contact
with the front of the mo-
tor base.
4) Place the lid on the
bowl so that the large
feed-hopper is facing
you. Rotate to the right
until it locks.
Once contact is made, your device is ready for use.
WARNING
THIS APPLIANCE MUST BE PLUGGED INTO
AN EARTHED SOCKET (RISK OF ELECTROCUTION).
 Loading...