EasyManua.ls Logo

ROCAM CR1001E - User Manual

ROCAM CR1001E
2 pages
Print Icon
To Next Page IconTo Next Page
Loading...
- 02 -- 01 -
Chapter 1 LOCATION OF CONTROLS
20
17
19
18
21
9
1
2
3
4
5
6
7
8
13
14
10
11
12
15
16
1.Set Time Button 2.Hour Button 3.Minute Button
4.Dimmer Button 5.SNOOZE Button 6.Alarm Pause Button
7.Alarm OFF Button 8.Alarm 1 Button 9. Alarm 2 Button
10. PM Indicator 11.Alarm 1 Indicator
12.Alarm 2 Indicator 13.DST Indicator
14.12/24H & DST Button 15.Volume + Button
16.Volume - Button 17.Battery Door
18.USB Port 19.DC Jack
20.Speaker 21.Holder ( x 2pcs)
Note: Battery is not included
Chapter 2 POWER RESOURCES
1. Install 2pcs 1.5V “AAA” size batteries to the proper terminals in
the battery compartment to memorize the time setting in case
of power outage.
NOTE: Batteries(not included) don't support time display but can back up
time & alarm setting and trigger an alarm in case of AC power failure.
2. Connect the adapter line to DC jack , then plug into a 100~240V
AC wall power outlet.
Chapter 3 TIME SETTING
SET
TIME
HOUR MIN
SET
TIME
12/24H &DST
1. Press button once, display starts flashing.
2. Press button to set the hour. press button to set
the minute.
3. Press button or button to save time or wait
for another 5 seconds to confirm automatically.
To change 12H/24H time format
Press button to change 12H/24H time format.
ROCAM
R
CR1001E
Alarm Clock with USB Charger
CREATE YOUR PERFECT SLEEP ENVIRONMENT
Version 1.0
Mad e in China
Http://www.yelaw.net
support@yelaw.net
Speak with our Experts
+1 (240) 514-4451
Mon-Fri: 9:00am ~01:00pm PST
8:00am ~12:00pm PST
SNOOZE

Other manuals for ROCAM CR1001E

Question and Answer IconNeed help?

Do you have a question about the ROCAM CR1001E and is the answer not in the manual?

Summary

Chapter 1 Location of Controls

Control Panel Overview

Identifies and locates all buttons, indicators, ports, and speakers on the alarm clock unit.

Chapter 2 Power Resources

Battery Backup Installation

Details installing 1.5V "AAA" batteries for time and alarm backup during power outages.

AC Power Connection

Explains connecting the device to a 100-240V AC wall power outlet via the DC jack.

Chapter 3 Time Setting

Setting Hour and Minute

Step-by-step guide to setting the current hour and minute for the clock.

Saving and Confirming Time

Instructions on how to save the entered time or allow automatic confirmation.

Changing Time Format

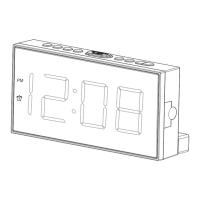
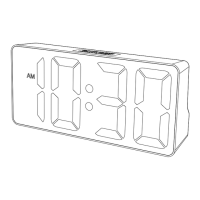
How to switch between 12-hour and 24-hour time formats.

Chapter 3 Alarm Setting

Setting Alarm Time and Volume

Guide to setting alarm times and adjusting the alarm volume.

Turning Off Alarms

Instructions for temporarily turning off (snooze), turning off for 24 hours, or permanently cancelling alarms.

Chapter 4 Dimmer

Adjusting Display Brightness

How to cycle through 5 levels of display brightness.

Chapter 5 DST

Switching DST Function

How to enable or disable the Daylight Saving Time (DST) function.

Chapter 6 USB Charging

Connecting Devices for Charging

Information on connecting devices like phones or tablets for charging.

ROCAM CR1001E Specifications

General IconGeneral
BrandROCAM
ModelCR1001E
CategoryAlarm Clock
LanguageEnglish

Related product manuals