EasyManua.ls Logo

ROCAM CR1023 - User Manual

ROCAM CR1023
2 pages
Print Icon
To Next Page IconTo Next Page
Loading...
Version 1.0
Digital Alarm Clock with USB Charger
THE BEST DECORATION FOR BEDROOM
Made in China
1
2
3
4
5
6
7
8
Chapter 1 LOCATION OF CONTROLS
10
11
12
13
- 01 -
1. DISPLAY DIMMER KNOB 2. TIME/DST BUTTON
3. 12/24H BUTTON 4. ALM ON/OFF BUTTON
5. ALARM 1 BUTTON 6. ALARM 2 BUTTON
7. VOLUME KNOB 8. TYPE-C CHARGING PORT
9. NIGHT LIGHT 10. SPEARK
11. DC IN JACK 12. USB CHARGING PORT
13. BACKUP BATTERY COMPARTMENT 14. DST INDICATOR
15. PM INDICATOR 16. AM INDICATOR
17.LOW DIMMER INDICATOR 18. ALARM 1 INDICATOR
19. ALARM 2 INDICATOR 20.TOUCHSCREEN SNOOZE / NIGHT LIGHT
14
15
16
17
18
19
20
9
- 02 -
Chapter 2 POWER SOURCES
1. Install 2pcs 1.5V “AAA” size batteries to the proper terminals in the
battery compartment to memorize the time setting and the alarm will
ring in case of power outage.
NOTE: Batteries are not included and don’t support time display or any
other functions
2.Connect the adapter line to DC jack , then plug into a 100~240V AC wall
power outlet.
Chapter 3 TIME SETTING
1. Press button once, the hour display indicator
light starts flickering on the screen.
2. Press or button to set the hour, and press to
confirm.
3. After step 2, minute display start flickering, press or button
to set the minute.
4.Press button to save time or wait for another 10 seconds to
confirm automatically.
Hold press button to change 12H/24H time format.
12H/24H time format setting
Contact our experts
lucy@yelaw.net
http://www.yelaw.net
ROCAM
R
Question and Answer IconNeed help?

Do you have a question about the ROCAM CR1023 and is the answer not in the manual?

Summary

Location of Controls

Power Sources

Time Setting

12 H;24 H Time Format Setting

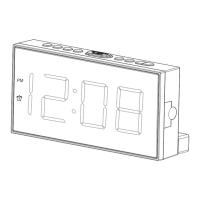
Hold the '+' button to toggle between 12-hour and 24-hour time display formats.

Alarm Setting

Alarm Ring Volume Setting

Adjusts the alarm sound volume using the dial, rotating left to increase and right to decrease.

Turn off Alarm

Temporarily snooze the alarm for 9 minutes or turn it off completely for 24 hours.

Cancel Alarm

Night Light

Dimmer

DST

USB & Type-C Charging

Overview

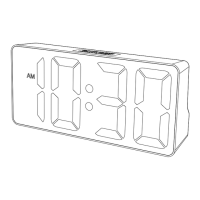
The FROCAM CR1023 is a digital alarm clock with a USB charger, designed to be a functional and decorative addition to any bedroom.

Function Description

The CR1023 serves as a multi-functional device, primarily a digital alarm clock with two independent alarms, a night light, and a display dimmer. It also features a built-in USB and Type-C charging port for external devices. The clock supports both 12-hour and 24-hour time formats and includes a Daylight Saving Time (DST) function.

Important Technical Specifications

  • Power Sources:
    • Main Power: Connects to a 100-240V AC wall power outlet via an adapter line to the DC IN jack.
    • Backup Power: Requires 2pcs 1.5V "AAA" size batteries (not included) for memorizing time settings and enabling alarms during power outages. Note that backup batteries do not support time display or other functions.
  • Charging Ports:
    • USB Charging Port: Available for charging external devices.
    • Type-C Charging Port: Available for charging external devices.
    • Maximum Charge Current: 1 Ampere (for both USB and Type-C ports combined).
  • Display: Digital LED display with adjustable brightness (7 dimmer levels).
  • Alarm: Two independent alarms (ALARM 1 and ALARM 2) with 7 adjustable volume levels. Snooze function provides a 9-minute delay.
  • Night Light: Integrated night light with touchscreen activation.

Usage Features

Time Setting:

  1. Press the "TIME/DST" button once. The hour display indicator (e.g., "6:30") will flicker.
  2. Use the "+" or "-" buttons to set the hour, then press the "TIME/DST" button to confirm.
  3. The minute display will flicker. Use the "+" or "-" buttons to set the minute.
  4. Press the "TIME/DST" button to save the time, or wait 10 seconds for automatic confirmation.

12H/24H Time Format Setting:

  • Hold down the "+" button to switch between 12H and 24H time formats.

Alarm Setting (ALARM 1 and ALARM 2):

  1. Press the "ALARM 1" button (for Alarm 1) or "ALARM 2" button (for Alarm 2) once. The corresponding alarm indicator light and hour display will flicker.
  2. Use the "+" or "-" buttons to set the desired hour, then press the "ALARM 1" or "ALARM 2" button to confirm.
  3. The minute display will flicker. Use the "+" or "-" buttons to set the desired minute.
  4. Press the "ALARM 1" or "ALARM 2" button to save the alarm time, or wait 10 seconds for automatic confirmation.

Alarm Ring Volume Setting:

  • Rotate the "VOLUME KNOB" (located on the back) to adjust the alarm volume. There are 7 volume levels; rotate left to increase volume, right to decrease.

Turning Off Alarm (When Alarm Goes Off):

  1. Snooze: Touch the "SNOOZE/NIGHT LIGHT" button to temporarily turn off the alarm for 9 minutes. The alarm will ring again after 9 minutes.
  2. Turn Off for 24 Hours: Press the "-" button to turn off the alarm for 24 hours. The alarm indicator (1 or 2) will remain on, indicating the alarm is still activated and will ring again after 24 hours.
  3. Deactivate Alarm: When the alarm is off, press the "ALARM 1" or "ALARM 2" button to activate the alarm with the previously set time.

Canceling Alarm (Permanently):

  1. Both Alarms: Hold down the "-" button to permanently turn off both Alarm 1 and Alarm 2. Their corresponding indicators will turn off.
  2. Alarm 1 Only: Hold down the "ALARM 1" button to permanently turn off Alarm 1. Its indicator will turn off.
  3. Alarm 2 Only: Hold down the "ALARM 2" button to permanently turn off Alarm 2. Its indicator will turn off.
  4. If Alarm 1 is ringing: Hold down the "-" or "ALARM 1" button to permanently turn off Alarm 1.
  5. If Alarm 2 is ringing: Hold down the "-" or "ALARM 2" button to permanently turn off Alarm 2.

Night Light:

  • Touch the "SNOOZE/NIGHT LIGHT" button to turn on the night light.
  • Touch the "SNOOZE/NIGHT LIGHT" button again to turn off the night light.

Display Dimmer:

  • Rotate the "DISPLAY DIMMER KNOB" (located on the back) to adjust the display brightness. There are 7 dimmer levels; rotate left to increase brightness, right to decrease.
  • Low Dimmer Indicator: If the knob is rotated to the far right, the "LOW DIMMER" indicator will appear on the screen and then disappear after 20 seconds. The time display will reappear when the knob is rotated to the left.

Daylight Saving Time (DST):

  • Hold down the "TIME/DST" button to switch the DST function on. The "DST" indicator will appear.
  • Hold down the "TIME/DST" button again to switch the DST function off. The "DST" indicator will disappear.

USB & Type-C Charging:

  • Plug a charging cable into the USB or Type-C port to charge devices like phones or tablets. Both ports can be used simultaneously, with a maximum combined charge current of 1 Ampere.

Maintenance Features

The manual does not explicitly detail maintenance features beyond initial setup and usage. However, general maintenance practices for electronic devices would apply:

  • Keep the device clean and free from dust.
  • Avoid exposing the device to extreme temperatures or moisture.
  • Ensure proper battery installation for backup power.
  • Use the specified power adapter (100-240V AC) to prevent damage.

ROCAM CR1023 Specifications

General IconGeneral
BrandROCAM
ModelCR1023
CategoryAlarm Clock
LanguageEnglish

Related product manuals