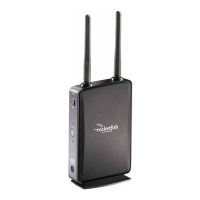
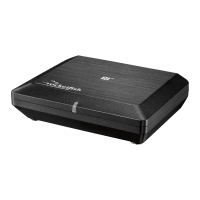
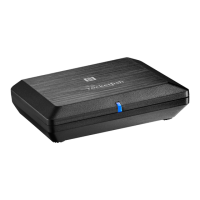
RF-RBAUX Wireless Sender / Receiver
QUICK SETUP GUIDE
Connecting the AC adapter
Connecting the System (2 congurations)
When the unit
is used as a wireless
sender
Connect one end of the
audio cable (supplied)
to the AUDIO IN jack
on the sender/receiver and
the other end to the audio
output jack of your device
(such as an A/V receiver,
PC, or iPod.)
Note: The sender/receiver
can be used simultaneously
as a sender and receiver.
When the unit is used as a
wireless receiver
Connect one end of the
audio cable (supplied) to
the AUDIO OUT jack on
the sender/receiver and the
other end to a mini jack to
RCA cable splitter and then
into the audio input jack of
your speaker system.
Connect one end of the adapter to the DC IN jack,
then plug the other end into an AC power outlet.
The sender/receiver will automatically turn on. To place
the unit in Standby, press the Power/Join button again.
Note: Make sure that the power outlet is 100-240V,
and do not connect the AC adapter until all other
connections are completed.
Establishing communication
To use the unit as a Sender:
Please read the section to the top left titled
“Please read before setting up your system."
1 Set the HUB STATUS switch to ENABLE
if the sender/receiver is deployed as a
network hub, otherwise set it to Disable.
• The power-on indicator LED lights
green when the HUB STATUS switch
is set to ENABLE.
• The power-on LED lights blue when
the HUB STATUS switch is set to
DISABLE .
2 Power on the device by inserting the power
cable (the device automatically powers on)
then press and hold the Power/Join
button on the sender/receiver for more
than three seconds to put it into joining mode.
• The power-on LED starts blinking rapidly.
3 Press the Power/Join button on the Hub
device for more than three seconds so the
two devices will enter connection mode.
• The power-on LED lights steadily if the link
is activated between both of the units.
• The power-on LED blinks at a slower rate if
the communication link is not successful.
4 The power LED lights solidly when the
sender/receiver has successfully joined the
network. Once a 3.5 mm device is connected,
the device will start sending audio
automatically and the TX LED will be on.
Note: The sender/receiver only needs to be
joined once, it can then be used as a sender
and receiver simultaneously.
Listening to music
To listen to music:
1 Turn on the sender/receiver and the audio device. Make sure that there
is an active link. The power LED should be on (not blinking).
2 Turn on the audio source and your speaker system. If the RX LED is not
illuminated, press the Source button to connect
the broadcasting source. Once connected to a source, the LED
will light solidly.
3 Adjust the volume level on your speaker system. Make sure
the volume is turned up on your source device.
4 If you wish to change the source you are listening to, press the Next
Source button to tune into the next audio stream. This assumes you have
multiple audio sending devices in your network.
TX LED
RX LED
09-0400
TM
Package Contents
Wireless sender/receiver
DC adapter
User Guide
3.5 mm stereo
male to male cable (6 feet)
IR remote
1
2
3
4
5
6
7
Power/Join button
Power/Join indicator (Blue/Green Light)
Standby indicator (Red Light)
IR sensor window
Next Source button
Receiver-mode indicator (Blue Light)
Sender-mode indicator (Blue Light)
Pull up the antennas
Adjust the antennas to
vertical for best results
User Guide
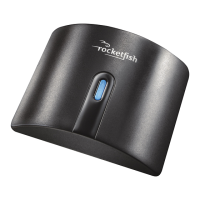
Front Panel
Adjust antennas
3.5 mm stereo
female to 2-RCA male cable
(6 inches)
Quick Setup Guide
QUICK SETUP GUIDE
1
5
4 6 732
TM
Preparing the remote control
Please read before setting up your system.
Every Rocketboost network must contain at least one hub device, which directs network data trac and helps devices
join the network. The network can have only one hub, which you can enable using the hub switch on the back of all
Rocketboost transmitters.
If this is your rst Rocketboost product you should make this unit the hub. If you are building a Network of two or more
RF-RBAUX units, you should enable hub mode on one unit only, you can pick any unit. Then join the other RF-RBAUX
units to the hub mode you selected. If you already have Rocketboost products you should disable the hub mode on
this device.If you bought this product at the same time as a RF-RBKIT or RF-RBWS02 please disable hub functionality on
your RF-RBAUX as one your other devices will be enabled as a hub from the factory.
IMPORTANT: Hub units must always have power for your network to operate. The device may be placed in standby, but
the unit must remain plugged into the wall for operation of your network.
See your User Guide (page 23) for further instructions on Establishing Communication to the network.
To activate the battery:
Remove the tab from the bottom of the remote
control to enable the battery.
TM
TM
To use the unit as a receiver
If the device is already joined to the
network, skip steps 1 and 2.
1 Press and hold the Power/Join button on
the sender/receiver for more than three
seconds to put it into joining mode.The device
will remain in joining mode for about 30 seconds.
• The power-on LED starts blinking rapidly.
The power-on LED lights steadily if
the link is activated between
both of the units.
The power-on LED blinks at a slower rate if
the communication link is not successful.
2 Press the Power/Join button on the Hub device
for more than three seconds so the sender
and
receiver will enter connection mode.
• The power-on LED lights steadily if
the link is activated between both of the units.
• The power-on LED blinks at a slower rate if
the communication link is not successful.