1.1 Before installation
Note: Please comply with following when fitting hitch:
– applicable national regulations
– vehicle manufacturer’s specifications
– clearance for axial rotation of coupling head of at least e 25h
Fig. 1 and 2 depend on technical standard
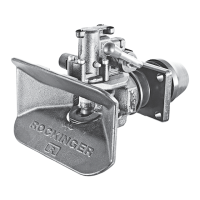
x Unscrew 3
x Remove 4, 5, 6 and 7, 8 and 9 remain on 10
Note:
x 1 and 2 in equipment pack, do not remove grease from 6, 8
and 10!
1.2 Installation
x Install the bearing (7) onto the inner side of the cross member (T)
x Secure with 4 hexagon bolts (DIN 931, grade 8.8)
and self-locking nuts, grade 8.
Size of bolts, nuts and torque to be chosen, see table
Note: Observe manufactures’ instructions in case different bolts
and nuts are recommended!
ATTENTION:
Mount bolt heads on the side directed towards the jaw (outside the
cross member) to avoid impairing movability of the hitch (see Fig. 2)
(UVV Fahrzeuge, VBG 12,
KBA-Merkblatt)
1. Fitting RO
i
400
ROCKINGER
Member of JOST-World
20
GB