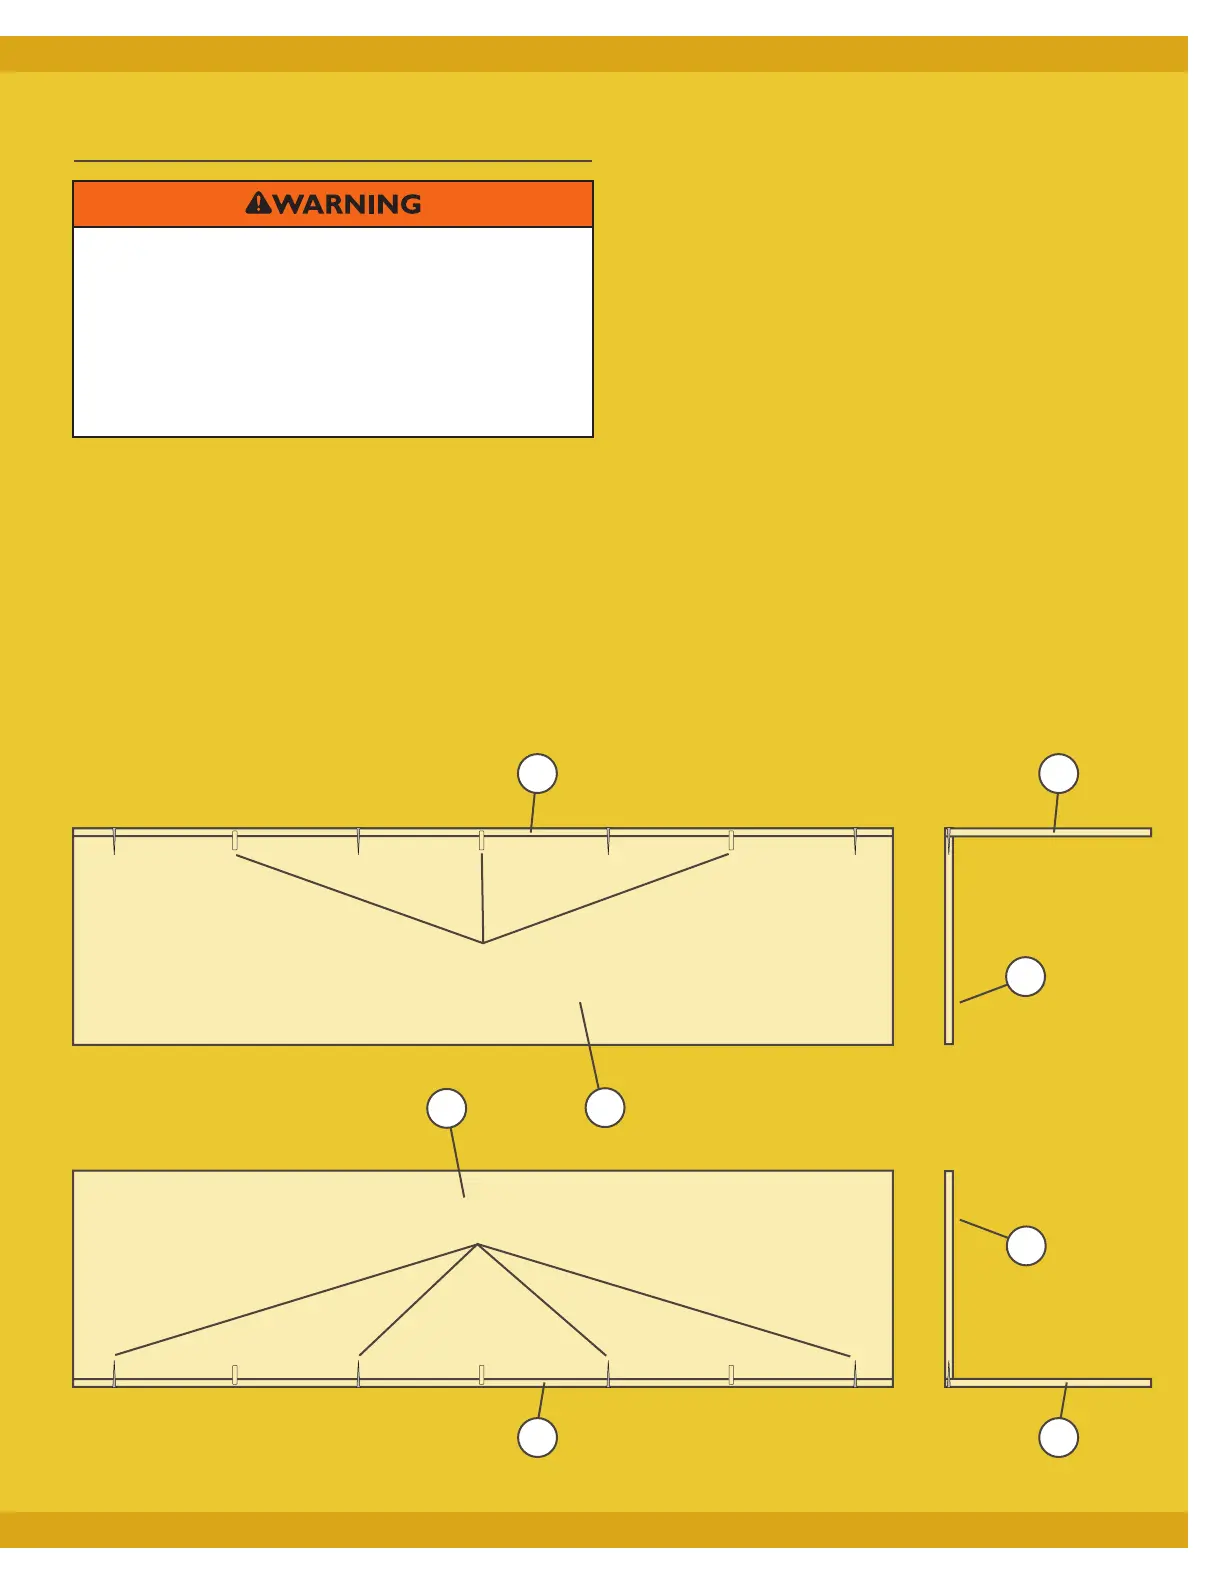
9
2. While the Top (2) and Upper Headboard (3) are clamped
in place, drill and countersink (if desired) pilot holes for
#8 x 2" Screws (not included). Fig. 2.
3. Release the clamps to separate the parts. Use a doweling
jig and 3/8" drill bit to bore 3/8" x 5/8" deep holes in the
inside face of the Top (2) and 3/8" x 1" deep holes in the top
edge of the Upper Headboard (3). You will join these pieces
with 3/8" x 1
1
⁄2" dowels and wood glue (not included). Fig. 2.
4. Repeat Steps 6-8 for the Bottom (2) and Lower
Headboard (4), drilling for dowels and screws at
the same intervals. Fig. 2.
5. Assemble the Top (2) with the Upper Headboard (3) and
the Bottom (2) with the Lower Headboard (4). Spread glue
on the edges of the headboards that join with the Top and
Bottom, as well as in the dowel holes. Bring the pieces
together, make sure the joint is square and secure by driving
#8 x 2" screws (not included) in the pilot holes. Wipe away
any excess glue with a damp cloth.
Recommended Cabinet
Assembly (Parts Not Included)
Fig. 2 - Top and Upper Headboard/Bottom and Lower Headboard Assemblies
1. Place the Top (2) on a work surface so that its inside face is
oriented up. Position the Upper Headboard (3) on its top
edge on the inside face of the Top (2) so the pieces form
an “L.” Clamp in place and mark locations for three
joint-reinforcing dowels across the back edge of the Top (2)
and back face of the Upper Headboard (3). Mark drilling
locations for four screws on the top face of the Top (2).
Fig. 2.
> Failure to use appropriate fasteners and construction
practices could undermine the structural integrity of
your cabinet, potentially leading to cabinet failure
and serious injury.
> Do NOT use an impact driver to drive fasteners; the
added torque of an impact driver increases the risk of
stripping the pilot holes and weakening connections.
Do NOT overtighten screws.
Front View
Front View
Side View
Side View
Dowel Rods
Screws
2 2
22
3
3
4
4