– 8 – – 9 –
– 8 – – 9 –
InStALLInG tHE tWEEtER
Two different tweeter mounting options are provided by the tweeter mounting hardware
included in the set contents:
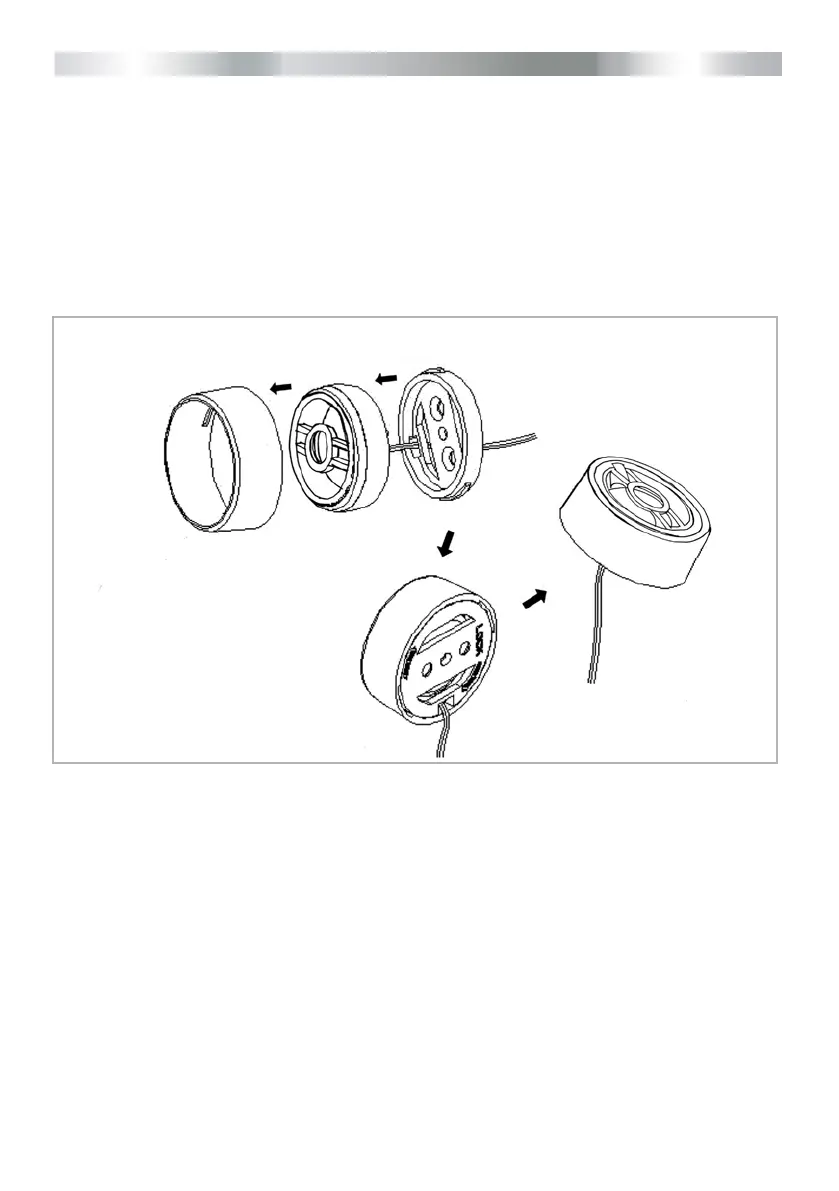
Flat Surface Mounting Option
Usetheatmountingadapterhousingasatemplate:Drillthreeholes:One7mmdiameter
hole for the tweeter wire routing, two smaller pilot holes for the tweeter xation screws. Fix
the at mounting adapter ring to the surface, using the two provided self tapping screws.
Feed the wire through the adapter bottom plate and the pre-drilled hole. Align the tweeter
unit with the adapter housing and x the tweeter in place by turning it clockwise.
Abb.: Flat Surface Mounting
Flush Mounting Option
Find a good location where to install the tweeters. Cut the mounting hole, the exact cutout
diameteris40.5mm.Checktheclearancebehindthesurface,beforeyoustarttocutthe
hole! The assembled surface mount tweeter unit needs approx. 22 mm installation depth/
clearance, to be mounted properly. Preassemble the at mounting ring with the crossobla-
de and the metric screw contained in the tweeter mounting hardware bag. Insert the ush
munt adaptor into the hole that was cut. Insert the main tweeter into the adaptor’s rear
opening and hold the preassembled at ring with crossoblade in place, and lock it with a
clockwise turn.