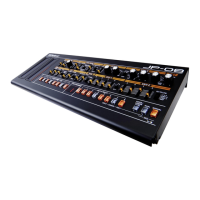
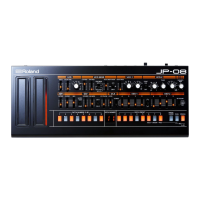
1. Hold down the [SHIFT] button and press the [3] (Eects
Edit) button.
The EFFECTS EDIT screen appears.
Tone eect Studio set eect
Eect switch
Eect applied to the entire this unit
(System eect)
MEMO
You can also access the EFFECTS EDIT screen from the menu
(p. 26).
Turning the eect on/o
1.
Use the cursor buttons to select the eect switch, and
use the dial to turn it on/o.
Editing the eect parameters
1.
Press a function button to enter the edit screen for each
eect.
2. Use the cursor buttons to select a parameter, and use
the dial to change its value.
To return to the EFFECTS EDIT screen, press the [EXIT] button.
NOTE
The edits that you make to the eect settings are temporary. If
you turn o the power or select a dierent studio set or tone,
your changes will be lost. If you want to keep the changes
you made, save the tone, studio set, or system settings
respectively.
MEMO
For details on the parameters, refer to “Parameter Guide” (PDF).
Saving the system eect
The edits that you make to the system eect will be lost
when you turn o the power. If you want to keep the
changes you made, save them as follows.
1. In the system eect edit screen, press the [6]
(System Write) button.
Synthesizer (Editing)
Editing the Eects
Here’s how to edit the eects.
Saving a Studio Set, Tone, or Song
The edits that you make to a studio set, tone, or a recorded song are temporary. Your changes will be lost if you turn o the power, or if you
select another studio set, tone, or song. If you want to keep the edited content or the recorded song, you must save the respective data.
Studio Sets and tones that you save are saved in this unit’s memory; songs are saved on the SD card.
NOTE
• When you save, the data that was previously in the save-destination is overwritten.
• In addition to the performance data, a song also contains information specifying the studio set. This means that if you edit the studio set or
tones that are used in the song, the song will no longer sound the same.
1. Press the [WRITE] button.
2. Use the cursor buttons to select the item that you want
to save, and press the [ENTER] button.
3. Press the [2] (Rename) button and assign a name.
Controller Explanation
Dial or [DEC] [INC] Specify the character that you want to enter.
[
] [ ]
Move the cursor.
[
] [ ]
Switch between uppercase and lowercase
alphabetical characters.
[4] (Delete) Deletes the character at the cursor location.
[5] (Insert) Inserts a space (blank) at the cursor location.
[6] (Cancel) Cancels input and exits the naming screen.
[7] (OK) Conrms the name.
4. Press the [7] (OK) button.
5. Use the dial or the [DEC] [INC] buttons to select the save-
destination.
6. Press the [7] (Write) button.
A conrmation message appears.
If you decide to cancel, press the [7] (Cancel) button.
7. Press the [6] (OK) button.
The data is saved.
For details, refer to “Reference Manual”
(PDF)
The data is saved on this unit’s memory or the SD card.
For more about the memory structure of this unit, refer to
“Overview” in “Reference Manual” (PDF).
18