12
Setting Up Foot-Pedal Control
Setting Up a FOOT PEDAL CTR Jack Pedal or Switch
Here’s how to set up a foot pedal or footswitch connected to the FOOT
PEDAL CTR-1 or-2 jack.
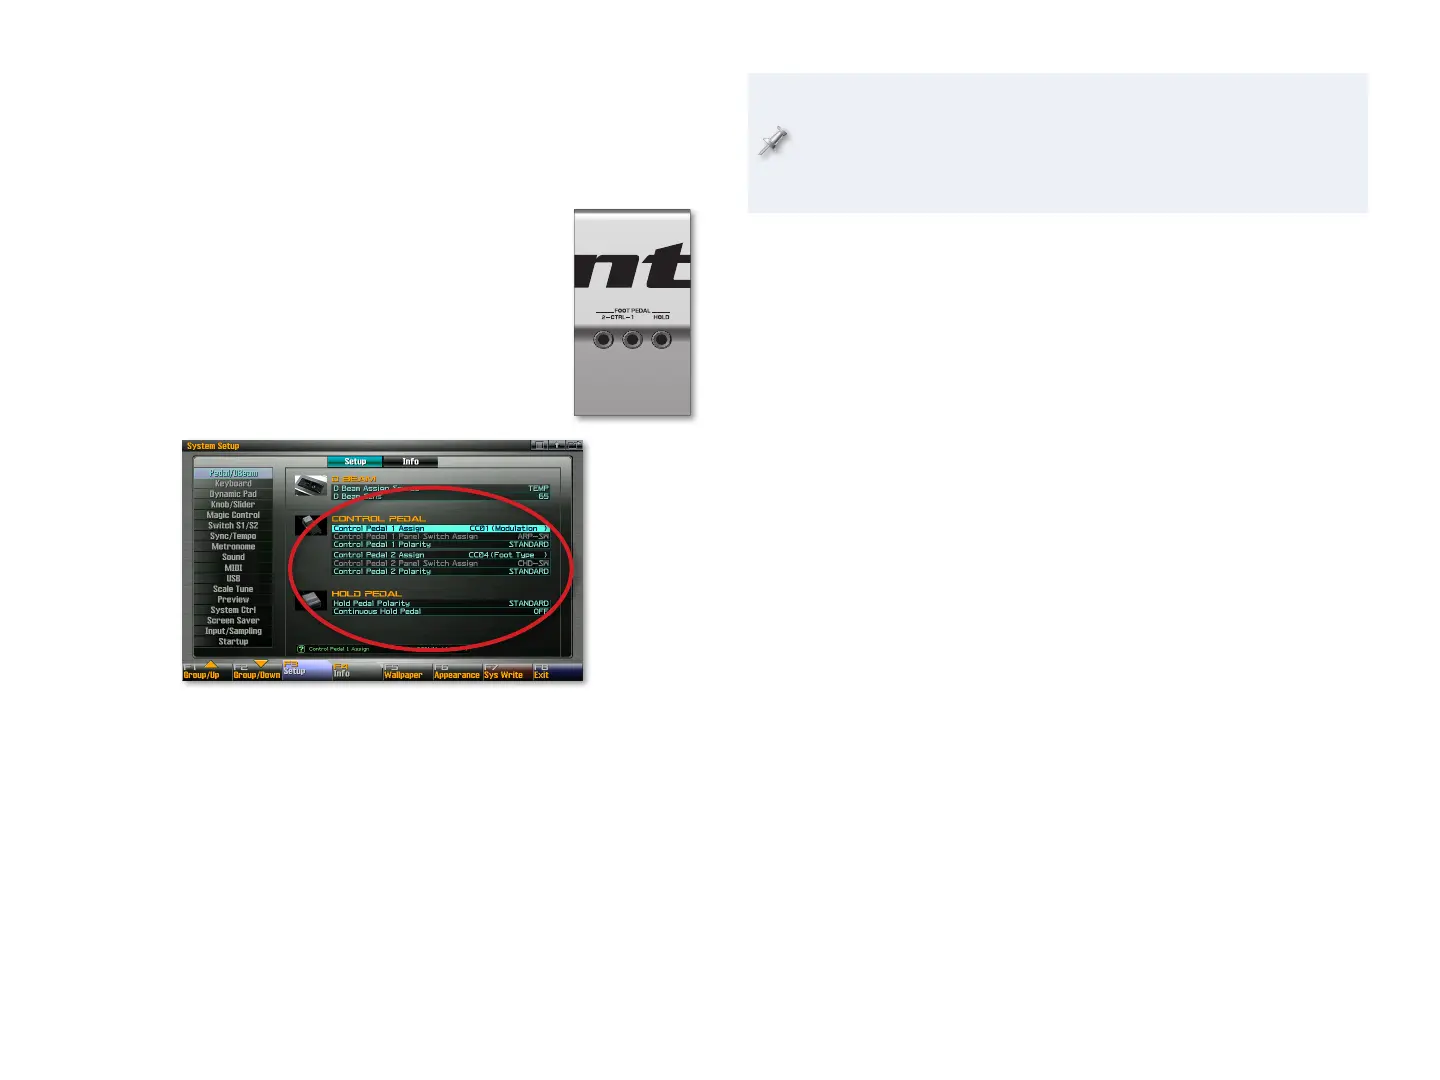
Press the MENU button.
1
Click F2 (System)—if the Pedal/DBeam tab isn’t 2
already selected, click F1 (Group/Up) until it is.
You’ll set up foot control using the CONTROL
PEDAL parameters in the middle of the screen.
Each jack—and therefore each connected
pedal—has its own pair of parameters that
allow you to configure the pedal’s behavior.
The Control Pedal Assign and Polarity Parameters
The Control Pedal Assign and Polarity Parameters parameters work
together.
The Control Pedal Assign parameter—
• selects the thing you want the
pedal to do.
The Control Pedal Polarity parameter—
• set the part of the pedal that
produces the maximum effect. When Polarity’s set to STANDARD, the
effect of the pedal becomes greater as you press the front of the pedal.
When Polarity’s set to REVERSE, pressing the back of the pedal produces
the maximum effect.
We’ve provided the Polarity setting for two reasons. First, if you have
a non-Roland pedal and it’s producing the maximum effect when you
press the back of the pedal, you can make it behave like a Roland
pedal by setting Polarity to REVERSE. Second, there may be times when
reversing the action of a pedal just feels more natural to you.
Here are what the Control Pedal Assign values get you.
OFF—
• so the pedal does nothing.
Using an expression pedal, you might want to set Control Pedal Assign to:
a MIDI Control Change number—
• so that it transmits values for that
Control Change message.
AFTERTOUCH—
• so that the pedal generates the same type of aftertouch
data produced by pressing into the keyboard.
BEND UP, BEND DOWN—
• so that pressing the pedal causes the pitch of
the current sound to bend upwards or downwards, respectively.
Using a footswitch, you might want to set Control Pedal Assign to:
START/STOP—
• so that you can start and stop the sequencer by foot
without removing your hands from the keyboard.
TAP TEMPO—
• to set the Fantom-G’s tempo by tapping it out with your
foot. This allows you to control the speed of the sequencer, rhythms,
arpeggios, RPS phrases, tempo-based effects and so on.
PROG UP, PROG DOWN—
• so you can select the next or previous sound,
live set, or studio set, depending on your current mode. This can be very
handy onstage when you’ve stored your stuff in the order in which you
need it when you perform.
USER GROUP UP, USER GROUP DOWN—
• to select the next or previous
User Group item, respectively, using your pedal.
FAVORITE UP, FAVORITE DOWN—
• so you can select the next or previous
Favorite, respectively, using your foot.

 Loading...