18
The Recording Process
Press the I1 3 button to return to the start of the song.
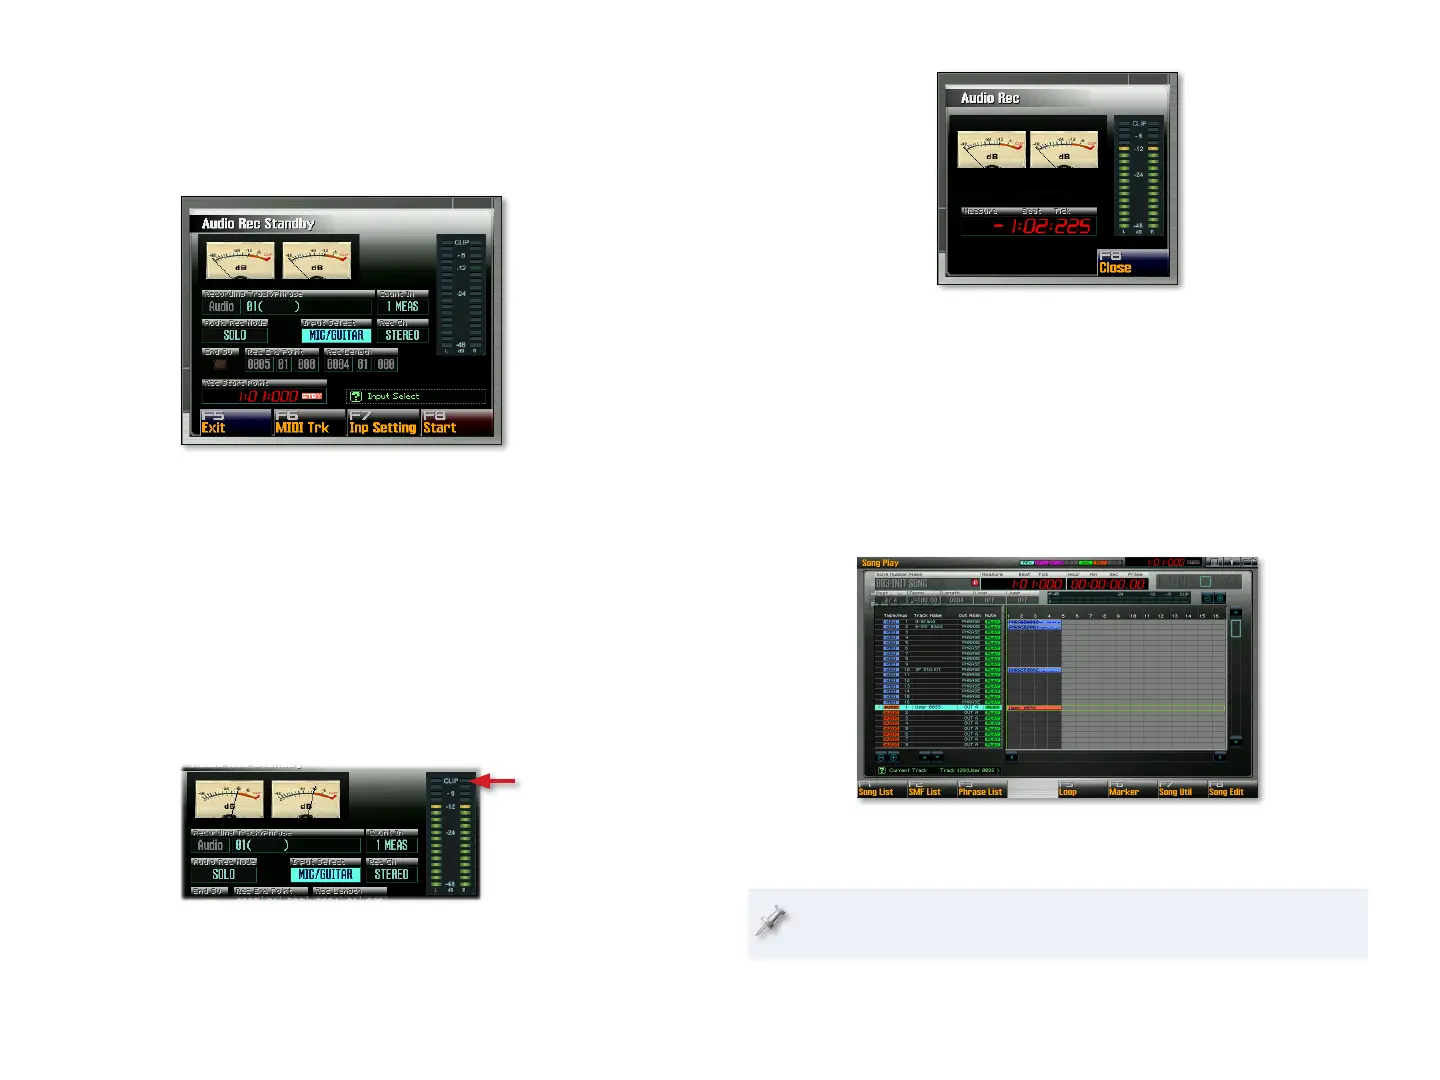
Press the REC button to open the Audio Rec Standby window and
2
start the metronome.
Here we’ve selected the Input
Select parameter and set it to
MIC/GUITAR so the Fantom-G
“listens” to that input.
Set the Input Select parameter to 3 MIC/GUITAR, as we did in the
screenshot above.
Make sure that Audio Rec Mode is set to
4 SOLO, and set Audio Rec
Channel to MONO since we’ll be recording a monaural signal.
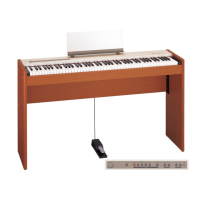
Watch your input level in the Audio Rec standby window’s meters as
5
you sing into your mic or play your instrument as loud as you intend
to.
Reach around the back of the Fantom-G and turn the LEVEL knob
6
—it’s located just to the right of the MIC/GUITAR jack as viewed from
the Fantom-G’s playing position—to set your level as loud as possible
without lighting the Audio Rec Standby window’s CLIP indicator.
CLIP
indicator
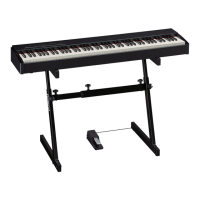
To begin recording, press F8 (Start)—the Audio Rec window opens.7
You hear a four- beat count-in before recording actually begins.
Sing or play as you hear the previously-sequenced MIDI track 8
playing.
When you’re done, hit the STOP button to end recording—the
9
Fantom-G asks if you want to assign your newly recorded sample to
the currently selected track, or toss it out and try again.
To keep your recording, press F7 (OK). To toss it, press F8 (Cancel). If
10
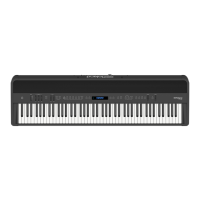
you keep the recording, it appears on its audio track in the Song Play
screen, named for the sample you just recorded.
Press PLAY to hear your new audio recording—playback ends after 11
your recording’s played back.
Just as when you sequence, you can undo your recording by pressing
MENU, F5 (Undo), and then F7 (OK).