©2011 Roland Corporation U.S. www.RolandUS.com TBS278
®ÂØÒňÎ
®
GR-55 Guitar Synthesizer
2
Selecting Patches
A patch is a collection of tones and effects along with their settings, stored together in
a single location. Patches are stored in groups of three, each of which is called a “bank.”
There are 270 Preset (factory) patches and 297 User patches in the GR-55. Sound Styles
are collective groups in which the different banks and patches are stored.
To select a patch you can
• Turn the dial.
• Press the S1 or S2 switches on the GK-3 (or other 13-pin pickup system).
Note: By default in the GR-55, the S1 and S2 switches are set up for changing patches. If this
has been changed, the S1/S2 switches may not function as expected.
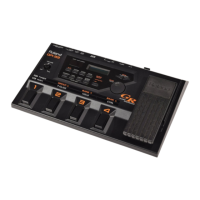
• Press the numbered (1-3) pedals
You can change banks using the numbered pedals. Here’s how.
1 Press Pedals 1 and 2 simultaneously—the bank number and pedal indicators flash.
2 Press the 1 or 2 pedal to select a desired bank.
3 Press Pedal 3, and then press Pedals 1, 2, or 3 to select the patch.
Auditioning PCM Tones
The GR-55 contains a whopping 910 PCM tones! Here’s how to select and audition them.
Note: You can access tones in any patch. In this example we’ll use Patch 04-1 Drive Blues
Harp.
1 Press the LEAD button, and then turn the dial to choose Patch 04-01 Drive Blues
Harp.
2 Press EDIT.
3 Press PAGE 3 to select the TONE tab.
4 Use the cursor buttons to highlight “PCM1 :119 Harmonica 2.”
5 Now turn the dial to select the desired PCM Tone—as we mentioned, there are 910
of them.
6 Press EXIT when you’re finished.
Using the Phrase Loop Feature
The GR-55 contains a Phrase Looper that allows you to record and play back a
performance, and then have it loop continuously. Here’s how to use the Phrase Loop.
1 Select the desired patch.
2 Press the Number 3 and CTL pedals simultaneously—the indicator on the CTL
pedal begins flashing to let you know you’re in Standby mode.
3 Press CTL—the LED flashes rapidly and recording begins. Play for up to 20 seconds.
4 When you’re finished, press CTL once to stop the recording process. Playback of
your new recording begins immediately.
5 If you’d like to overdub on top of the recording, repeat Steps 3 and 4.
6 Press the CTL pedal twice in quick succession to stop playback.
Note: When playback stops, the recording is deleted.
7 To exit Phrase Loop mode, press the Number 3 and CTL pedals simultaneously.

 Loading...

