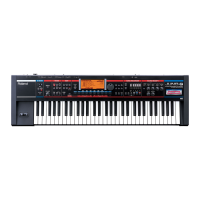
Listen to the demo song
The JUNO-G contains a demo song that you can use as a model for your own
roductions. It’s an example o
what a pro musician can do with the JUNO-G.
et’s start
istening to t
is
emo song.
Turn on the JUNO-G’s power, wait
or it to start up, and then simply press the
PLAY
n
h
r
h
m
B
r
f
l
f
h
v
l
m
Take a look at the song recorder
The JUNO-G has a function called the “song recorder.” The song recorder contains
“MIDI
r
t
at
et
ou recor
note
ata t
at wi
p
a
e JUNO-G’s own soun
s, an
au
io trac
s
that let you record sounds
rom a connected mic etc., just as though you were using an audio
ecorder. Let’s take a look at these two types o
tracks.
Get ready to record
1
MIDI tracks
T
“MIDI
r
” record the note data and other
erformance
data that plays the JUNO-G’s synthesizer sound generator.
r
SONG
n
r
The instrumental parts of the demo song are all recorded on
hese MIDI tracks. The screen makes it easy to see which instru-
ent is assigned to each of the 16 tracks.
AUDIO track
A
i
r
”are the other type of track; they record actual “sound
rom a mic or other audio source connected to the JUNO-G
Pr
AUDIO TRACK
n
r
The vocal parts of the demo song are recorded on the audio
racks. Notice that the audio wave
orms are shown on the
our
r
2
Turn on the power, and press the
[PLAY] button.

 Loading...