3
5 Select a new tone for either hand by highlighting any of Lower 1’s
or Upper 1’s settings, pressing the desired tone category button
beneath the screen, and then choosing the tone you want.
6 Lower 1 and Upper 1 also have onscreen level knobs you can adjust
to set the volume balance between the tones. Highlight a knob and
use the Value dial or DEC and INC to set it as desired.
The JUNO-Gi actually offers quite a few settings for each tone. We’ll
discuss some of these in the next section of this booklet.
7 To turn off a quick split, press the lit SPLIT button so it’s no longer lit.
Creating Detailed Layers and Splits
The LAYER-SPLIT Screen
The most basic aspect of creating a layer or split is turning on the tones you
want to use, and turning off any you don’t need. This takes place on the
LAYER/SPLIT screen.
As in the last section, we’ll start with Preset 001 88KeyGrand, though
we’ll need to re-select it to get back to its original settings. To do this,
press the PIANO button beneath the display.
Basic Tone Setup
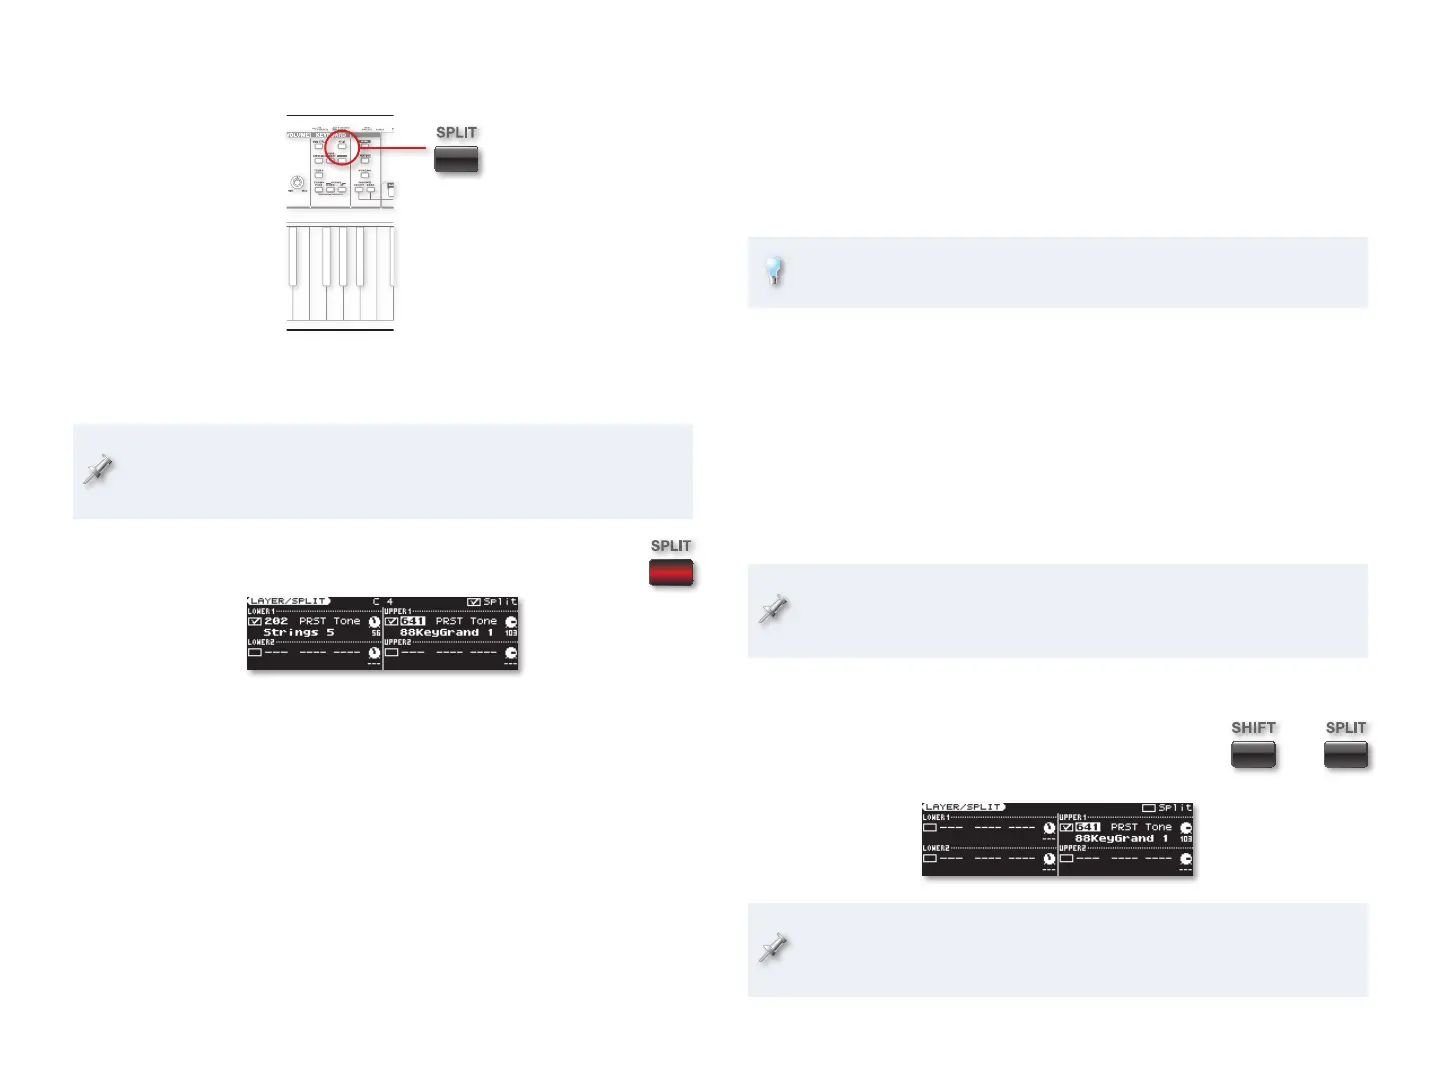
1 While holding down the SHIFT button, press
the SPLIT button to display the LAYER/SPLIT
screen.
Note that Split is unchecked onscreen, and the SPLIT button isn’t lit,
either. Those two indicators have to do with quick splits—we’re moving
beyond them now.
+
Creating a Quick Split
The key to setting up a simple quick split on the JUNO-Gi is the SPLIT button,
and the Split checkbox on the LAYER/SPLIT screen. Here’s how they work.
In this tutorial, we’ll start off with Preset 001 88KeyGrand. This is a
single-tone live set. To select it, press the PIANO button beneath the
display.
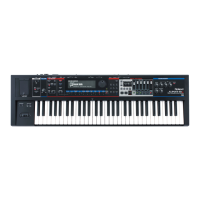
1 Press the SPLIT button so it lights and the LAYER-SPLIT
screen appears.
In this screen, the Split checkbox is checked to show that the
keyboard is now split. As you can see onscreen—and hear when you
play the keyboard—Lower 1 now plays a strings tone, and Upper 1
plays a piano tone.
The split takes place at Middle C, or “C4,” on the keyboard, so the
Lower 1 tone begins at the B just below it, and the Upper 1 tone plays
from Middle C on up. Upper 1’s first key is called the “split” point.
2 You can change the split point by holding down the lit SPLIT button.
3 While continuing to hold the button down, press the key on the
keyboard at which you want Upper 1’s tone to start playing. The
JUNO-Gi shows you the split point you’ve selected.
4 Press SPLIT again to close the SPLIT POINT window.
 Loading...